seekdb MCP Server 与 Kiro 集成
MCP(Model Context Protocol) 是 Anthropic 公司于 2024 年 11 月推出并开源,旨在实现大语言模型与外部工具或数据源交互的协议。通过 MCP,用户不需要将大模型的输出手动复制执行,大模型可以直接指挥工具执行相应的动作(Action)。
MCP Server 通过 MCP 协议提供了大模型与 seekdb 交互的能力,可以执行 SQL 语句。通过合适的客户端可以快速搭建项目原型,已在 github 上开源。
Kiro 是亚马逊云科技(AWS)推出的一款专为AI Agent设计的集成开发环境(agentic IDE)。它是一个具有人工智能能力的编程工具,旨在帮助开发者从概念阶段到生产部署完成全流程开发。
本文使用 Kiro,展示如何通过 seekdb MCP Server 快速构建一个后端应用。
前提条件
-
您已完成部署 seekdb。
-
安装 Python 3.11 及以上版本 和相应 pip。如果您的机器上 Python 版本较低,可以使用 Miniconda 来创建新的 Python 3.11 及以上的环境,具体可参考 Miniconda 安装指南。
-
安装 Python 包管理器 uv。安装完成后,可使用
uv --version命令验证安装是否成功:pip install uv
uv --version -
Kiro 客户端:
可以在 kiro 下载页,根据自己的操作系统选择合适的版本进行安装。
步骤一:获取数据库连接信息
联系 seekdb 部署人员或者管理员获取相应的数据库连接串,例如:
mysql -h$host -P$port -u$user_name -p$password -D$database_name
参数说明:
-
$host:提供 seekdb 连接 IP 地址。 -
$port:提供 seekdb 连接端口,默认是 2881。 -
$database_name:需要访问的数据库名称。提示连接的用户需要拥有该数据库的
CREATE、INSERT、DROP和SELECT权限。 -
$user_name:提供数据库连接账户。 -
$password:提供账户密码。
步骤二:配置 seekdb MCP Server
这里以 Visual Studio Code 为例,展示如何配置 seekdb MCP Server。
安装 seekdb MCP Server
执行下面的命令进行安装:
pip install seekdb-mcp-server
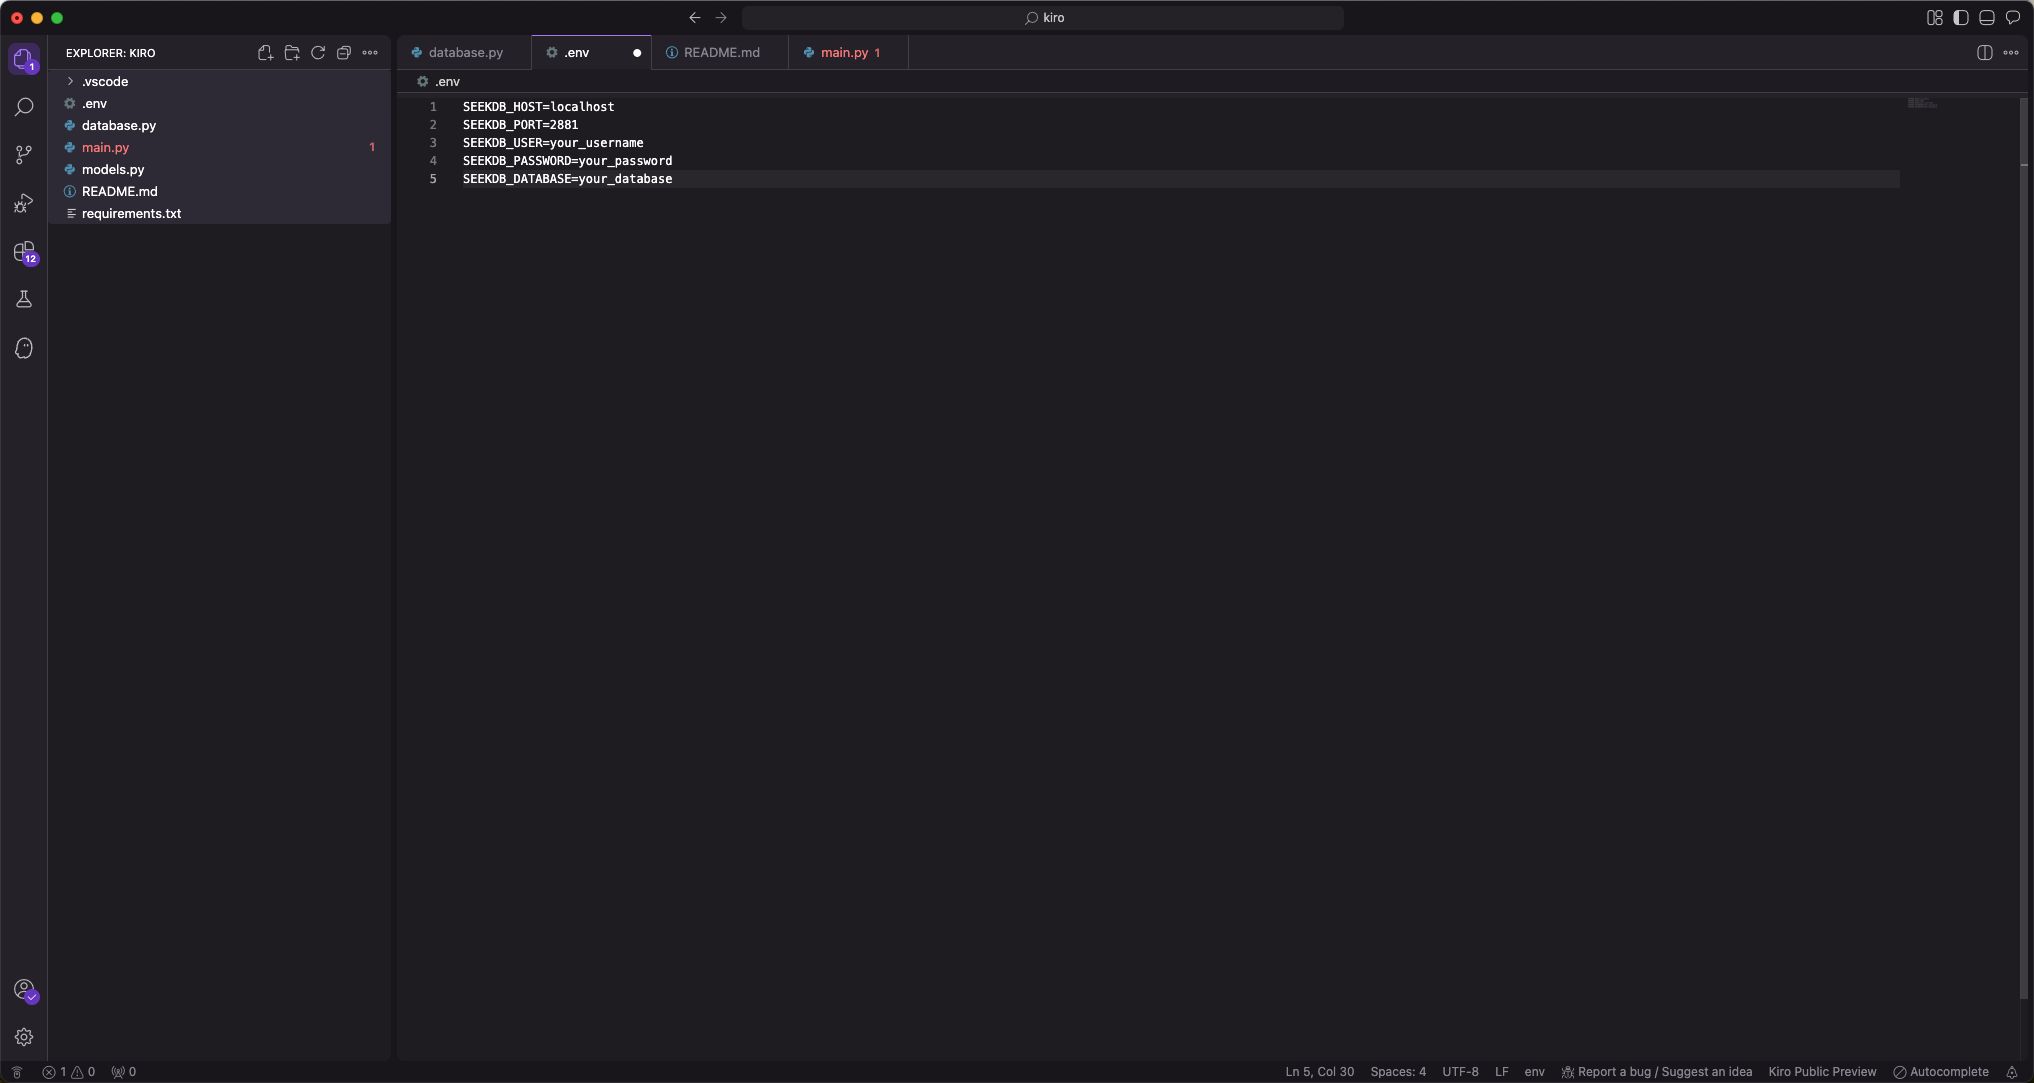
配置 seekdb 服务器环境变量到 .env 文件中
在当前目录下创建一个名为 .env 的文件,并添加以下内容:
vi .env

SEEKDB_HOST=localhost      # 数据库主机
SEEKDB_PORT=2881           # 数据库端口(默认:2881)
SEEKDB_USER=your_username
SEEKDB_PASSWORD=your_password
SEEKDB_DATABASE=your_database
以 SSE 模式启动
env $(cat .env | xargs) uvx seekdb-mcp-server --transport sse --port 8000 --host 0.0.0.0
在 Kiro 中配置 seekdb MCP Server
-
使用快捷键 Command + L(MacOS)打开聊天对话框,点击左下角上角的齿轮,选择 Kiro Settings。
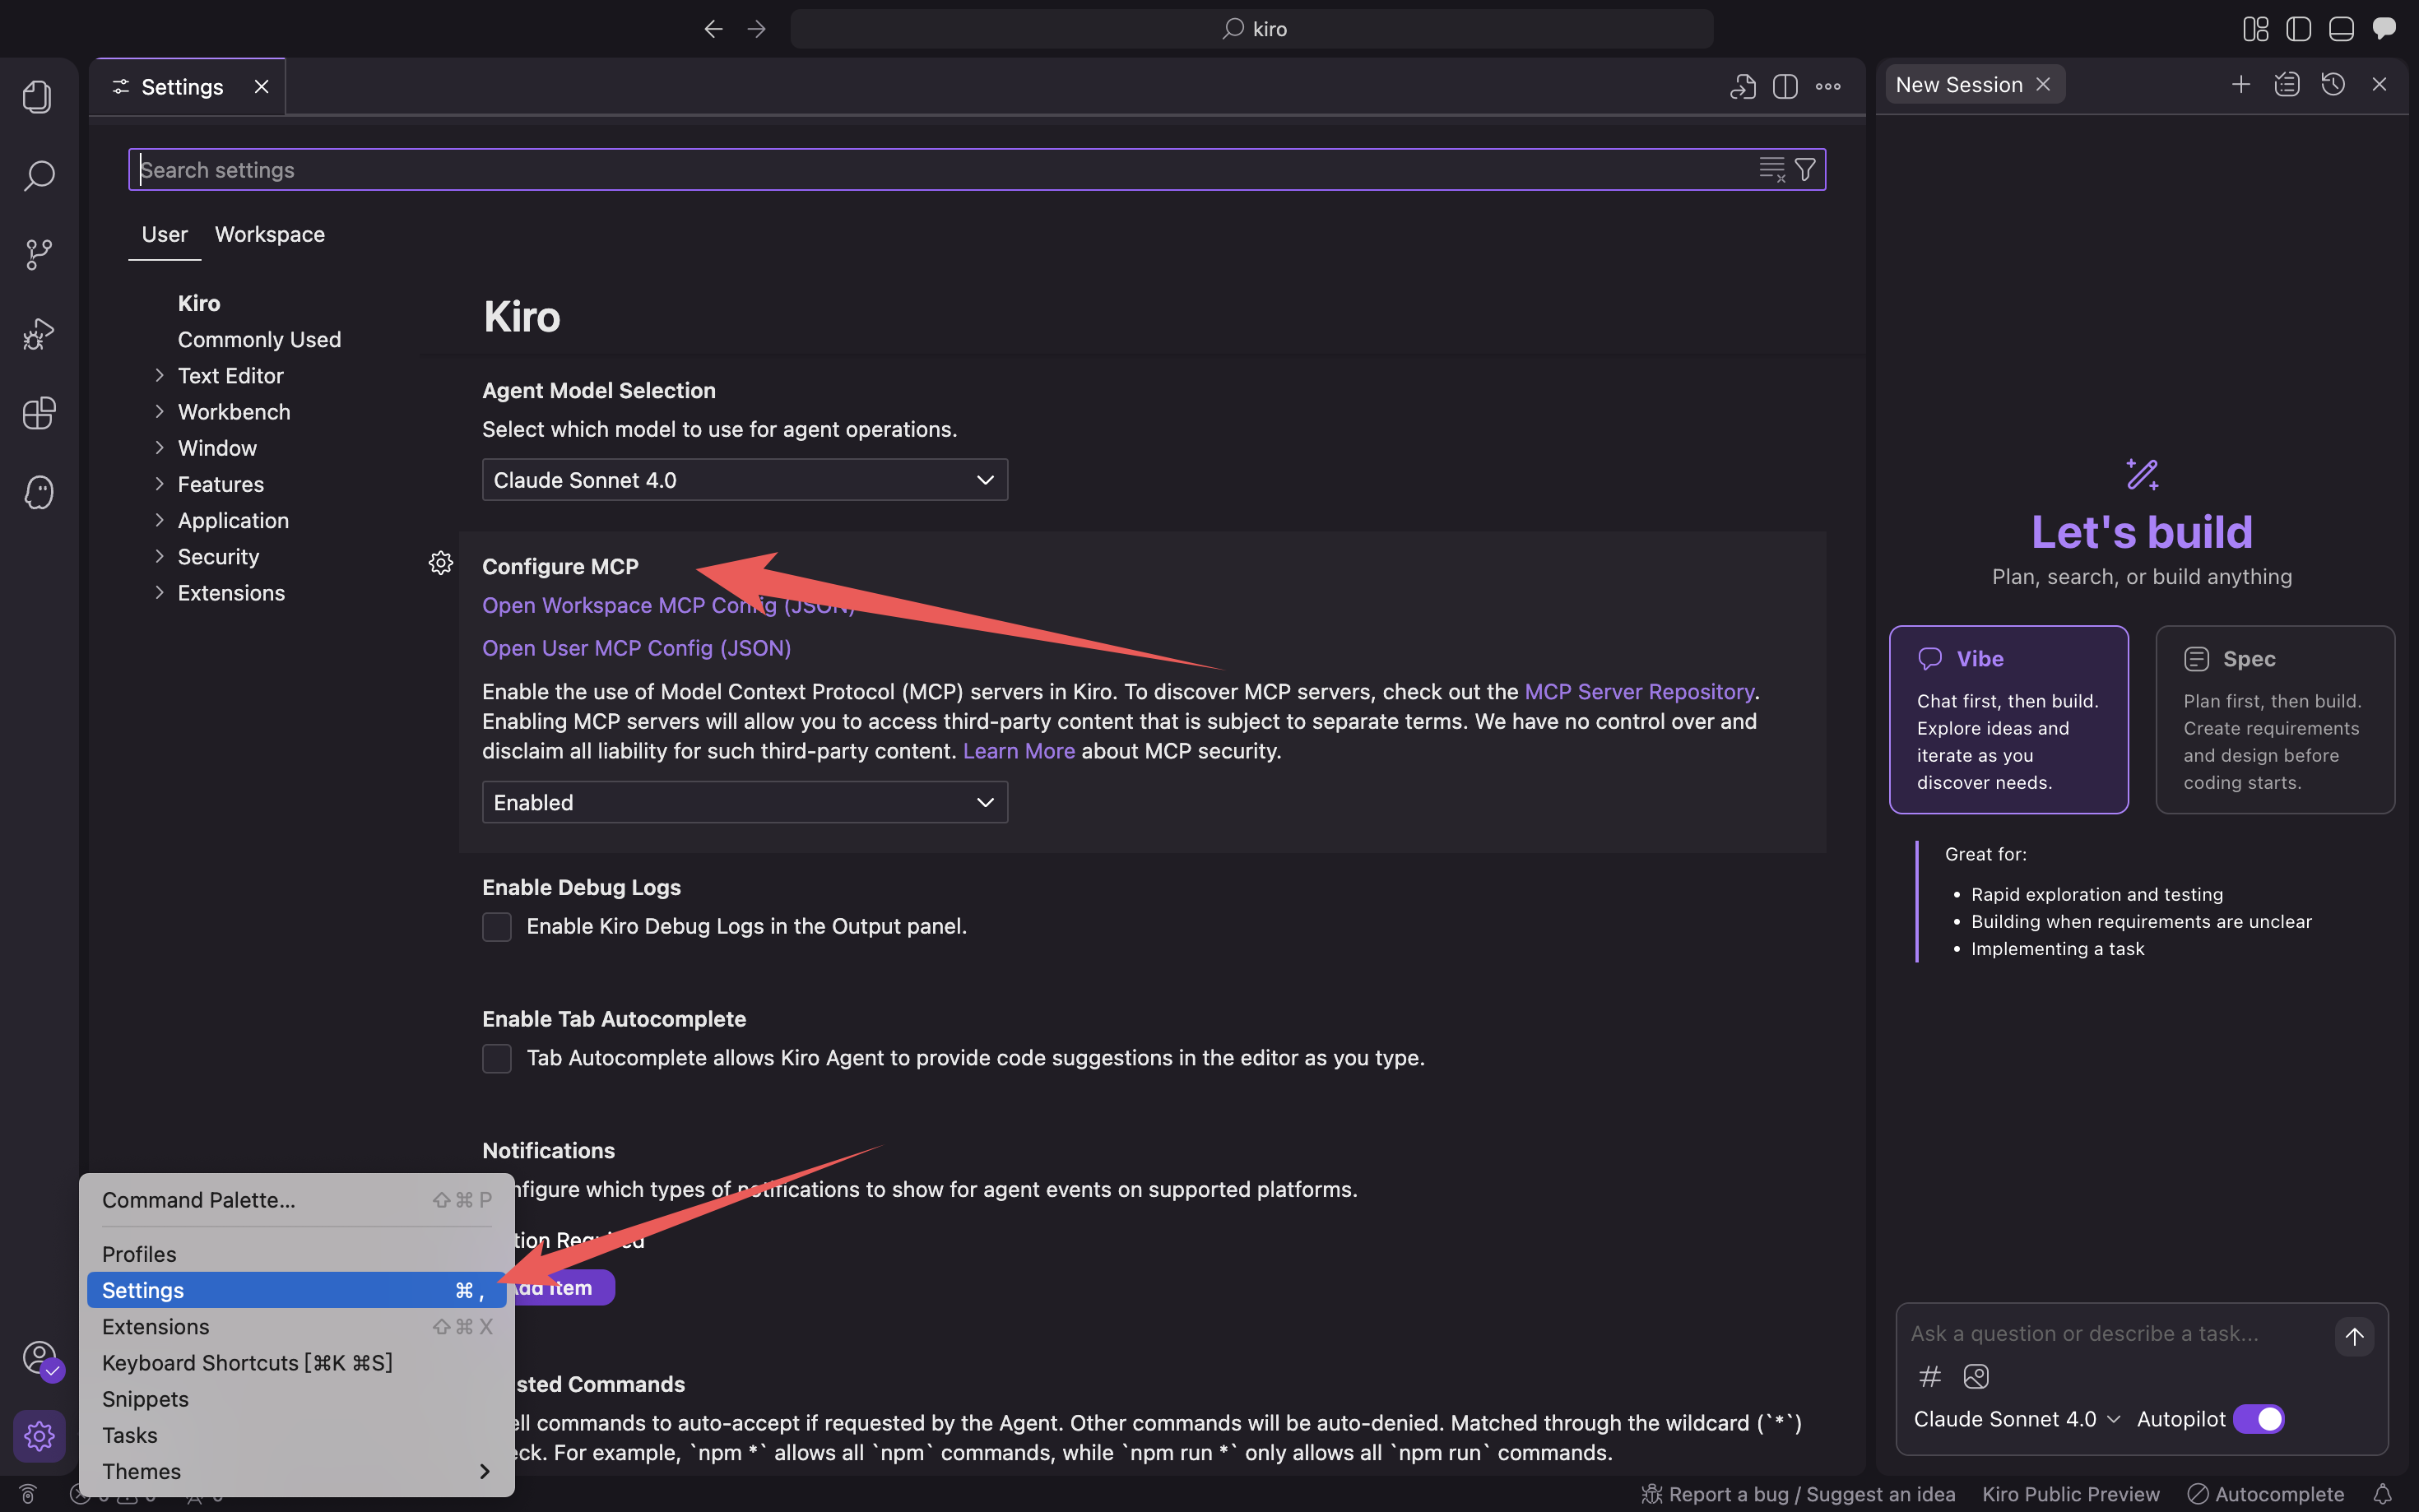
-
点击 Open User MCP Config (JSON)/Open Workspace MCP Config (JSON),填写 mcp 配置文件。
填入下面的配置文件,点击确认。
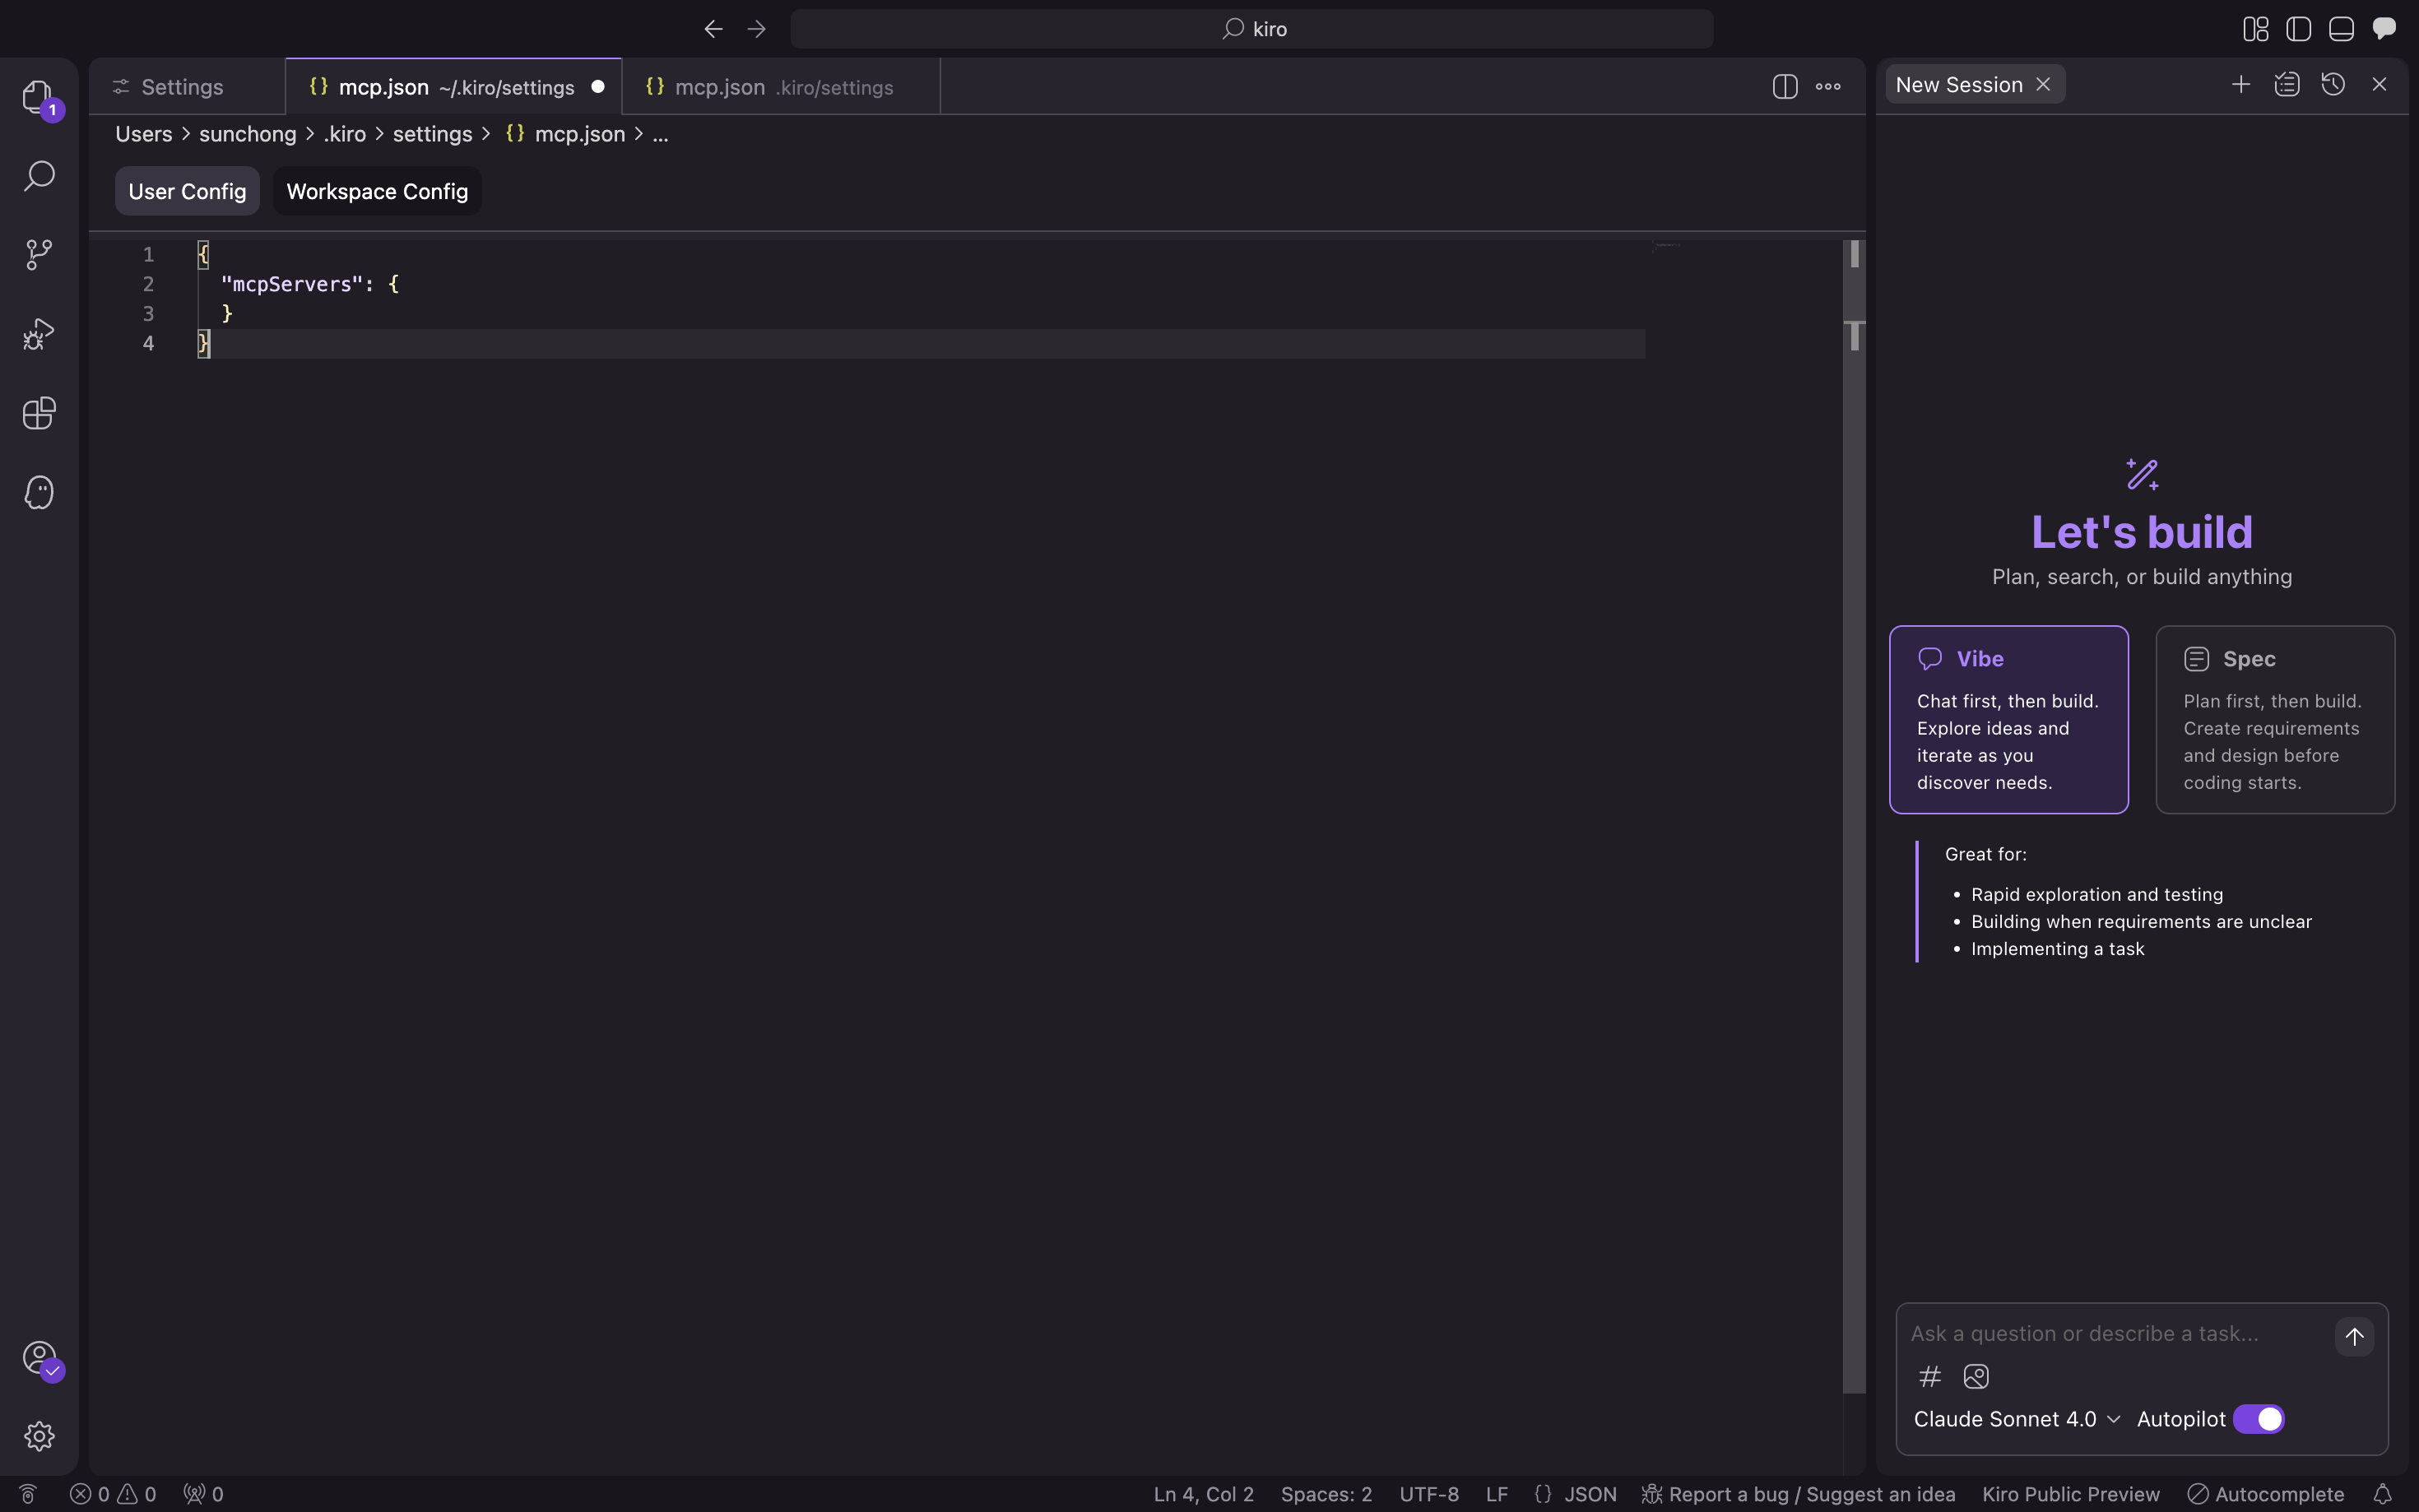
{
  "mcpServers": {
    "seekdb": {
      "command": "uvx",
      "args": ["seekdb-mcp-server"],
      "env": {
        "SEEKDB_HOST": "127.0.0.1",
        "SEEKDB_PORT": "2881",
        "SEEKDB_USER": "root",
        "SEEKDB_PASSWORD": "",
        "SEEKDB_DATABASE": "test"
      }
    }
  }
} -
验证是否可以连接数据库。
输入提示
How many tables in the test database?,Kiro 会展示即将执行的 SQL 语句,并输出查询结果: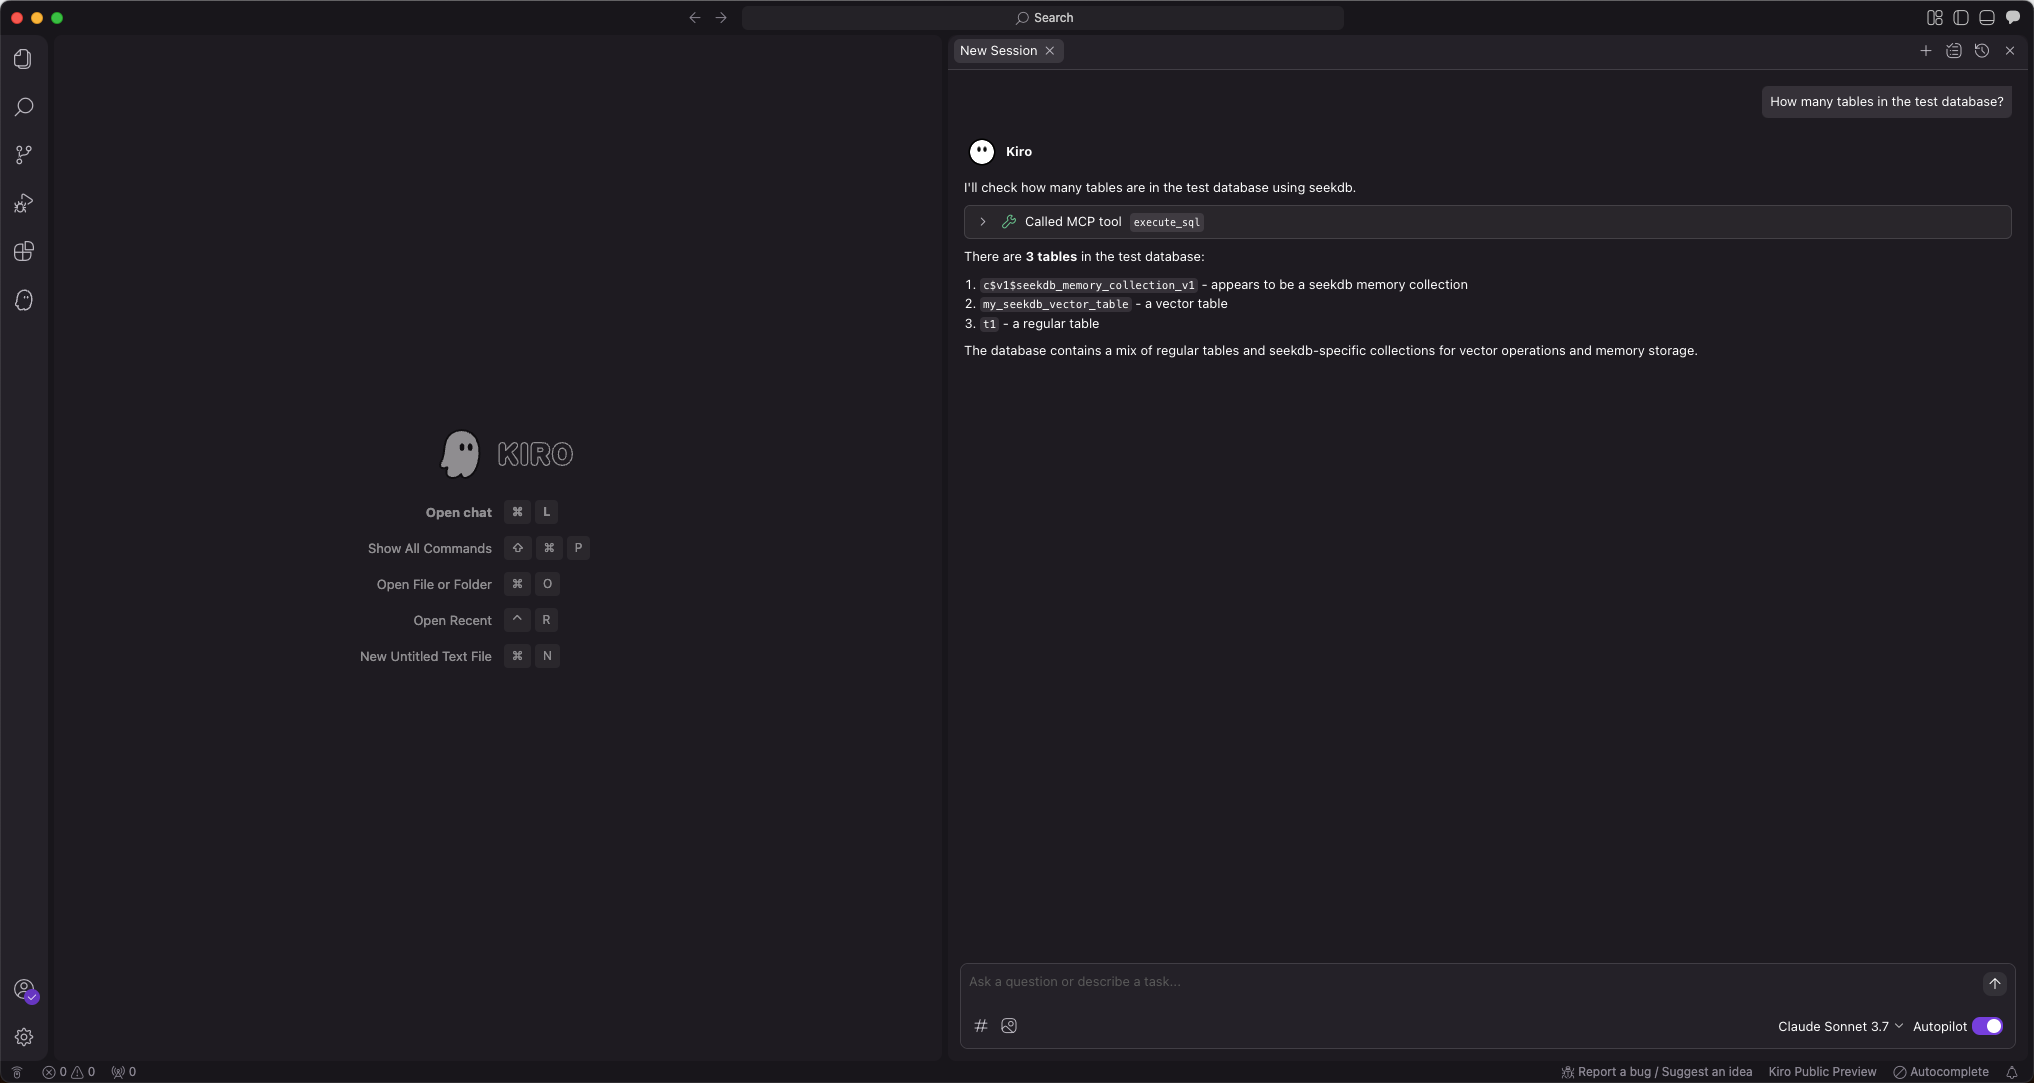
Kiro 会展示当前 test 库中的表数量,说明可以正常连接 seekdb。
步骤三:使用 FastAPI 快速创建 RESTful API 风格的项目
你可以使用 FastAPI 快速创建 RESTful API 风格的项目。FastAPI 是一个 Python 的 Web 框架,可以快速构建 RESTful API。
-
创建 customer 表
输入提示
Create a "customer" table with "ID" as the primary key and containing fields such as "name", "age", "telephone", and "location":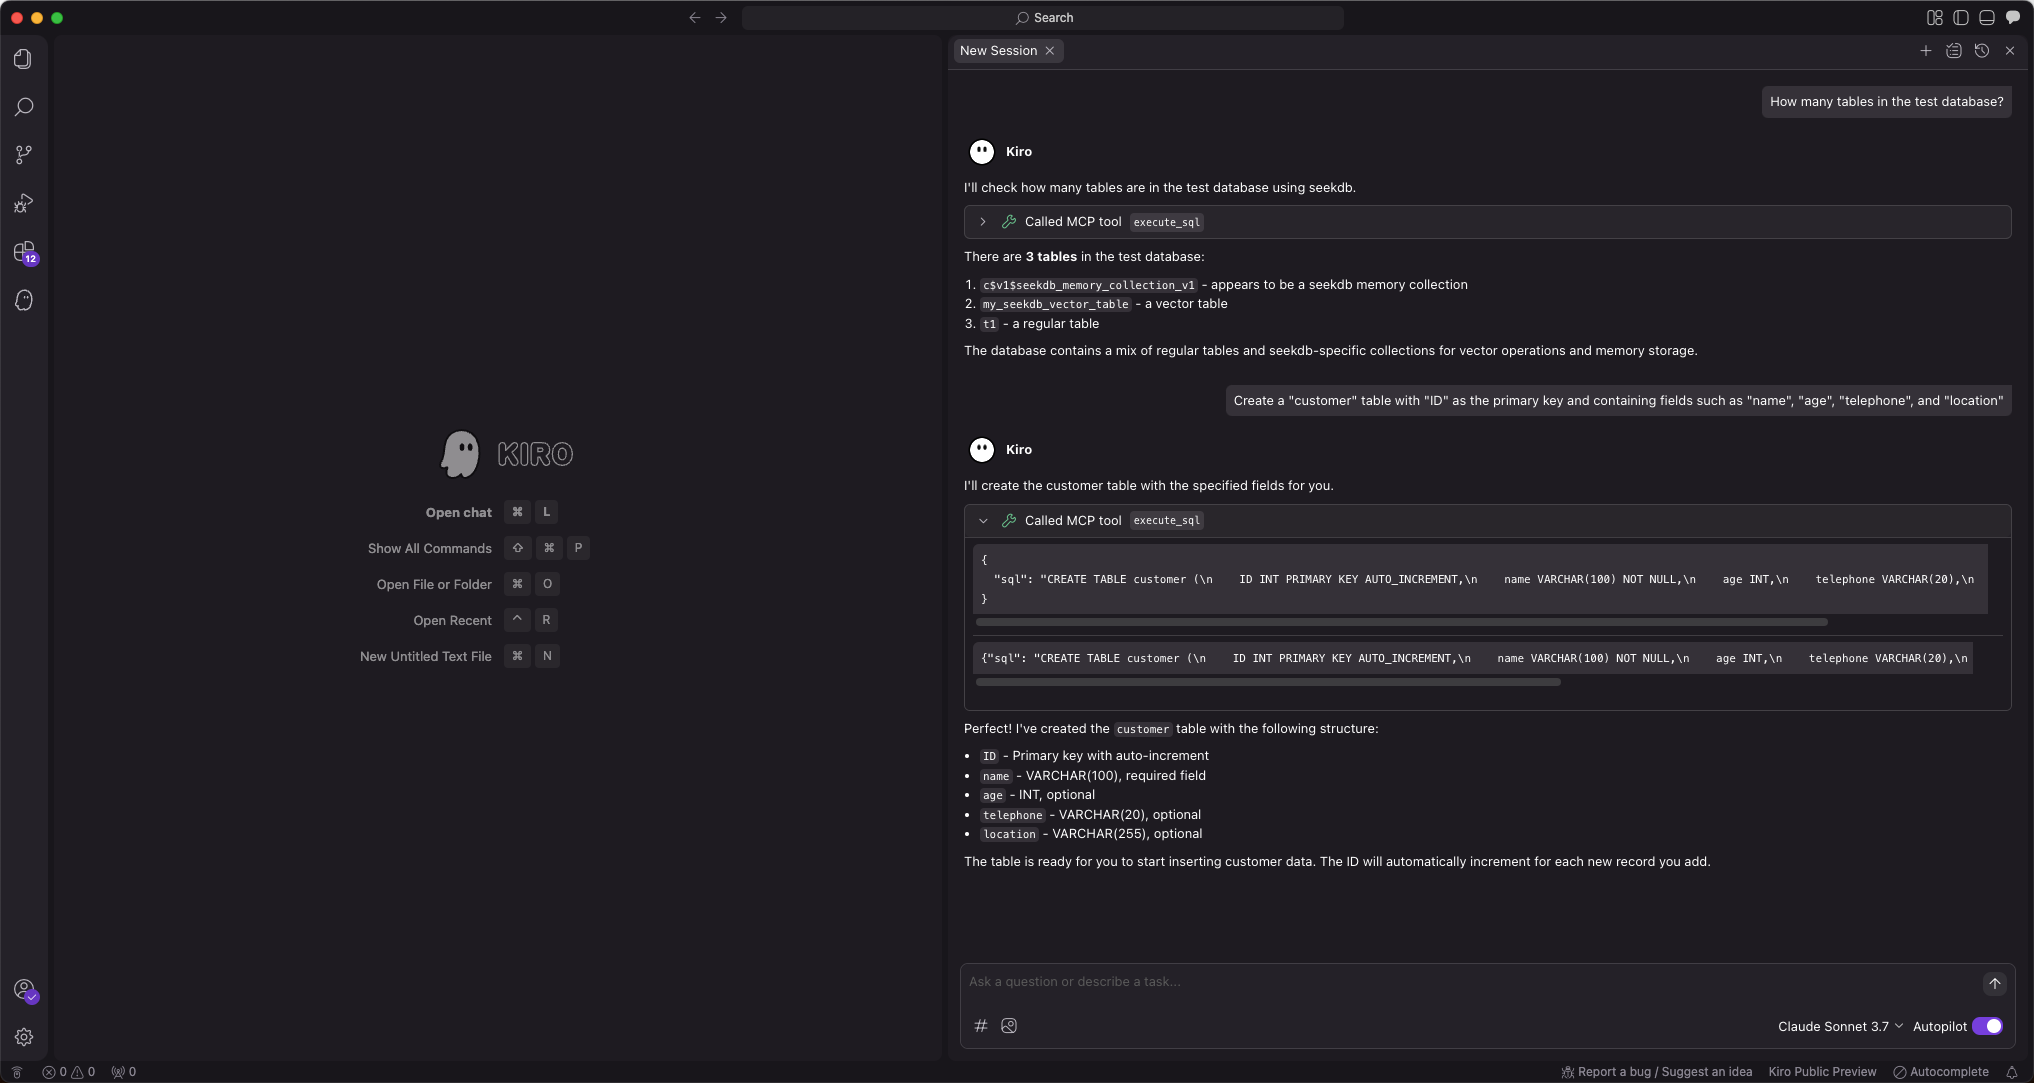
-
插入测试数据
输入提示
Insert 10 pieces of data into the customer table: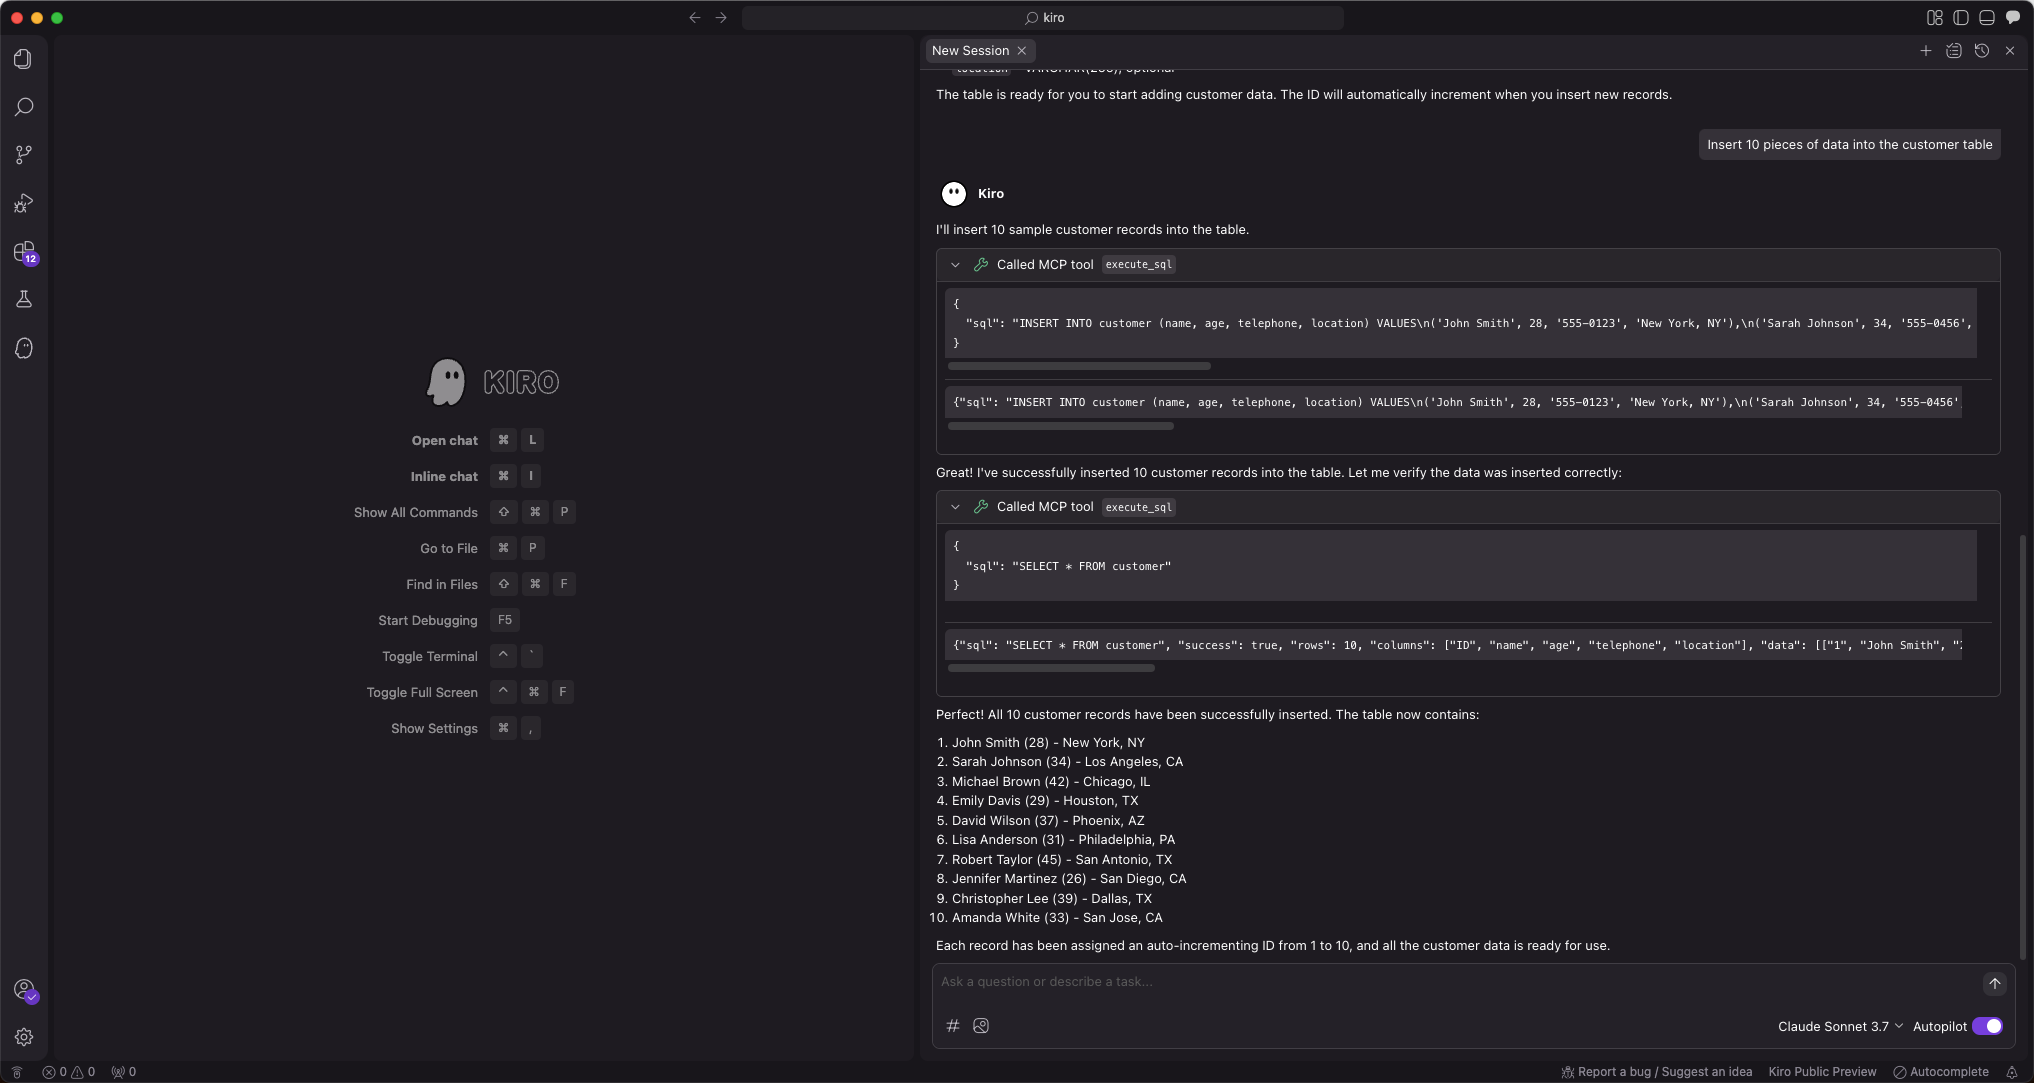
-
创建 FastAPI 项目
输入提示
Create a FastAPI project on the customer table,自动生成了多个文件,先点击全部接受。如果有问题再进行二次修改。因为 AI 生成的文件每次可能都是不一样的,这里不再展示修改的过程。
此步骤将自动生成多个文件。建议首次使用时选择
全部接受,因为 AI 生成的文件内容可能具有不确定性,后续可根据实际需求进行调整。 -
FastAPI 项目配置数据库连接信息
-
安装项目依赖
执行如下命令,安装项目依赖:
pip install -r requirements.txt -
启动 FastAPI 项目
执行如下命令,启动 FastAPI 项目:
source .env
uvicorn main:app --reload -
查看表中数据
在命令行中运行如下命令,或者使用其他请求工具,查看表中的数据:
curl http://127.0.0.1:8000/customers返回结果如下:
[{"name":"John Smith","age":28,"telephone":"555-0123","location":"New York, NY","ID":1},{"name":"Sarah Johnson","age":34,"telephone":"555-0456","location":"Los Angeles, CA","ID":2},{"name":"Michael Brown","age":42,"telephone":"555-0789","location":"Chicago, IL","ID":3},{"name":"Emily Davis","age":29,"telephone":"555-0321","location":"Houston, TX","ID":4},{"name":"David Wilson","age":37,"telephone":"555-0654","location":"Phoenix, AZ","ID":5},{"name":"Lisa Anderson","age":31,"telephone":"555-0987","location":"Philadelphia, PA","ID":6},{"name":"Robert Taylor","age":45,"telephone":"555-0147","location":"San Antonio, TX","ID":7},{"name":"Jennifer Martinez","age":26,"telephone":"555-0258","location":"San Diego, CA","ID":8},{"name":"Christopher Lee","age":39,"telephone":"555-0369","location":"Dallas, TX","ID":9},{"name":"Amanda White","age":33,"telephone":"555-0741","location":"San Jose, CA","ID":10}]