Integrate seekdb MCP Server with Kiro
MCP (Model Context Protocol) is an open-source protocol launched by Anthropic in November 2024. It enables large language models (LLMs) to interact with external tools or data sources. With MCP, users can directly instruct tools to execute actions based on the LLM's output, eliminating the need for manual copying and pasting.
seekdb MCP Server is a server that allows large models to interact with seekdb through the MCP protocol. It can execute SQL statements. With the help of a suitable client, you can quickly build a project prototype, and it has been open-sourced on GitHub.
Kiro is an integrated development environment (IDE) designed for AI agents, launched by AWS. It is a programming tool with AI capabilities, aimed at helping developers complete the entire development process from concept to production deployment.
This topic demonstrates how to use Kiro to quickly build a backend application with seekdb MCP Server.
Prerequisites
-
You have deployed seekdb.
-
You have installed Python 3.11 or later and the corresponding pip. If your machine has a lower Python version, you can use Miniconda to create a new Python 3.11 or later environment. For more information, see Miniconda installation guide.
-
You have installed the Python package manager uv. After the installation is complete, you can run the
uv --versioncommand to verify whether the installation is successful:pip install uv
uv --version -
Kiro client:
You can download the appropriate version of Kiro based on your operating system from the kiro download page.
Step 1: Obtain database connection information
Contact the seekdb deployment personnel or administrator to obtain the corresponding database connection string, for example:
mysql -h$host -P$port -u$user_name -p$password -D$database_name
Parameter description:
-
$host: the IP address for connecting to seekdb. -
$port: the port for connecting to seekdb. The default value is 2881. -
$database_name: the name of the database to be accessed.tipThe user for the connection must have the
CREATE,INSERT,DROP, andSELECTpermissions on the database. -
$user_name: the database connection account. -
$password: the account password.
Step 2: Configure seekdb MCP Server
Here, we use Visual Studio Code as an example to show how to configure seekdb MCP Server.
Install seekdb MCP Server
Run the following command to install seekdb MCP Server:
pip install seekdb-mcp-server
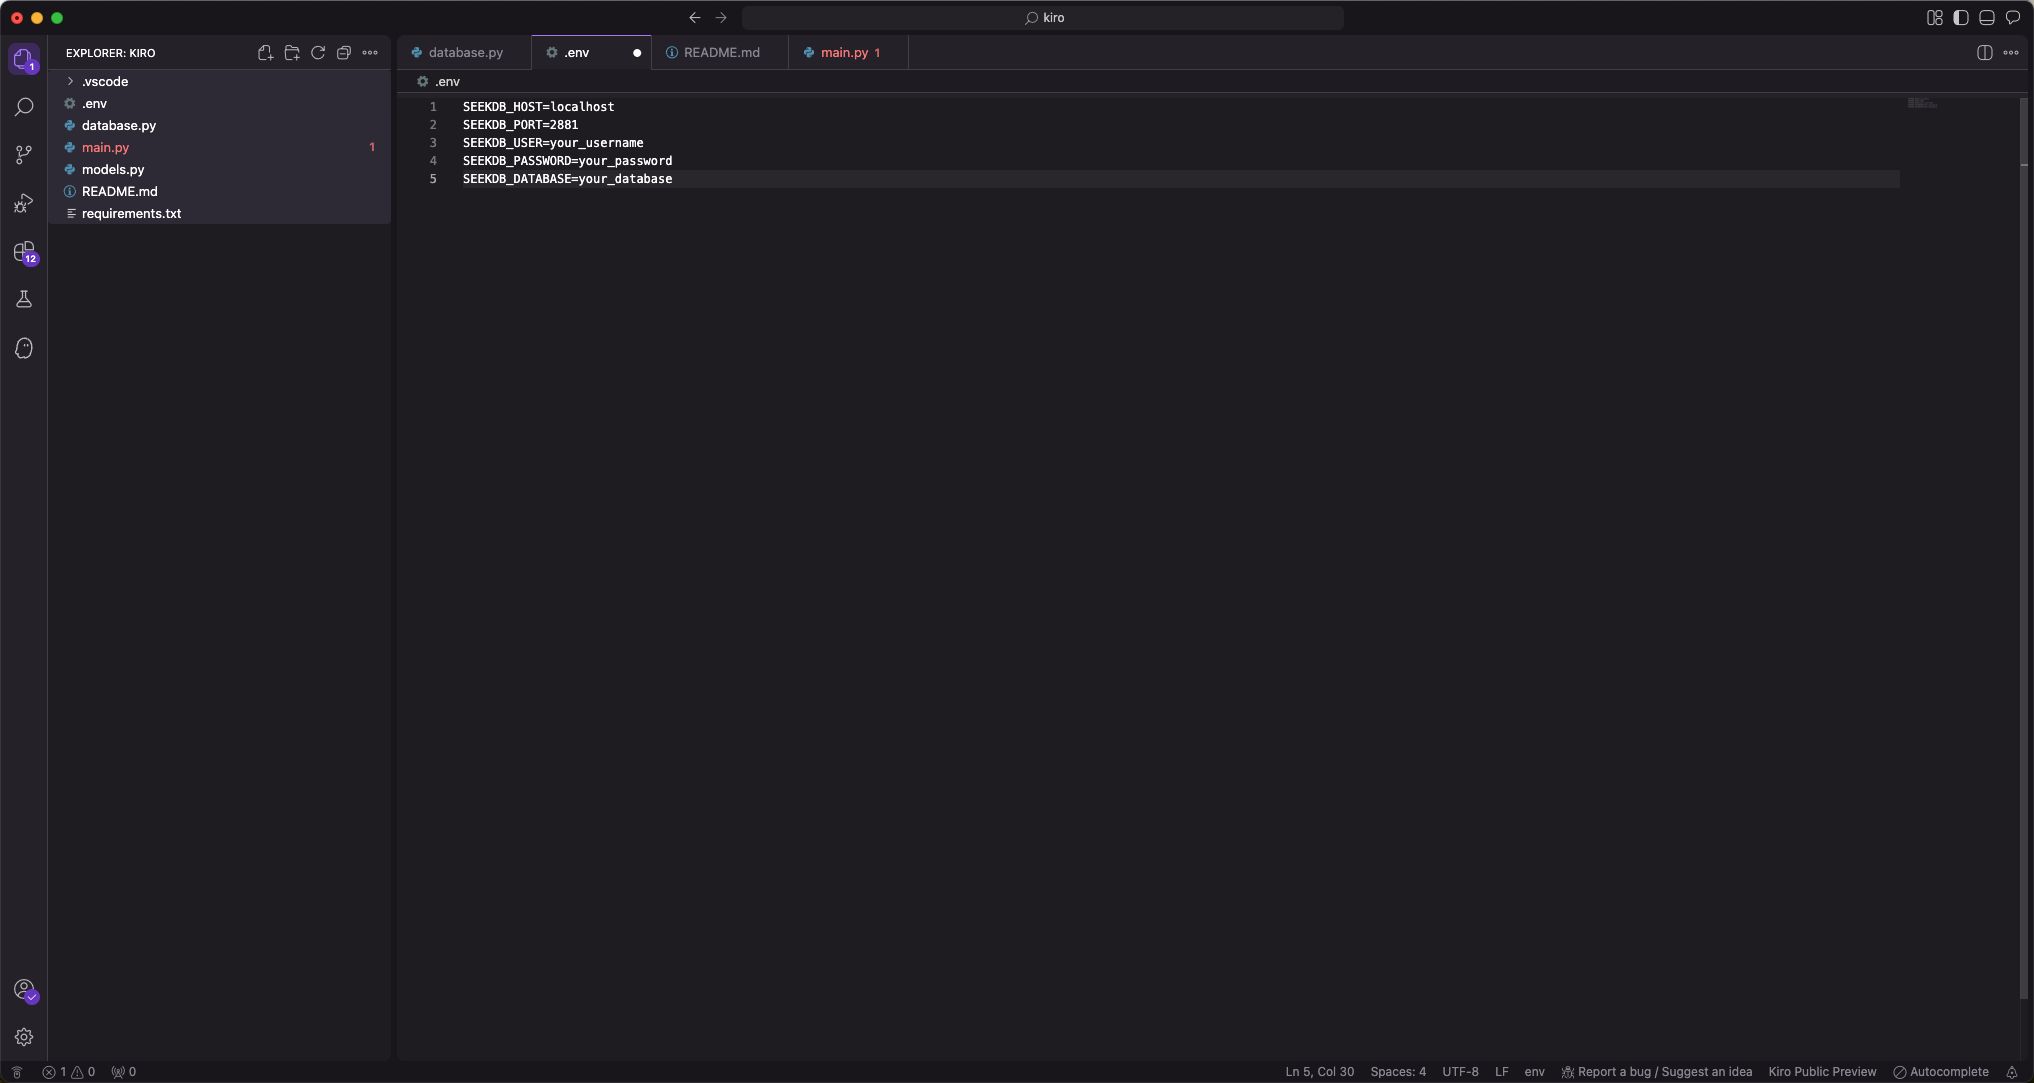
Configure seekdb server environment variables in the .env file
Create a file named .env in the current directory and add the following content:
vi .env

SEEKDB_HOST=localhost      # Database host
SEEKDB_PORT=2881           # Database port (default: 2881)
SEEKDB_USER=your_username
SEEKDB_PASSWORD=your_password
SEEKDB_DATABASE=your_database
Start in SSE mode
env $(cat .env | xargs) uvx seekdb-mcp-server --transport sse --port 8000 --host 0.0.0.0
Configure seekdb MCP Server in Kiro
-
Press the Command + L shortcut key (on macOS) to open the chat dialog box, click the gear icon in the lower-left corner, and select Kiro Settings.
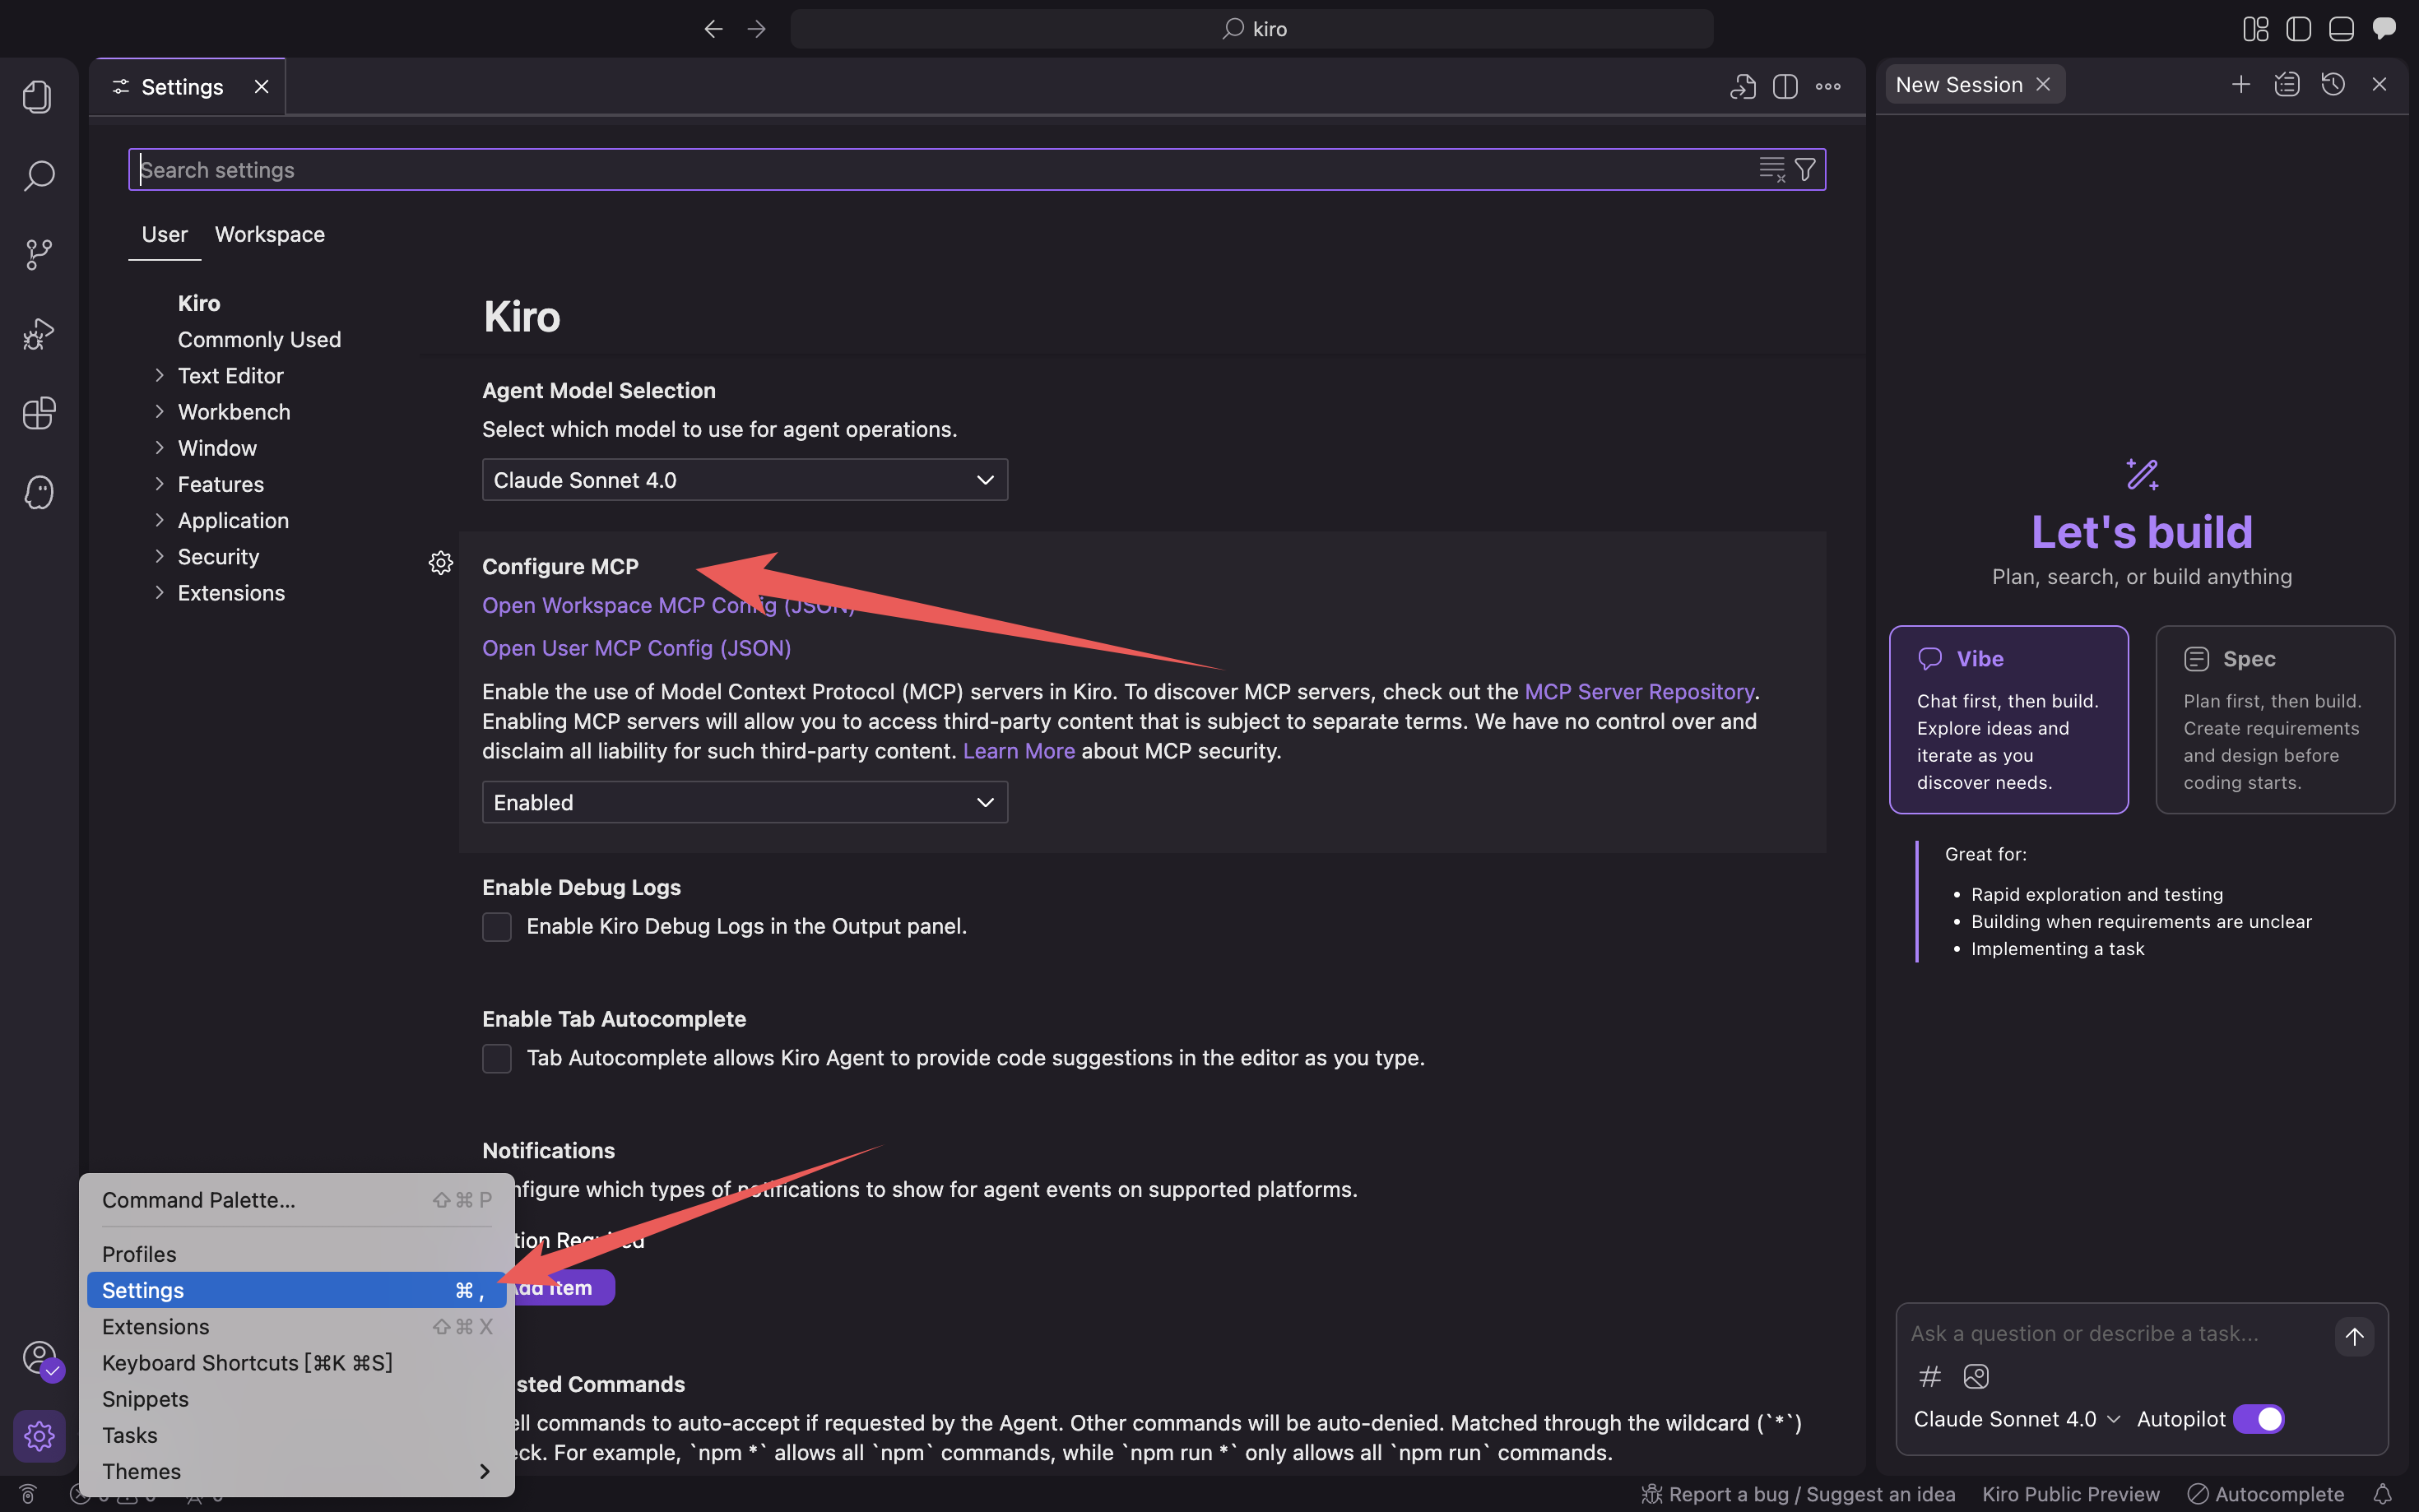
-
Click Open User MCP Config (JSON)/Open Workspace MCP Config (JSON) to fill in the mcp configuration file.
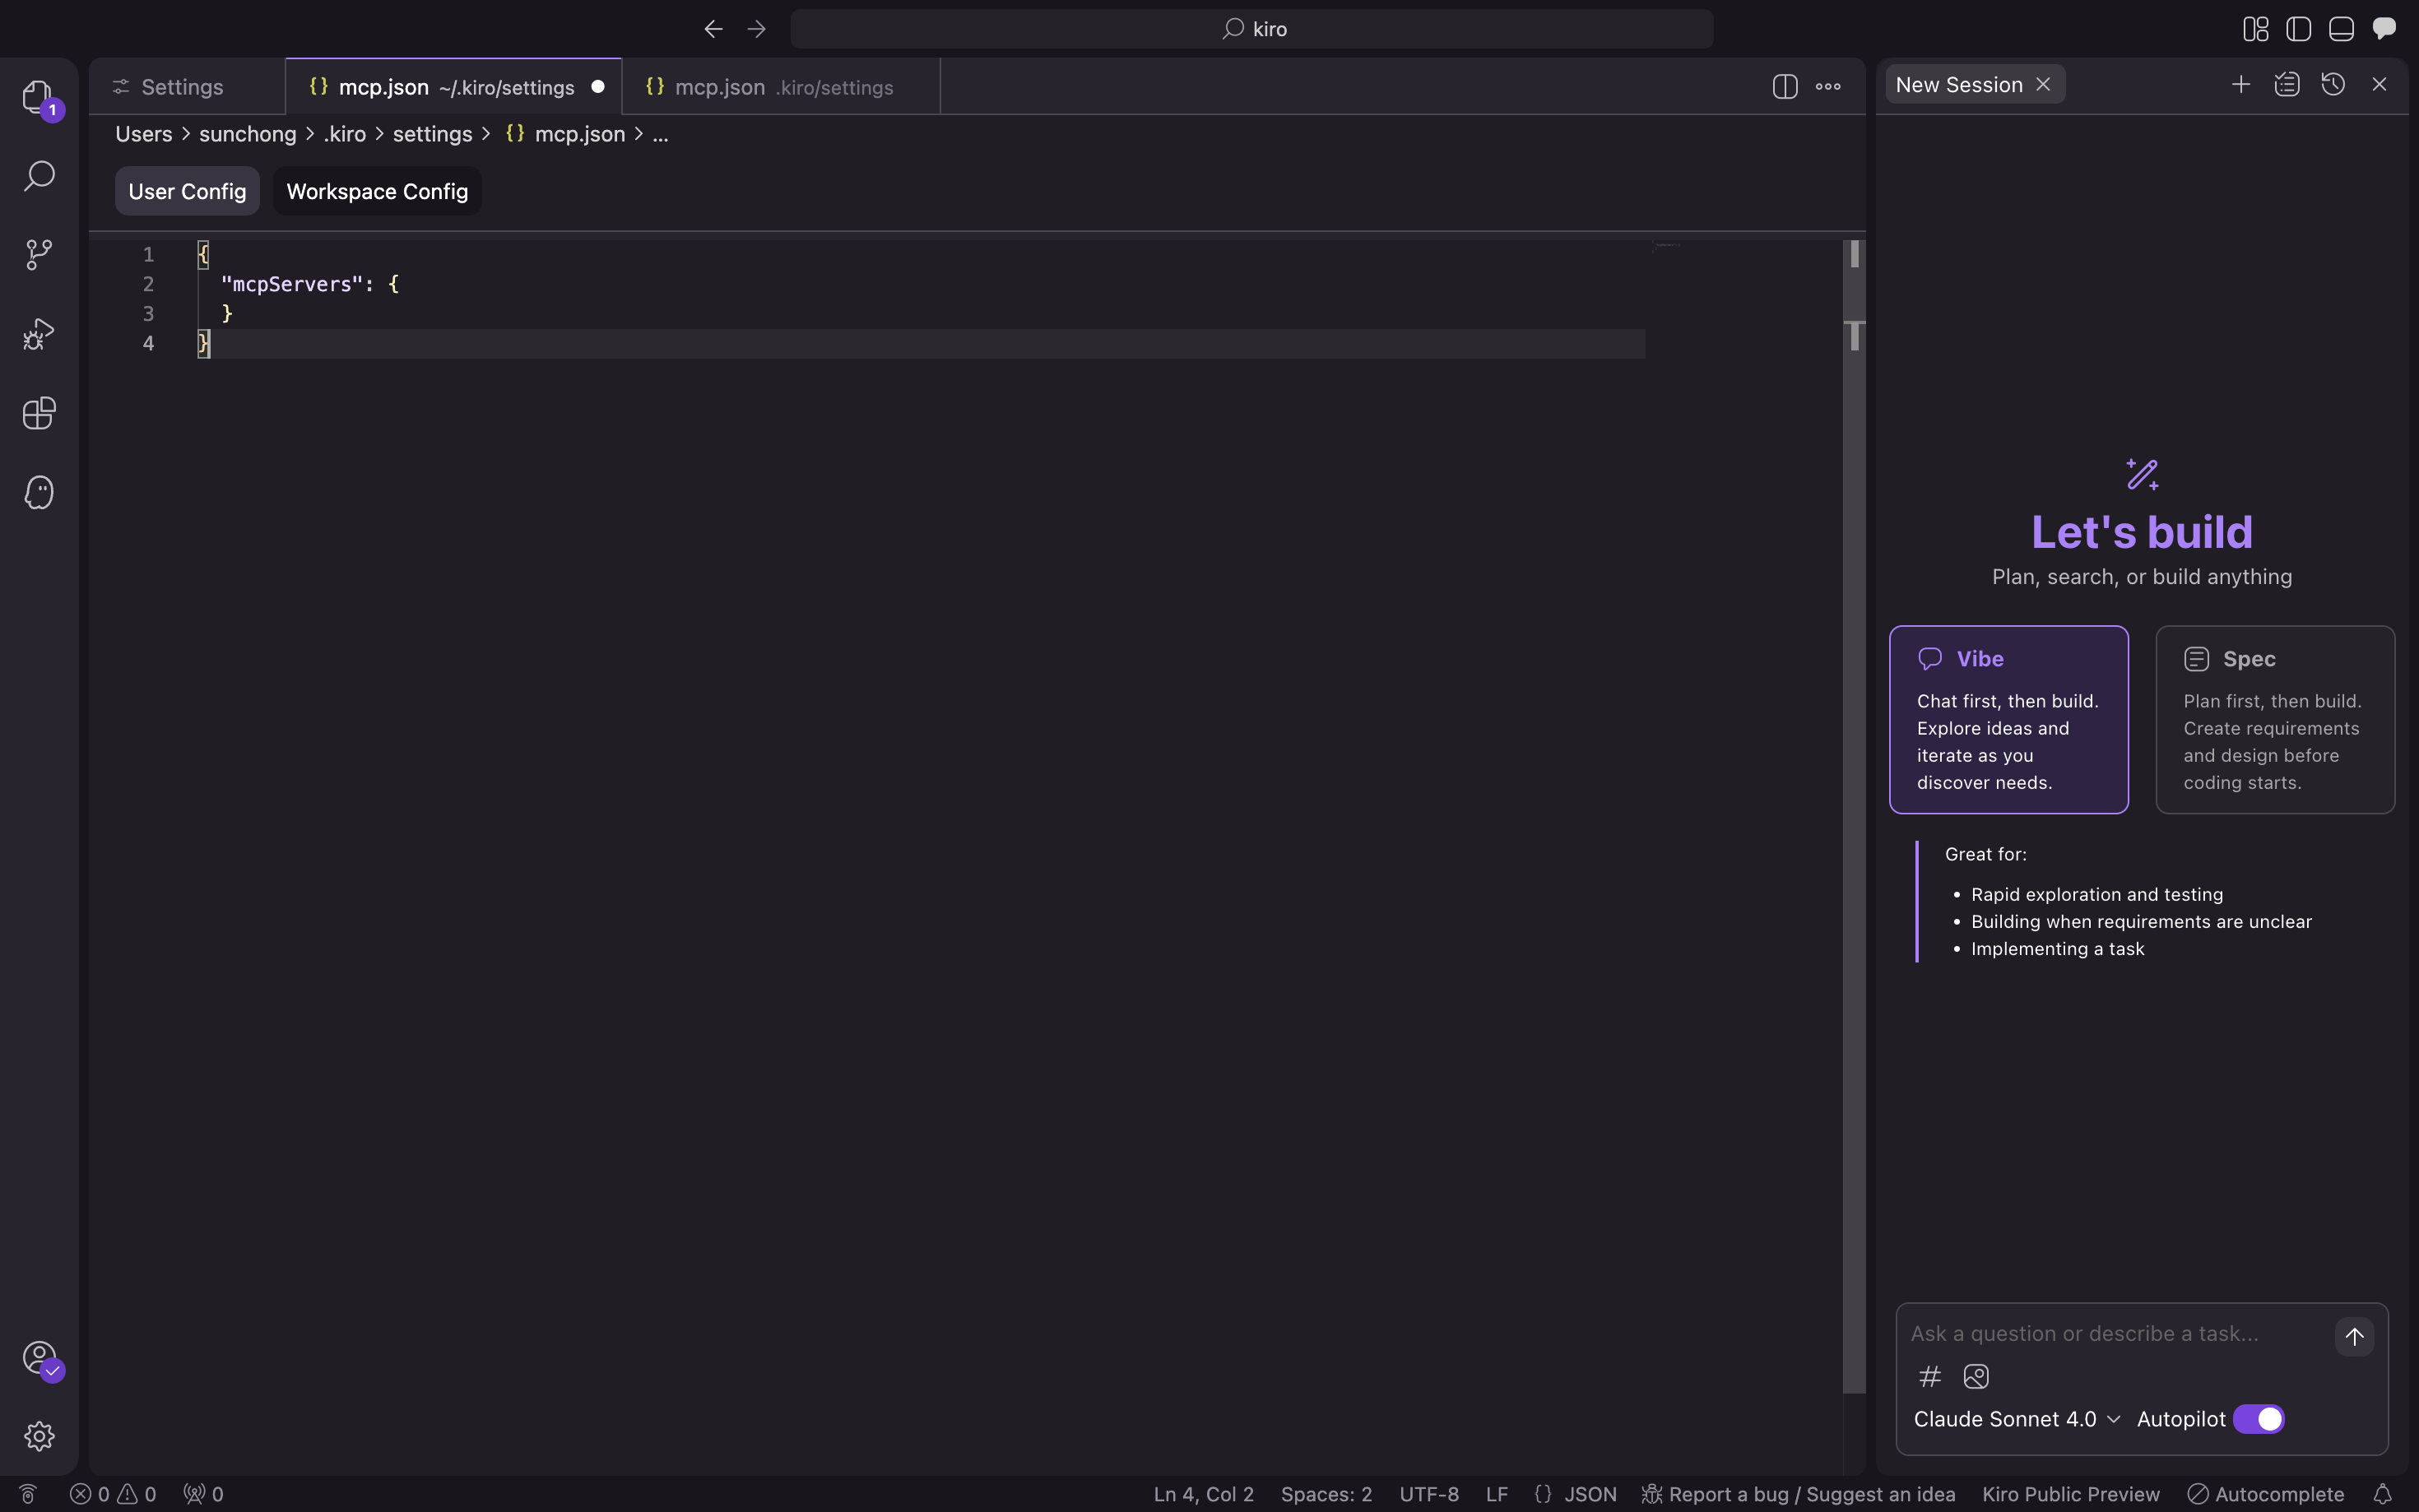
Fill in the following configuration file and click Confirm.
{
  "mcpServers": {
    "seekdb": {
      "command": "uvx",
      "args": ["seekdb-mcp-server"],
      "env": {
        "SEEKDB_HOST": "127.0.0.1",
        "SEEKDB_PORT": "2881",
        "SEEKDB_USER": "root",
        "SEEKDB_PASSWORD": "",
        "SEEKDB_DATABASE": "test"
      }
    }
  }
} -
Verify whether you can connect to the database.
Enter the prompt
How many tables in the test database?. Kiro will display the SQL statement to be executed and output the query result: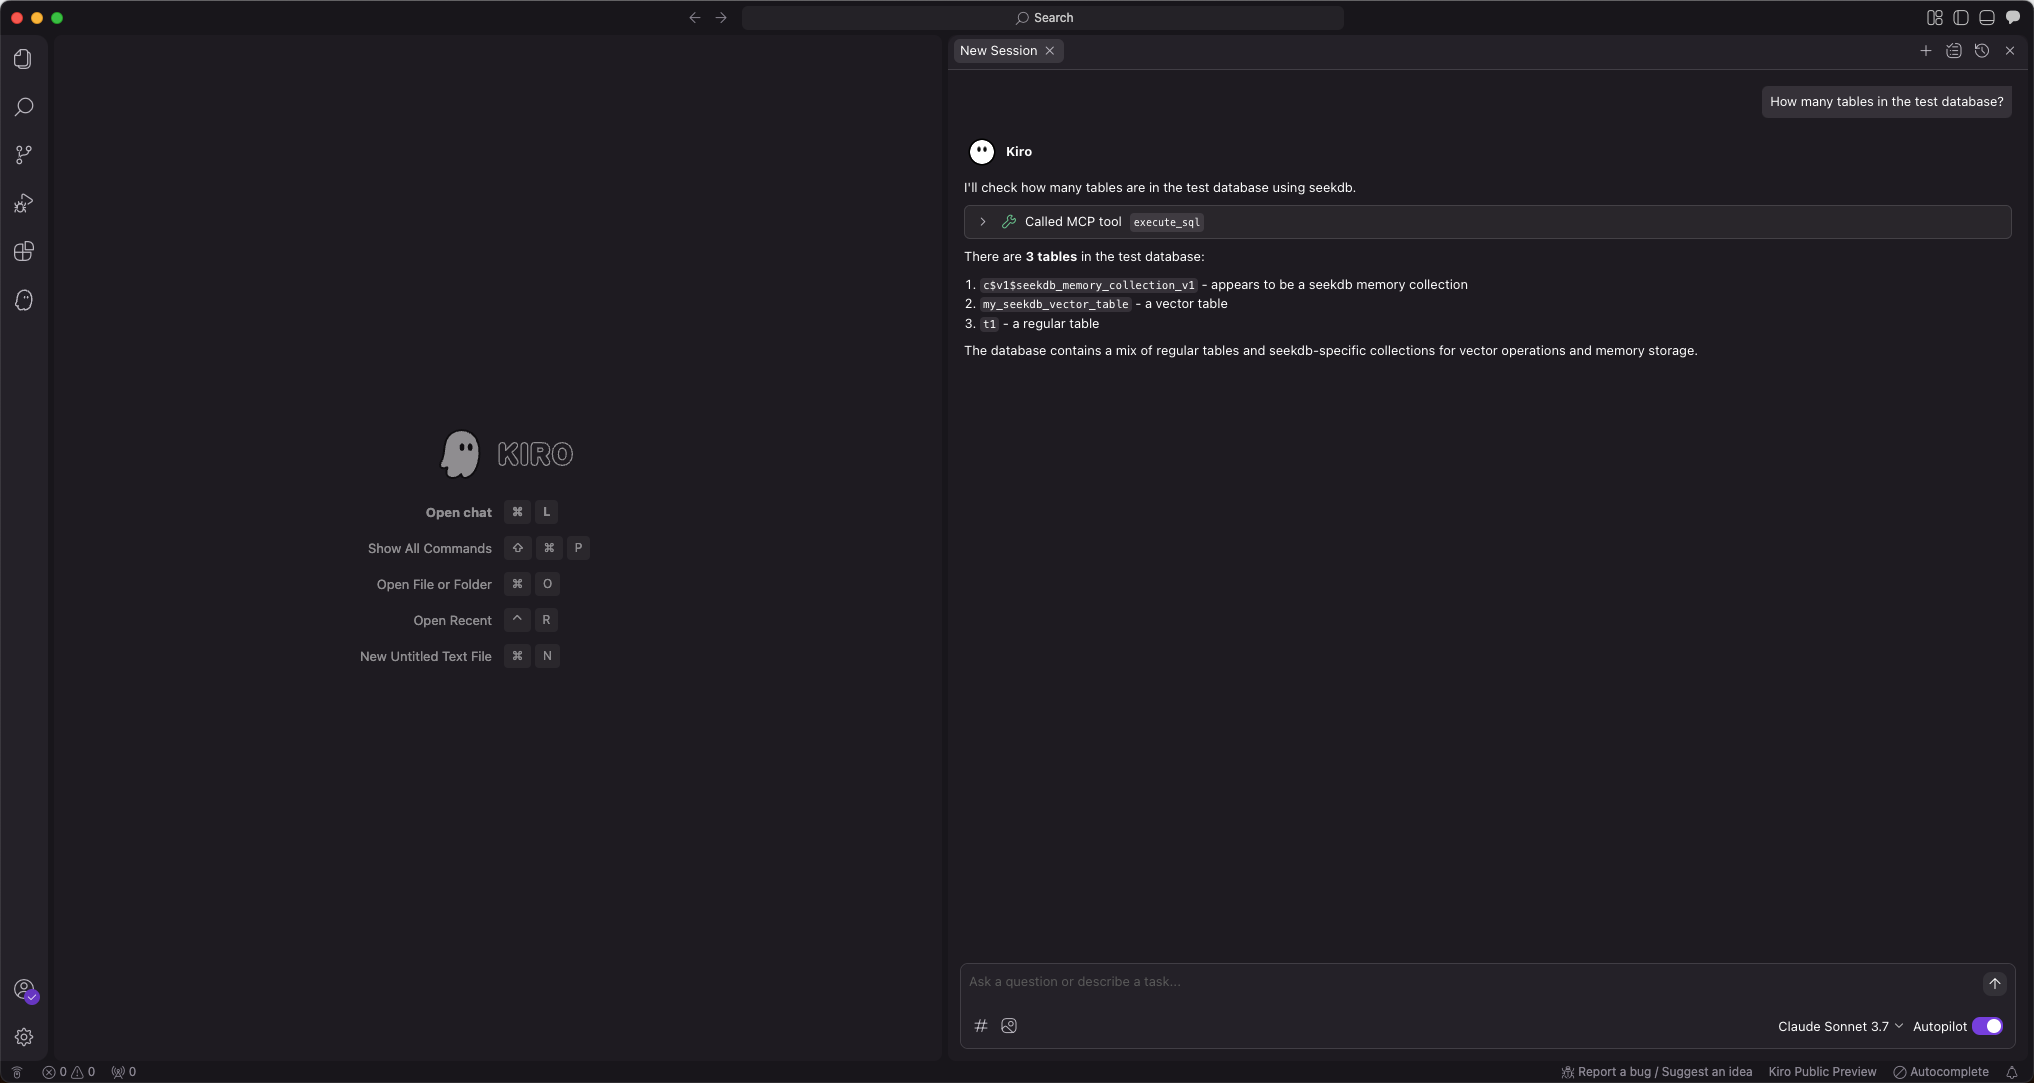
Kiro will display the number of tables in the test database, indicating that you can normally connect to seekdb.
Step 3: Use FastAPI to quickly create a RESTful API project
You can use FastAPI to quickly create a RESTful API project. FastAPI is a Python web framework that allows you to build RESTful APIs quickly.
-
Create a customer table
Enter the prompt
Create a "customer" table with "ID" as the primary key and containing fields such as "name", "age", "telephone", and "location":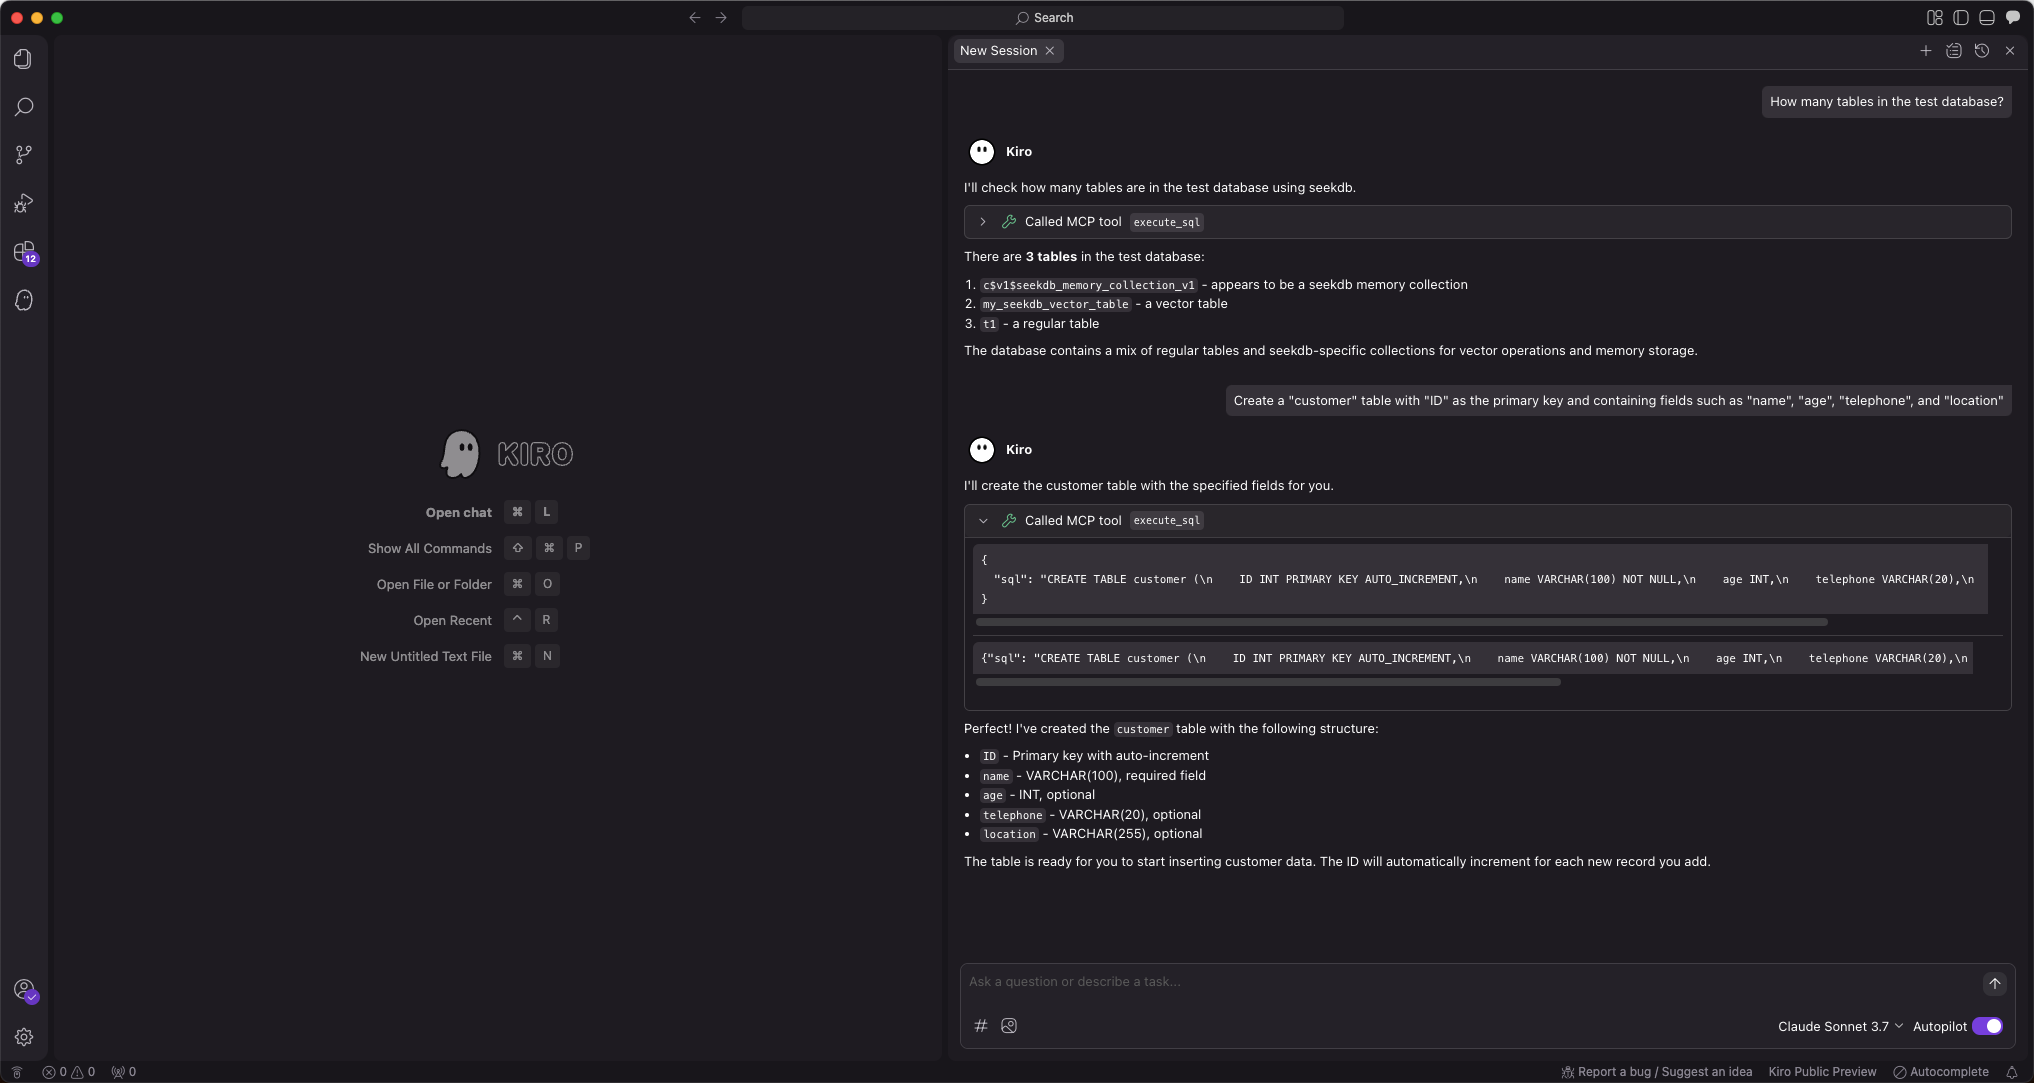
-
Insert test data
Enter the prompt
Insert 10 pieces of data into the customer table: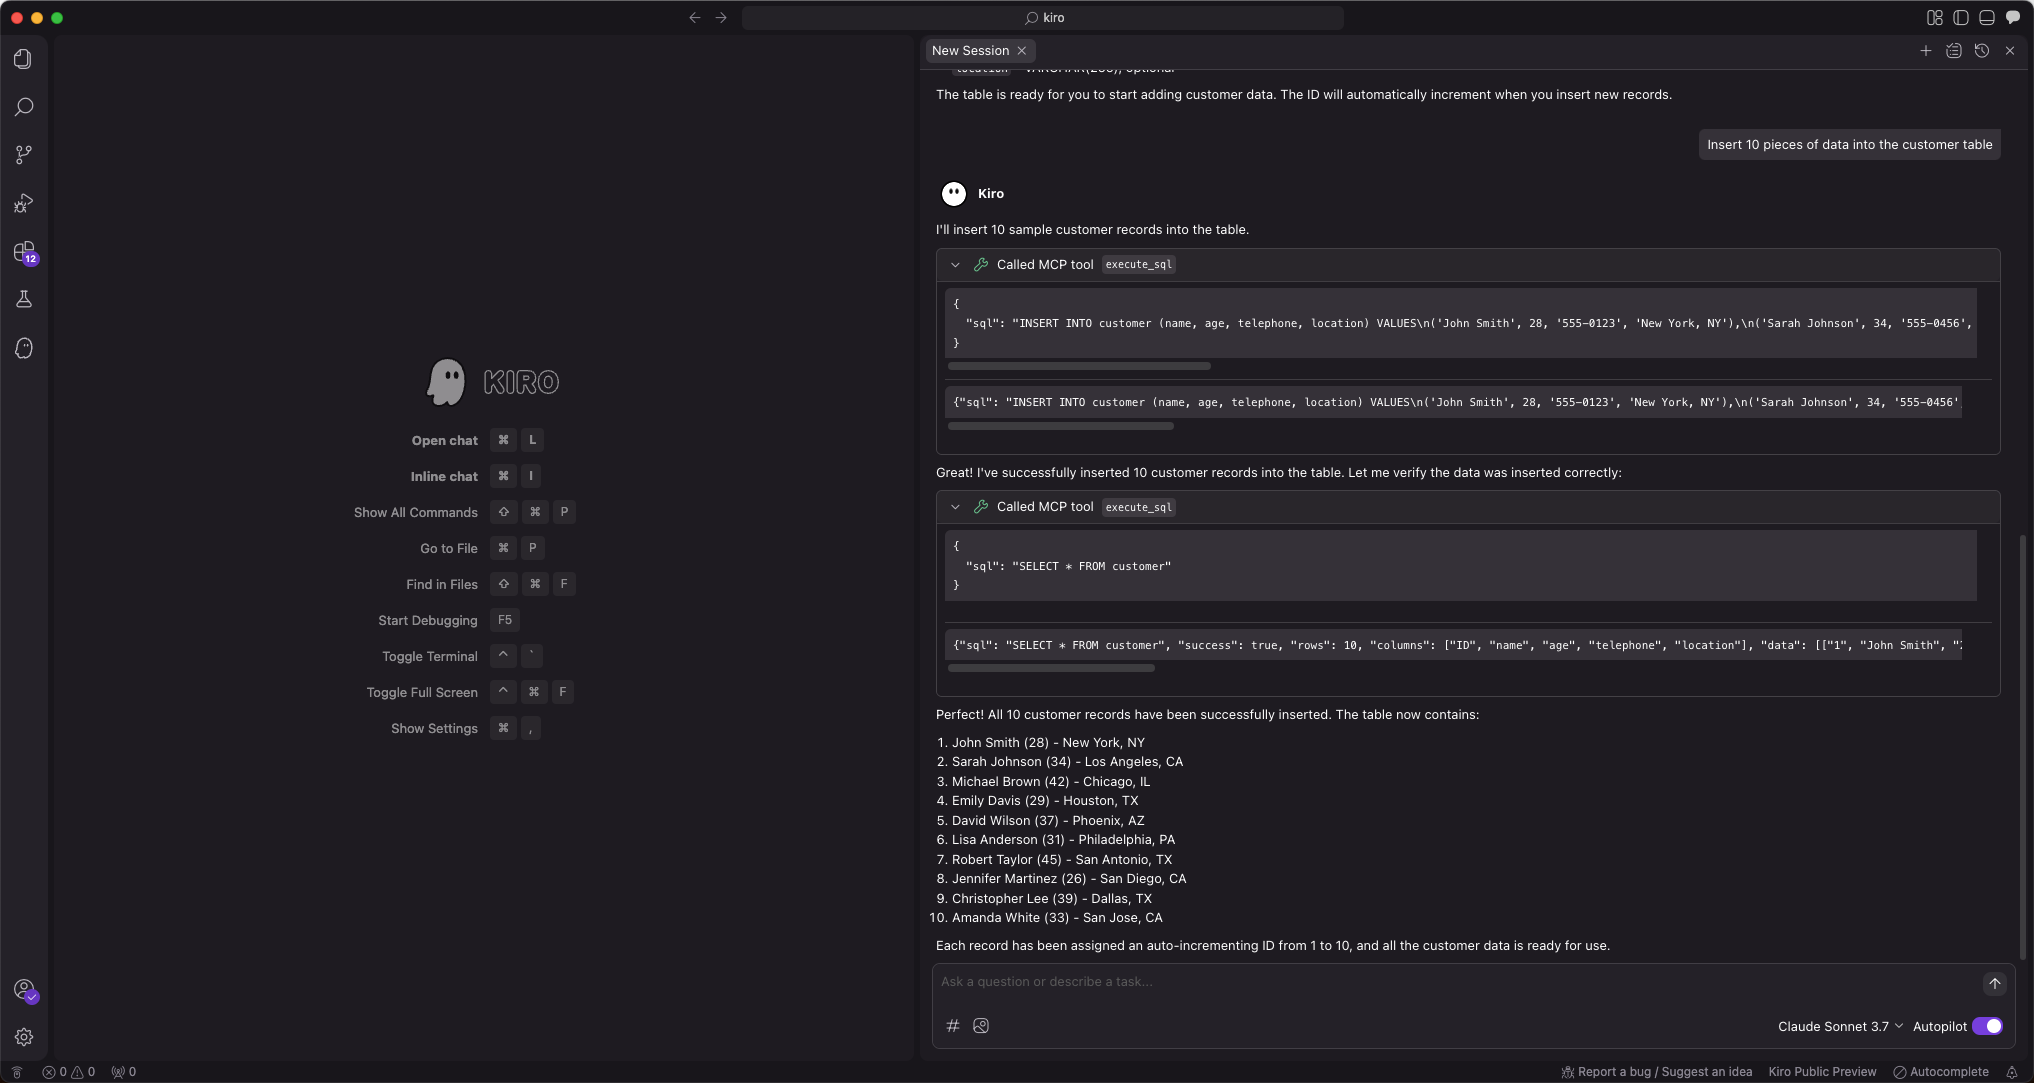
-
Create a FastAPI project
Enter the prompt
Create a FastAPI project on the customer table. Multiple files will be automatically generated. Click Accept All to accept them. You can make secondary modifications if there are any issues. Since the AI-generated files may vary each time, we will not show the modification process here.
This step will automatically generate multiple files. We recommend that you select
Accept Allfor the first time, as the content of AI-generated files may be uncertain. You can adjust them as needed later. -
Configure the database connection information for the FastAPI project
-
Install project dependencies
Run the following command to install the project dependencies:
pip install -r requirements.txt -
Start the FastAPI project
Run the following command to start the FastAPI project:
source .env
uvicorn main:app --reload -
View the data in the table
Run the following command in the command line or use other request tools to view the data in the table:
curl http://127.0.0.1:8000/customersThe returned result is as follows:
[{"name":"John Smith","age":28,"telephone":"555-0123","location":"New York, NY","ID":1},{"name":"Sarah Johnson","age":34,"telephone":"555-0456","location":"Los Angeles, CA","ID":2},{"name":"Michael Brown","age":42,"telephone":"555-0789","location":"Chicago, IL","ID":3},{"name":"Emily Davis","age":29,"telephone":"555-0321","location":"Houston, TX","ID":4},{"name":"David Wilson","age":37,"telephone":"555-0654","location":"Phoenix, AZ","ID":5},{"name":"Lisa Anderson","age":31,"telephone":"555-0987","location":"Philadelphia, PA","ID":6},{"name":"Robert Taylor","age":45,"telephone":"555-0147","location":"San Antonio, TX","ID":7},{"name":"Jennifer Martinez","age":26,"telephone":"555-0258","location":"San Diego, CA","ID":8},{"name":"Christopher Lee","age":39,"telephone":"555-0369","location":"Dallas, TX","ID":9},{"name":"Amanda White","age":33,"telephone":"555-0741","location":"San Jose, CA","ID":10}]