Claude Code
Claude Code is an AI-powered coding tool developed by Anthropic. It runs in the terminal as an intelligent coding assistant that helps developers quickly turn ideas into high-quality code.
This topic demonstrates how to build AI-invokable knowledge packs and workflows with seekdb Agent Skill, and how to build a backend application with seekdb MCP Server using Claude Code.
- seekdb Agent Skill with Claude Code
- seekdb MCP Server with Claude Code
Agent Skills are an AI capability extension format led by Anthropic and released as an open standard. The idea is to package instructions, scripts, and resources into a folder so that AI agents can discover and load these "skills" on demand and complete tasks more accurately and efficiently.
seekdb Agent Skills are "knowledge packs + workflows" built on this standard that can be invoked automatically by AI. After you install them in Claude Code, when you ask seekdb-related questions, Claude Code will use the skill instructions to look up seekdb documentation or run operations such as data import and export—no need to memorize commands or copy docs manually. You get official seekdb documentation and hands-on support while coding. For more on Agent Skills, see seekdb Agent Skills.
Supported skills
| Skill | Description | Example questions |
|---|---|---|
| seekdb (installed by default) | Covers official seekdb documentation (getting started, development guide, SDK/API, multi-model data, integrations and operations). The AI will find the relevant docs and return answers or examples based on your question. | How do I deploy seekdb? / How do I use vector search in seekdb? |
| importing-to-seekdb | Import data into seekdb collections and optionally vectorize specified columns. You can preview Excel/CSV structure and sample data before importing. | Import sample_products.xlsx into seekdb and vectorize the Details column. |
| querying-from-seekdb | Filter by metadata for scalar search, with full-text + semantic hybrid search (RRF ranking). Results can be exported to CSV or Excel. | Recommend 2 phones with rating above 4.3 and AMOLED display. |
Install seekdb Agent Skills in Claude Code
Claude Code discovers and loads Agent Skills from the .claude/skills directory in your project root. Follow these steps to install:
-
Go to the project root where you want to install the skills.
cd /path/to/your/project -
Install the interactive installer.
pip install seekdb-agent-skills -
Run the interactive installer.
seekdb-agent-skills -
Select the tool.
Use the ↑↓ arrow keys to select Claude Code, then press Enter to confirm.
🚀 seekdb Agent Skills Installer
==================================================

📋 Select tool to install to:
? Select one tool (use ↑↓ to navigate, Enter to confirm, Ctrl+C to cancel): (Use arrow keys)
» Claude Code
OpenClaw
Cursor
Codex
OpenCode
GitHub Copilot
Qoder
Trae -
Confirm the install location.
📁 Project root: /path/to/your/project
(Skills will be installed under .claude/skills)
? Install skills to this directory? (Y/n)
Enter
Yto confirm ornto exit the installer. -
Select the skills to install.
If you only need the AI to reference seekdb docs, press Enter. To import or export Excel/CSV with seekdb, also select importing-to-seekdb and querying-from-seekdb. Use ↑↓ to move, Space to toggle, and Enter to confirm.
📦 Select skills to install:
? Select skills (use ↑↓ to navigate, Space to select, Enter to confirm, Ctrl+C to cancel): (Select multiple with Space)
» ● seekdb
○ importing-to-seekdb
○ querying-from-seekdb
Use seekdb Agent Skills in Claude Code
After installation, open Claude Code from your project root and ask questions. The AI will invoke the right skills and answer using the docs or skill capabilities.
Example prompts:
- How do I deploy seekdb on Mac?
- How do I use vector search in seekdb?
- How do I implement hybrid search in seekdb?
MCP (Model Context Protocol) is an open-source protocol introduced and released by Anthropic in November 2024. It enables large language models to interact with external tools or data sources. With MCP, users can directly instruct tools to perform specific actions without manually copying and executing the model's output.
The MCP Server provides model-to-seekdb interaction over MCP and can execute SQL. With a suitable client you can quickly build project prototypes. It is open-sourced on GitHub.
Prerequisites
-
You have deployed seekdb.
-
Install Python 3.11 or later and the corresponding pip. If your system has a lower version of Python, you can use Miniconda to create a new environment with Python 3.11 or later. For more information, see Miniconda installation guide.
-
Install the Python package manager uv. After installation, run
uv --versionto verify:pip install uv
uv --version -
Install Claude Code:
-
Install the
Claude Code for VS Codeplugin in Visual Studio Code.
-
Configure the Claude Code plugin.
Configure the third-party API information for Claude Code and enable the Use Terminal option.
export ANTHROPIC_BASE_URL=YOUR_BASE_URL
export ANTHROPIC_API_KEY=YOUR_API_KEY
export ANTHROPIC_MODEL=YOUR_MODE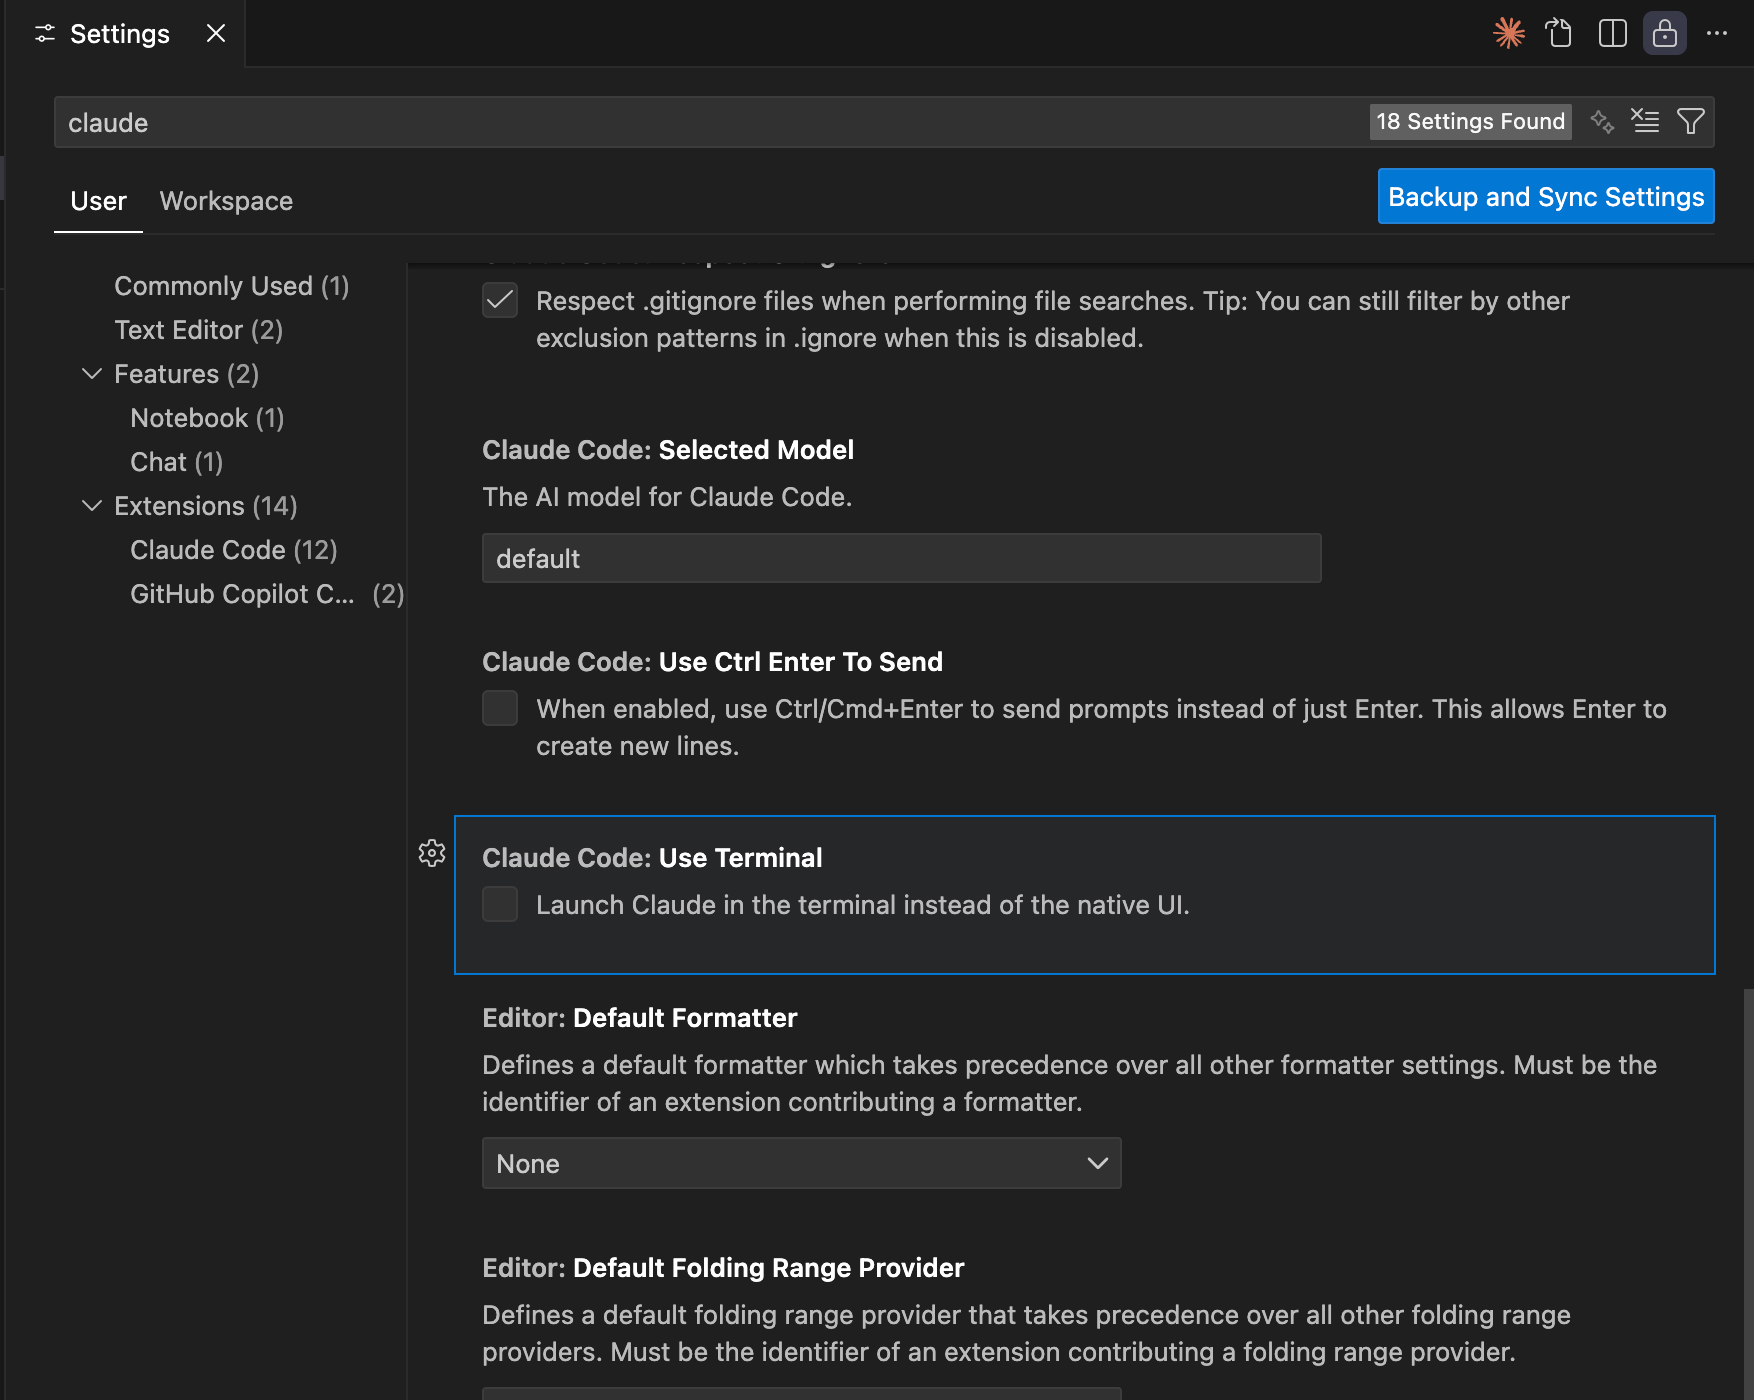
-
Test the connection.
Step 1: Obtain the database connection information
Contact the deployment personnel or administrator of seekdb to obtain the database connection string, for example:
mysql -h$host -P$port -u$user_name -p$password -D$database_name
Parameter description:
-
$host: the IP address for connecting to seekdb. -
$port: the port for connecting to seekdb, which is 2881 by default. -
$database_name: the name of the database to be accessed.tipThe user for the connection must have the
CREATE,INSERT,DROP, andSELECTpermissions on the database. -
$user_name: the database connection account. -
$password: the account password.
Step 2: Configure the seekdb MCP server
This example uses Visual Studio Code to configure the seekdb MCP server.
Install the seekdb MCP server
Run the following command to install the seekdb MCP server:
pip install seekdb-mcp-server
Configure the seekdb server environment variables in the .env file
Create a file named .env in the current directory and add the following content:
vi .env

SEEKDB_HOST=localhost      # Database host
SEEKDB_PORT=2881           # Database port (default: 2881)
SEEKDB_USER=your_username
SEEKDB_PASSWORD=your_password
SEEKDB_DATABASE=your_database
Start in SSE mode
env $(cat .env | xargs) uvx seekdb-mcp-server --transport sse --port 8000 --host 0.0.0.0
Open the VS Code terminal and run the claude mcp add-json command
claude mcp add-json sse-seekdb '{
   "autoApprove": [],
   "disabled": false,
   "timeout": 60,
   "type": "sse",
   "url": "http://ip:port/sse"
}'
Create a working directory for the Claude Code client and configure the seekdb MCP server
Manually create a working directory for Visual Studio Code on your local machine and open it with Visual Studio Code. The files generated by Claude Code will be stored in this directory. An example directory name is claudecode.
Verify whether you can connect to the database. When prompted with How many tables in the test database?, Claude Code will display the SQL statements to be executed and output the query results:

If the number of tables in the test database is displayed, the seekdb connection is successful.
Step 3: Use FastAPI to quickly create a RESTful API project
FastAPI is a Python web framework that allows you to quickly build RESTful APIs.
-
Create a table.
Enter the prompt
Create a "customer" table with "ID" as the primary key and containing fields such as "name", "age", "telephone", and "location":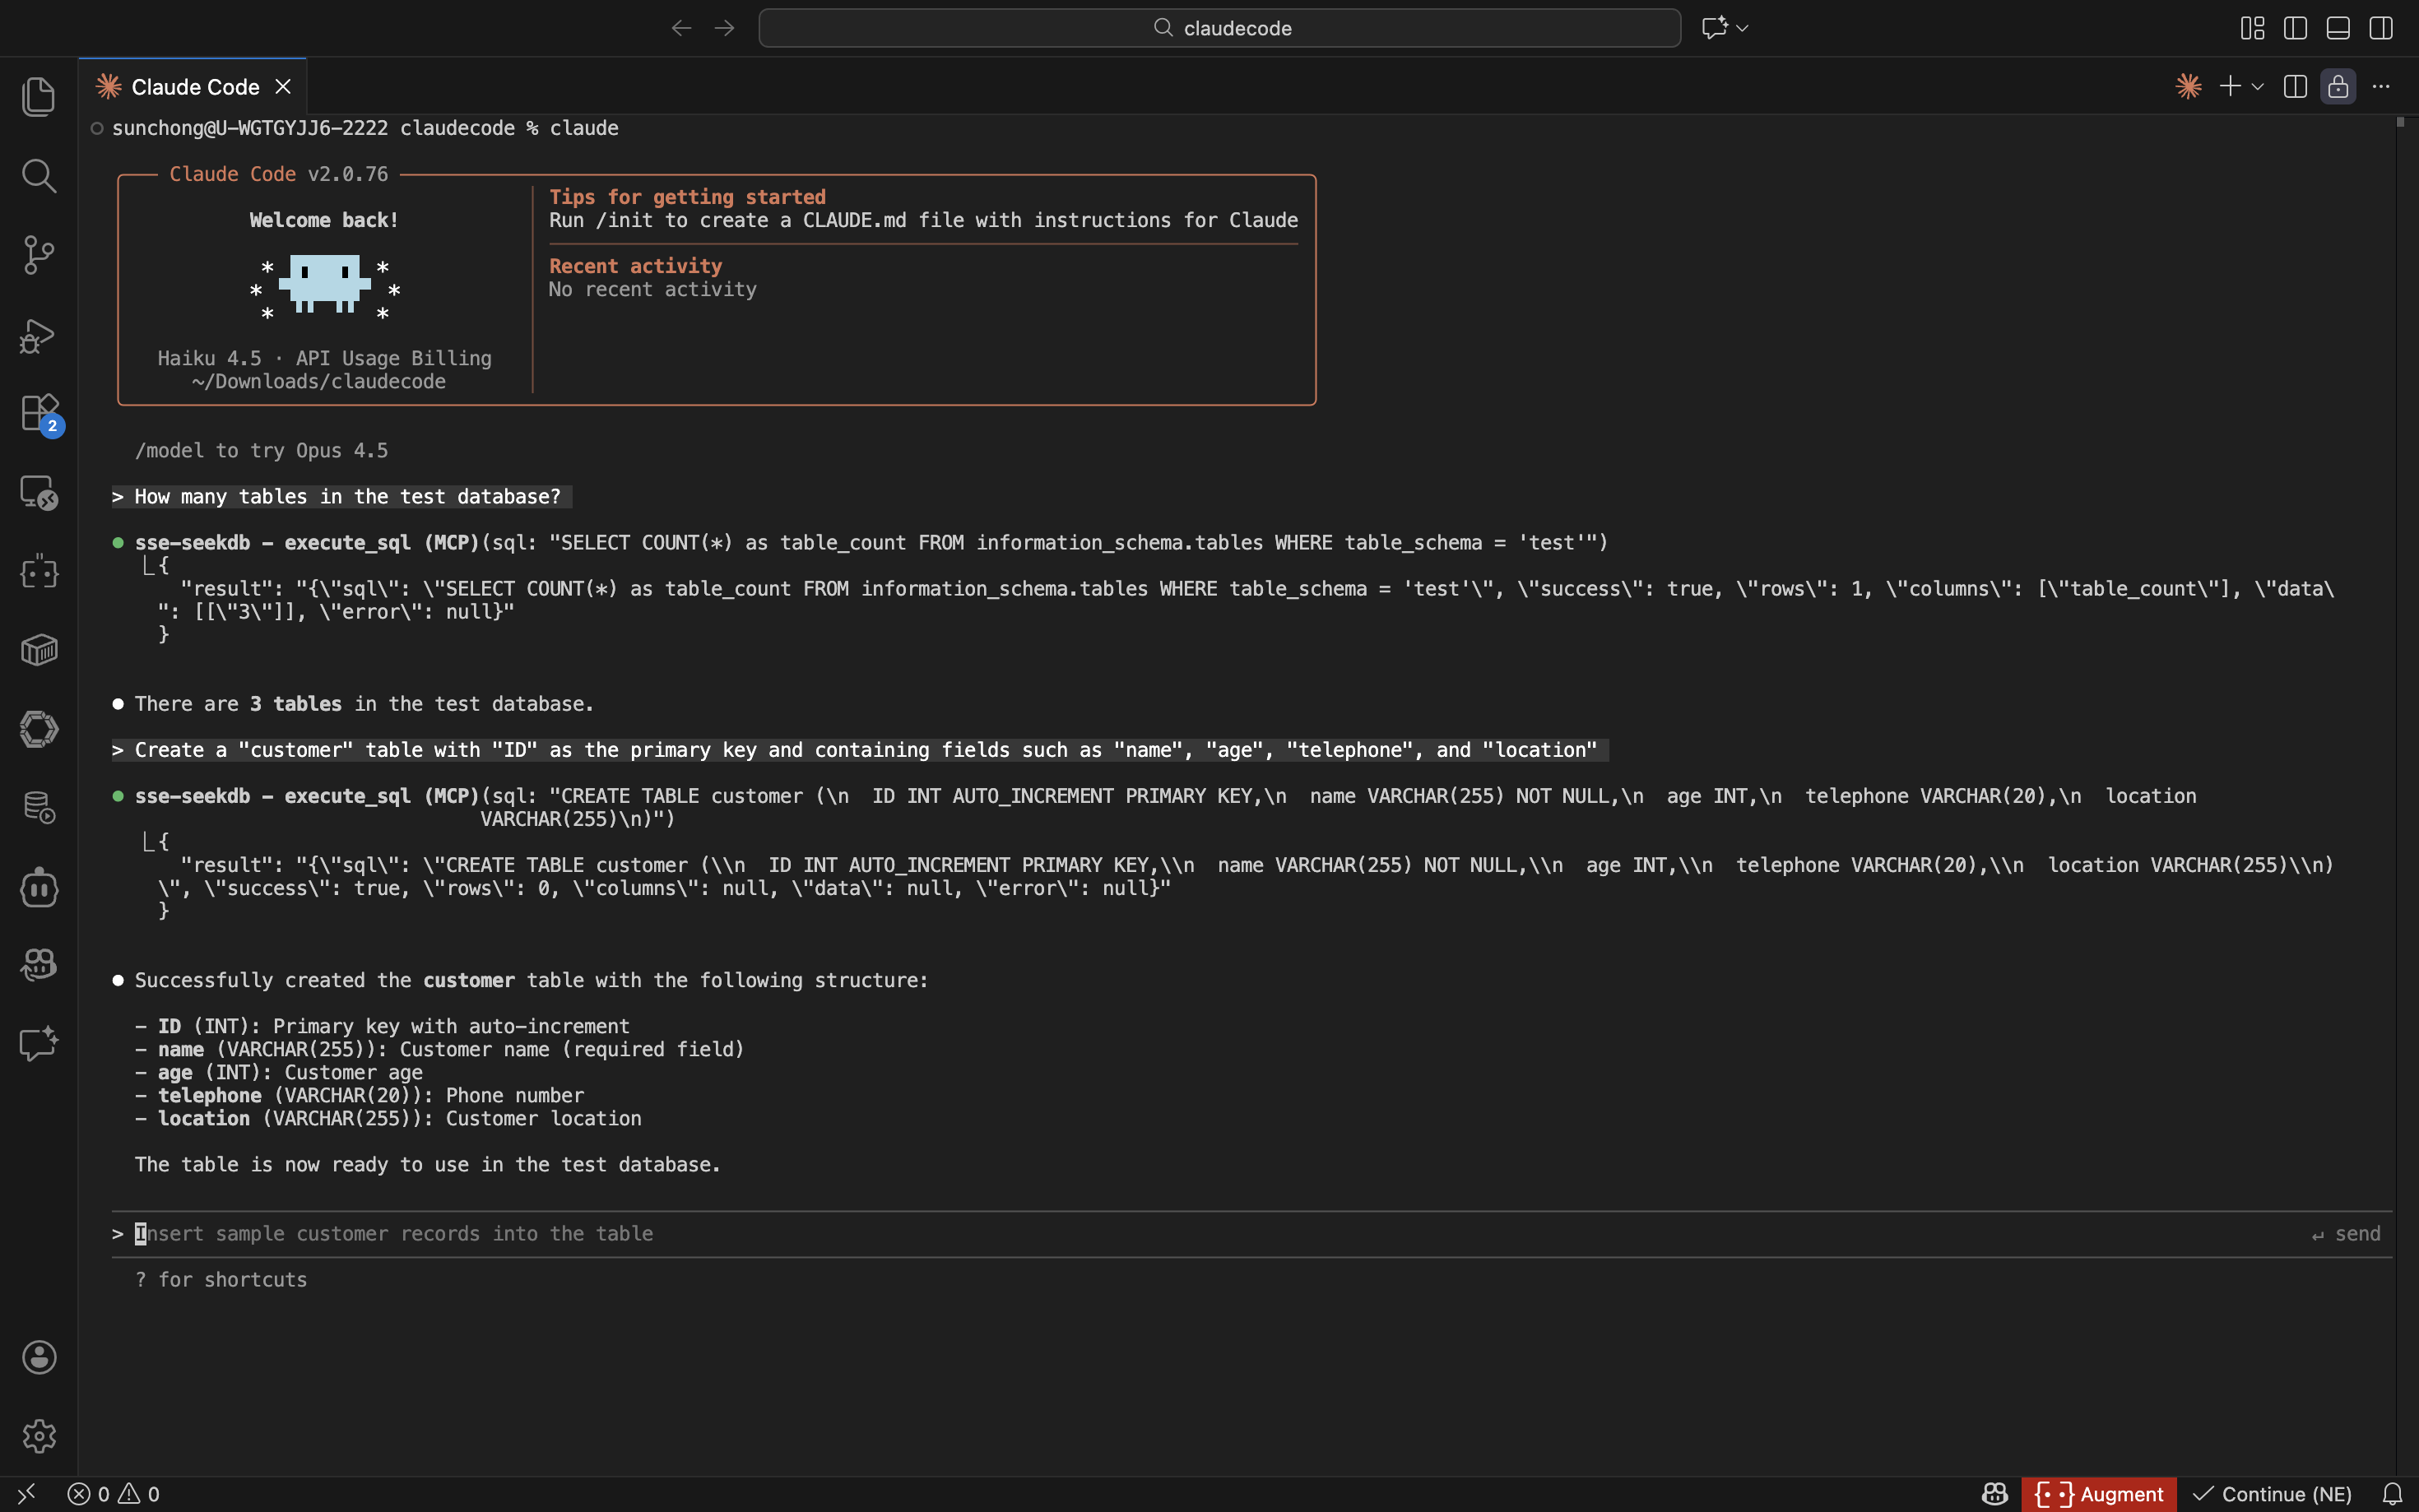
-
Insert test data.
Enter the prompt
Insert 10 pieces of data into the customer table:
-
Create a FastAPI project.
Enter the prompt
Create a FastAPI project on the customer table. Multiple files are automatically generated. You can modify them as needed.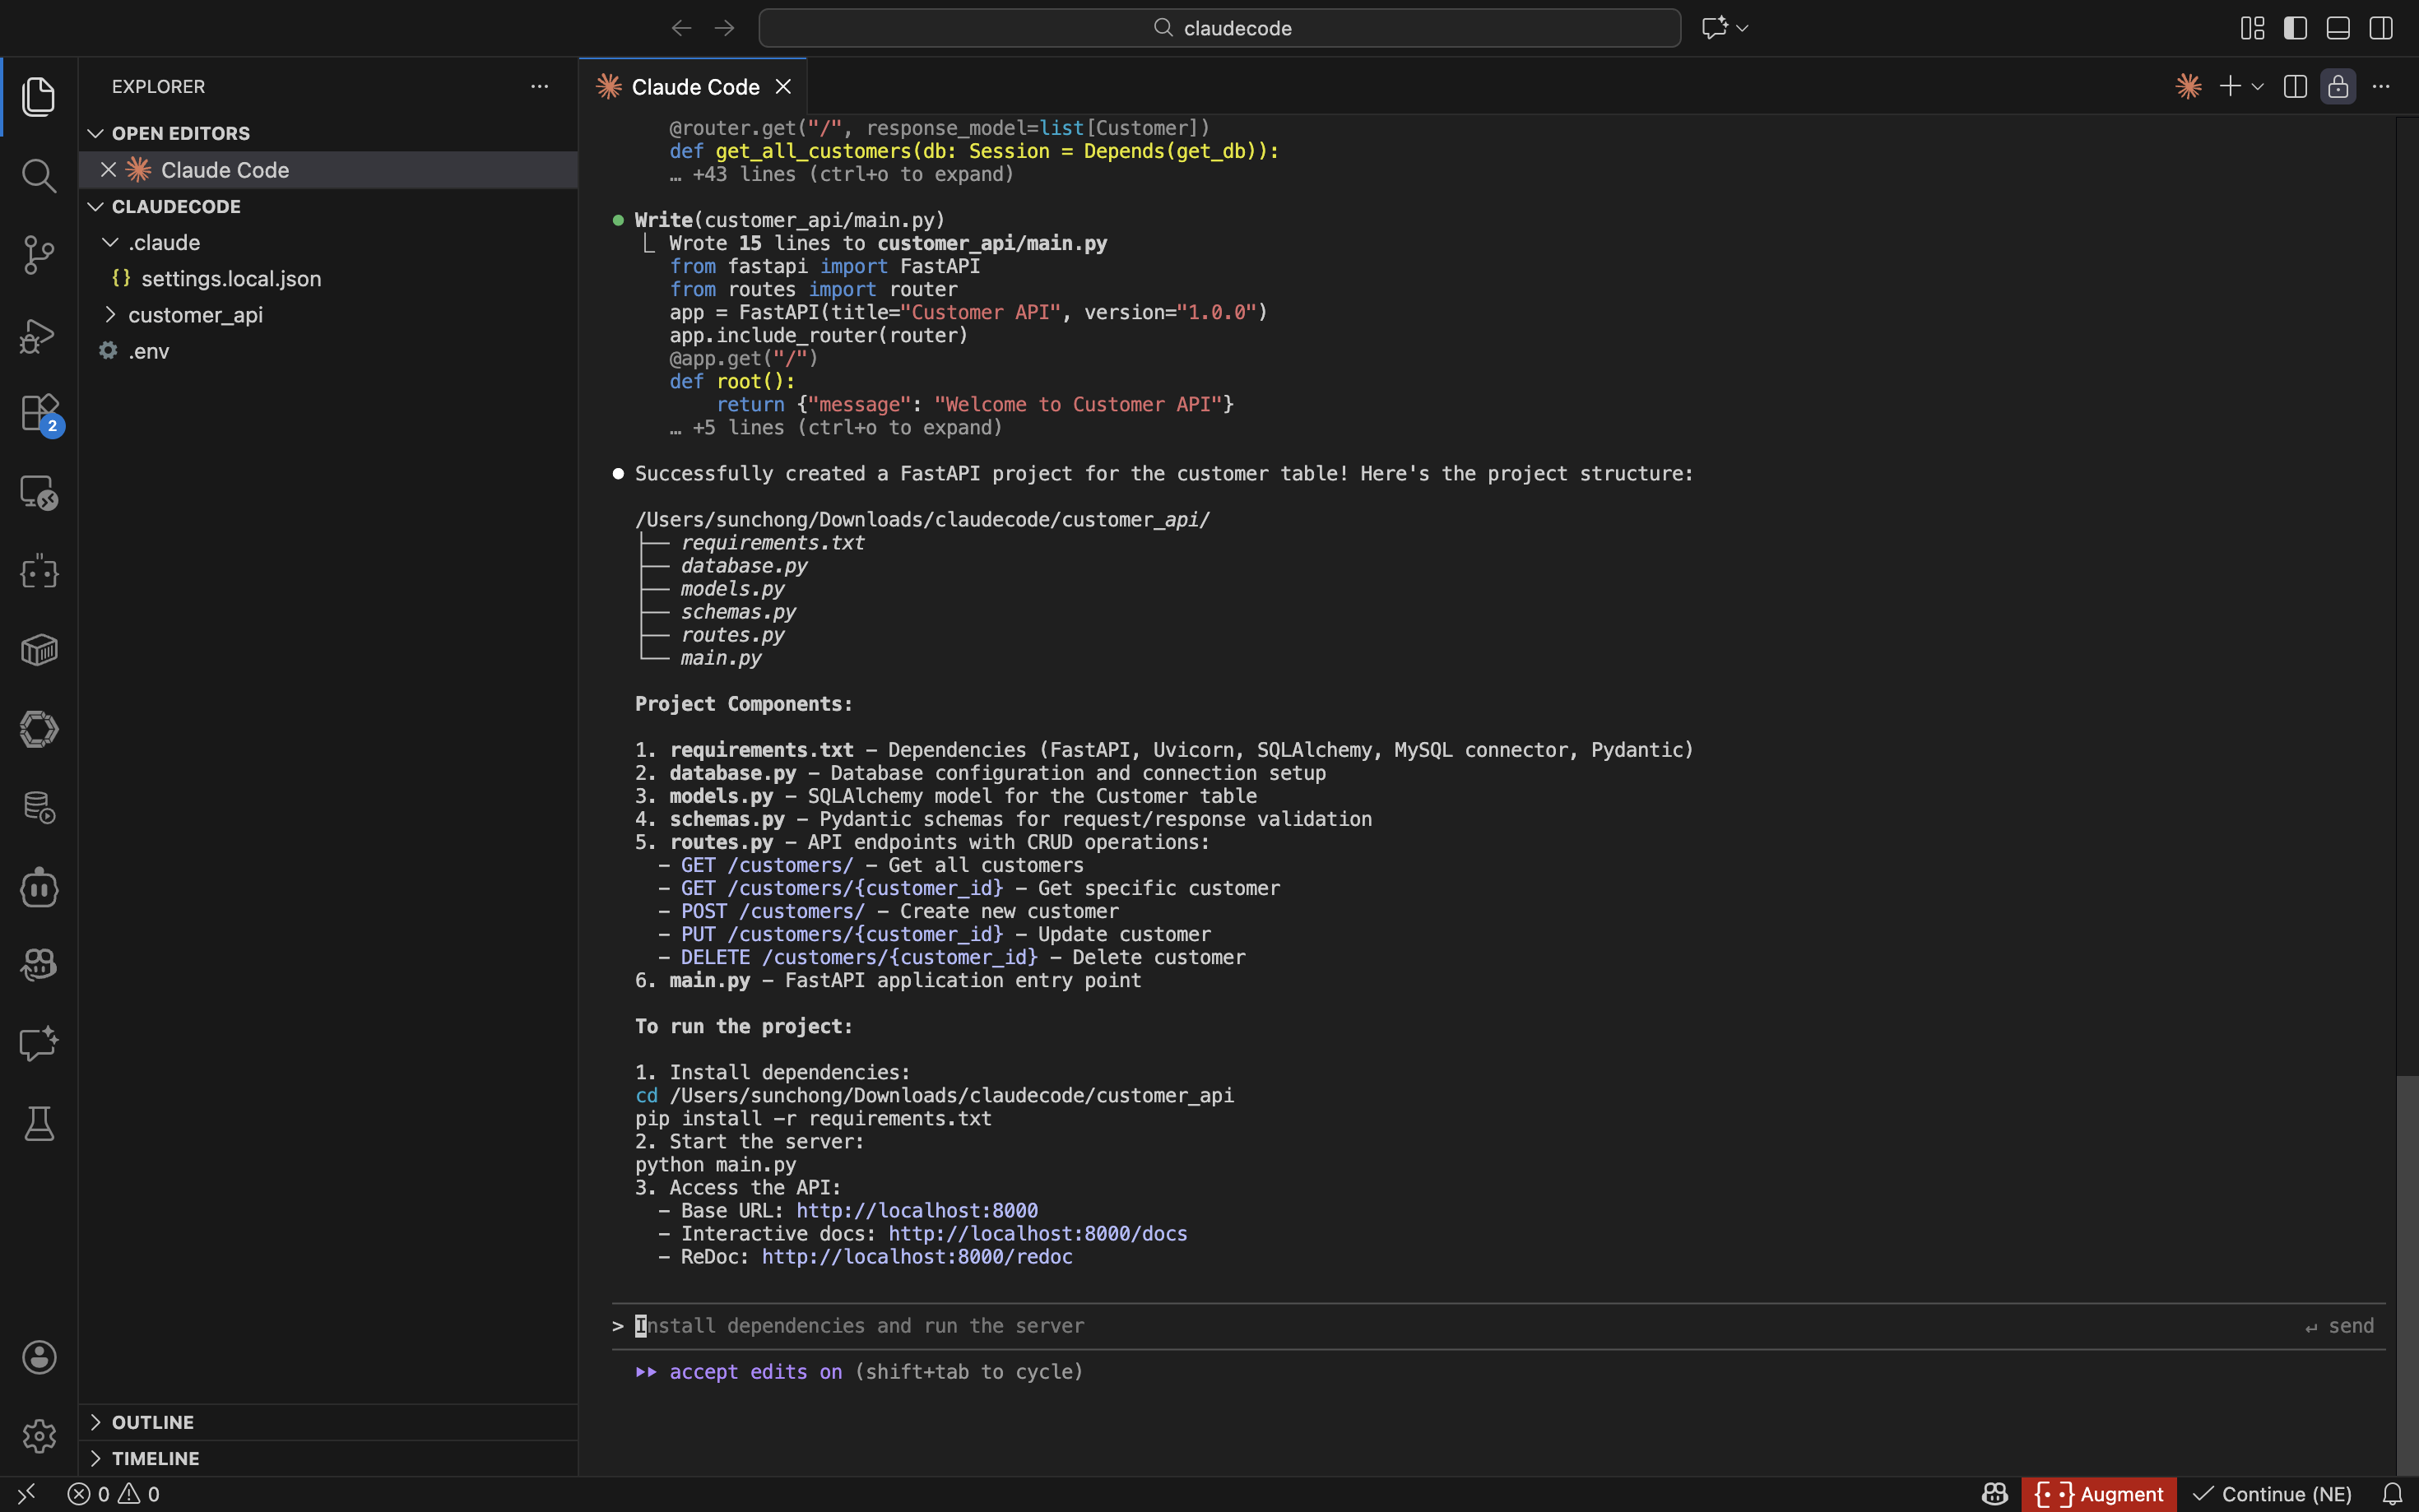
-
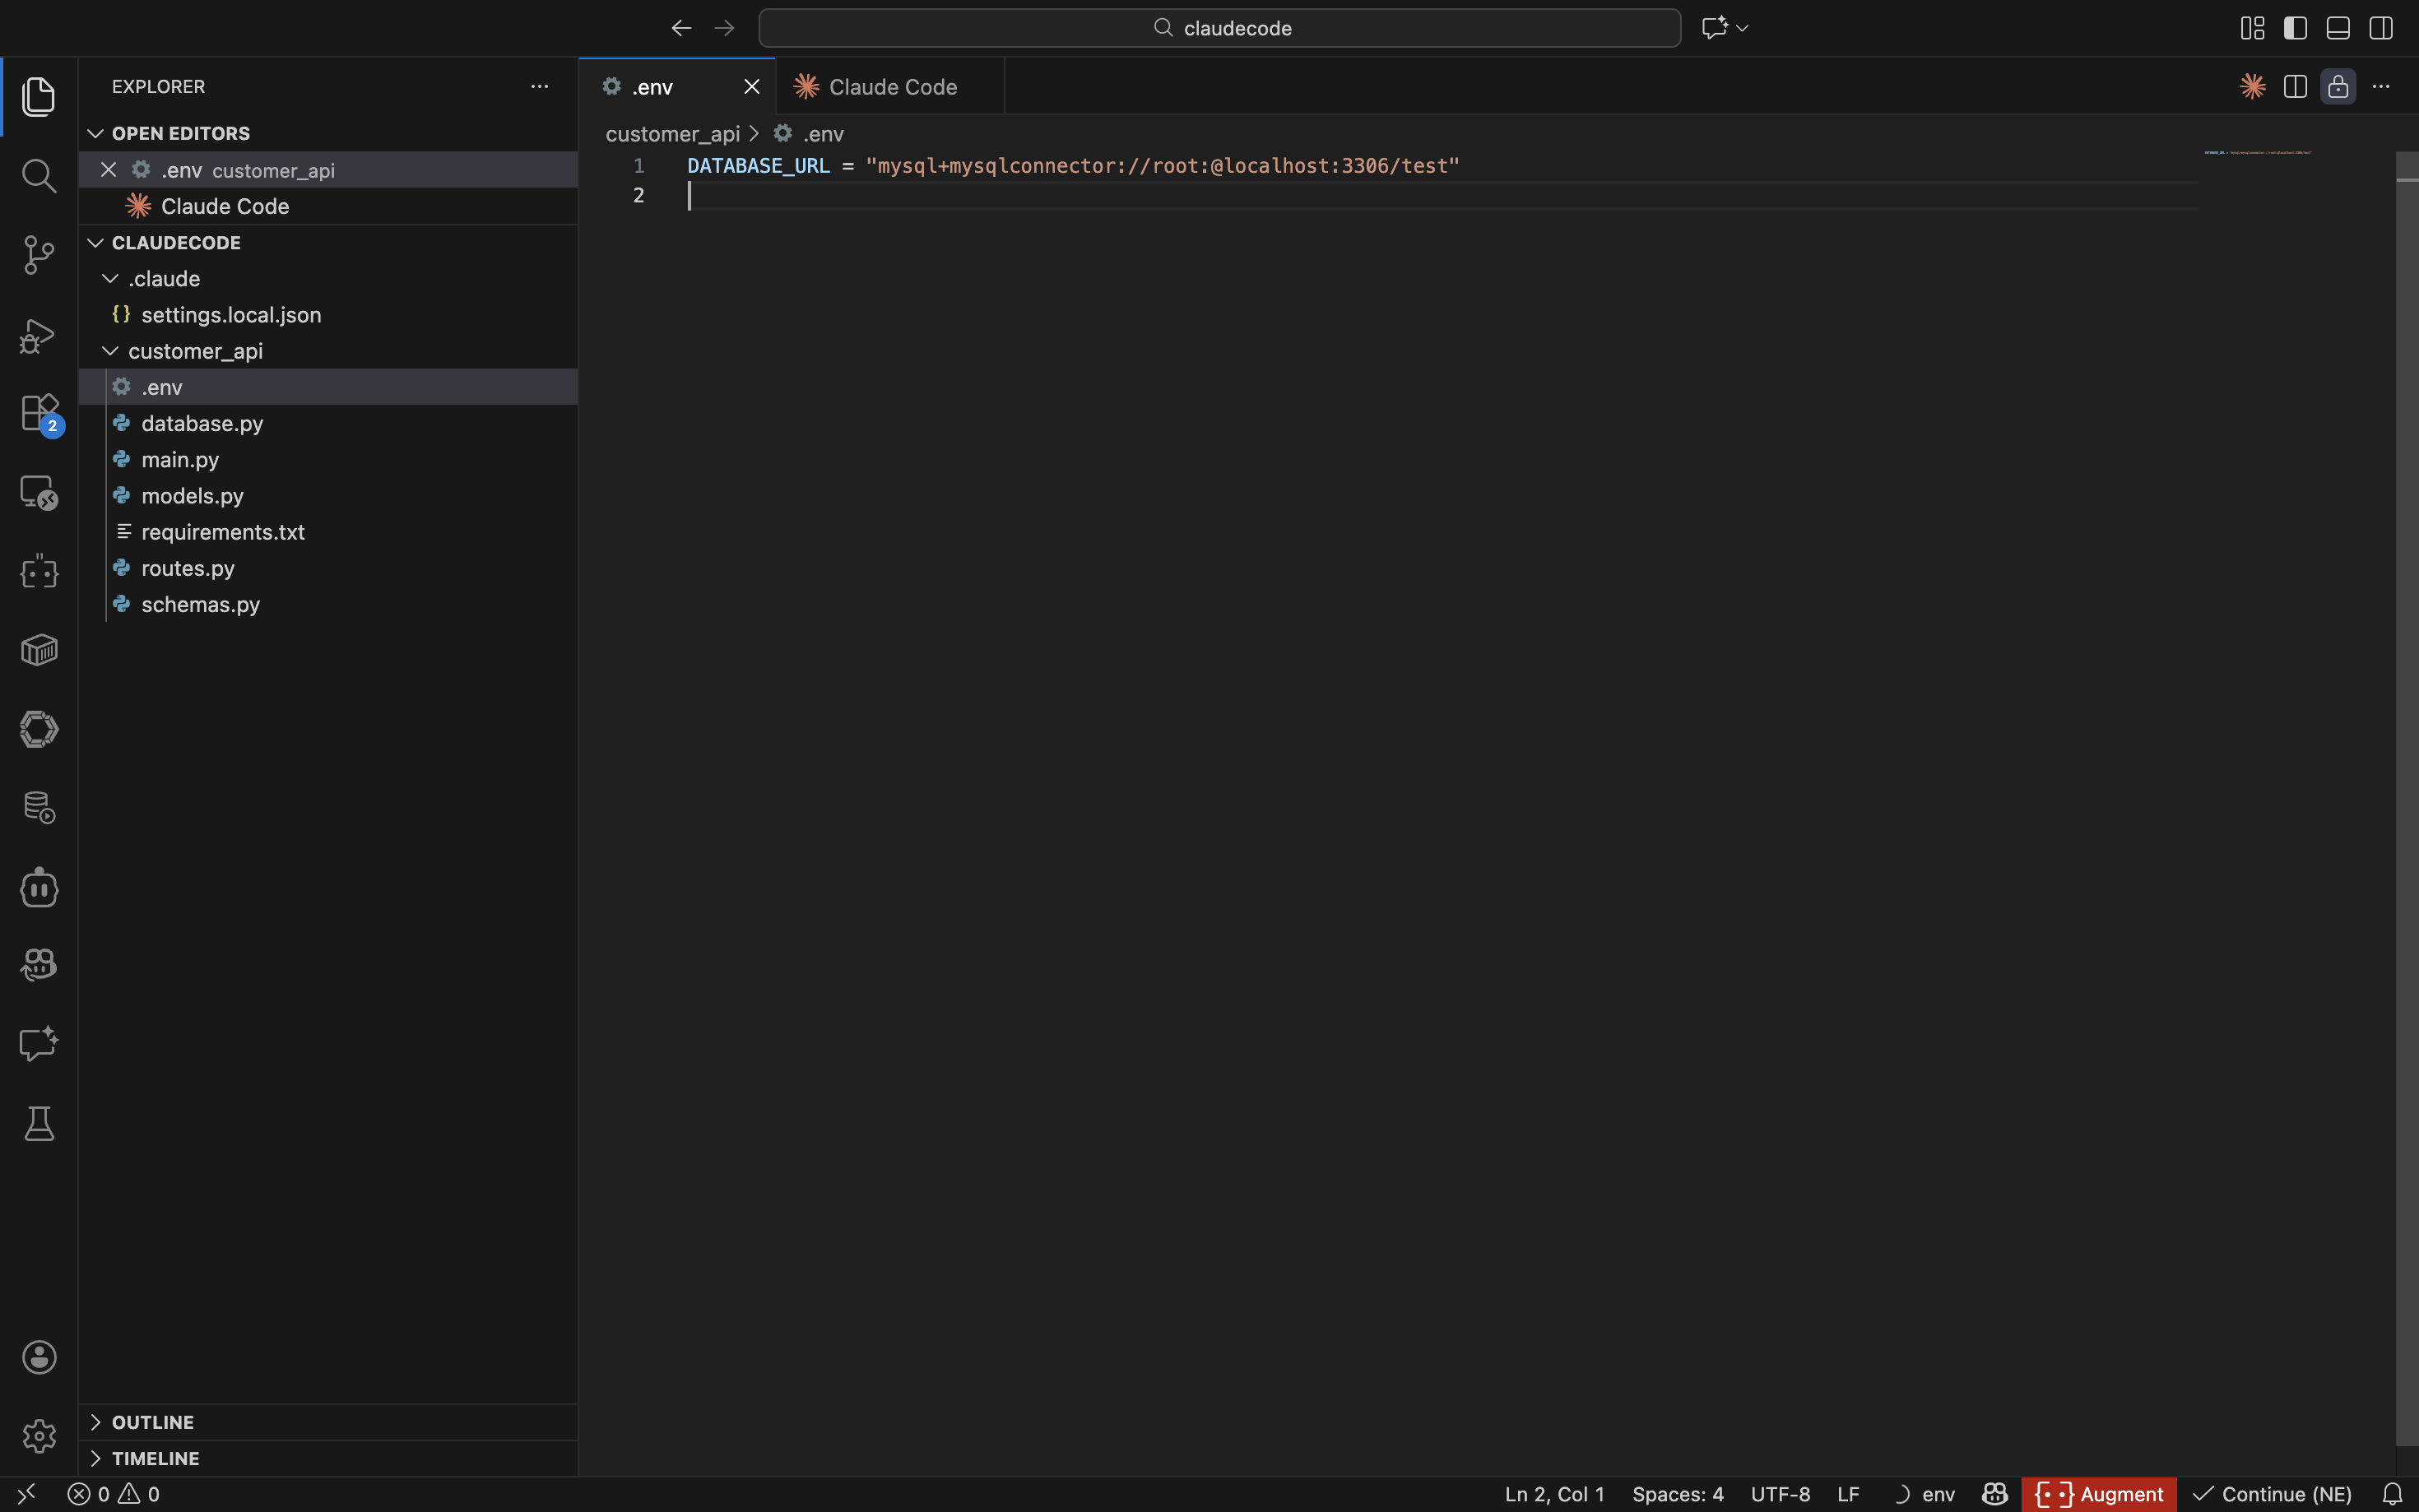
Configure the database connection information for the FastAPI project
-
Install project dependencies
Run the following command to install the project dependencies:
cd customer_api
pip install -r requirements.txt -
Start the FastAPI project
Run the following command to start the FastAPI project:
source .env
uvicorn main:app --reload -
View the data in the table
Run the following command in the command line or use other request tools to view the data in the table:
curl http://127.0.0.1:8000/customersThe returned result is as follows:
[{"name":"Alice Johnson","age":28,"telephone":"555-0101","location":"New York","ID":1},{"name":"Bob Smith","age":35,"telephone":"555-0102","location":"Los Angeles","ID":2},{"name":"Carol White","age":42,"telephone":"555-0103","location":"Chicago","ID":3},{"name":"David Brown","age":31,"telephone":"555-0104","location":"Houston","ID":4},{"name":"Eve Davis","age":26,"telephone":"555-0105","location":"Phoenix","ID":5},{"name":"Frank Miller","age":39,"telephone":"555-0106","location":"Philadelphia","ID":6},{"name":"Grace Lee","age":33,"telephone":"555-0107","location":"San Antonio","ID":7},{"name":"Henry Taylor","age":45,"telephone":"555-0108","location":"San Diego","ID":8},{"name":"Ivy Martinez","age":29,"telephone":"555-0109","location":"Dallas","ID":9},{"name":"Jack Wilson","age":37,"telephone":"555-0110","location":"San Jose","ID":10}]