Continue
MCP (Model Context Protocol) is an open-source protocol released by Anthropic in November 2024. It enables large language models to interact with external tools or data sources. With MCP, users do not need to manually copy and execute the output of large models; instead, the models can directly instruct tools to perform specific actions (Actions).
MCP Server provides the capability for large models to interact with seekdb through the MCP protocol, allowing the execution of SQL statements. With the right client, you can quickly build a project prototype, and it is open-source on GitHub.
Continue is an IDE extension that integrates with the MCP Server, supporting Visual Studio Code and IntelliJ IDEA.
This topic will guide you on how to integrate Continue with the seekdb MCP Server to quickly build backend applications.
Prerequisites
-
You have deployed seekdb.
-
You have installed Python 3.11 or later and the corresponding pip. If your machine has a low Python version, you can use Miniconda to create a new Python 3.11 or later environment. For more information, see Miniconda installation guide.
-
Install uv, a Python package manager. After the installation, run the
uv --versioncommand to verify the installation:pip install uv
uv --version -
Install the Continue extension in Visual Studio Code or IntelliJ IDEA. The extension name is
Continue.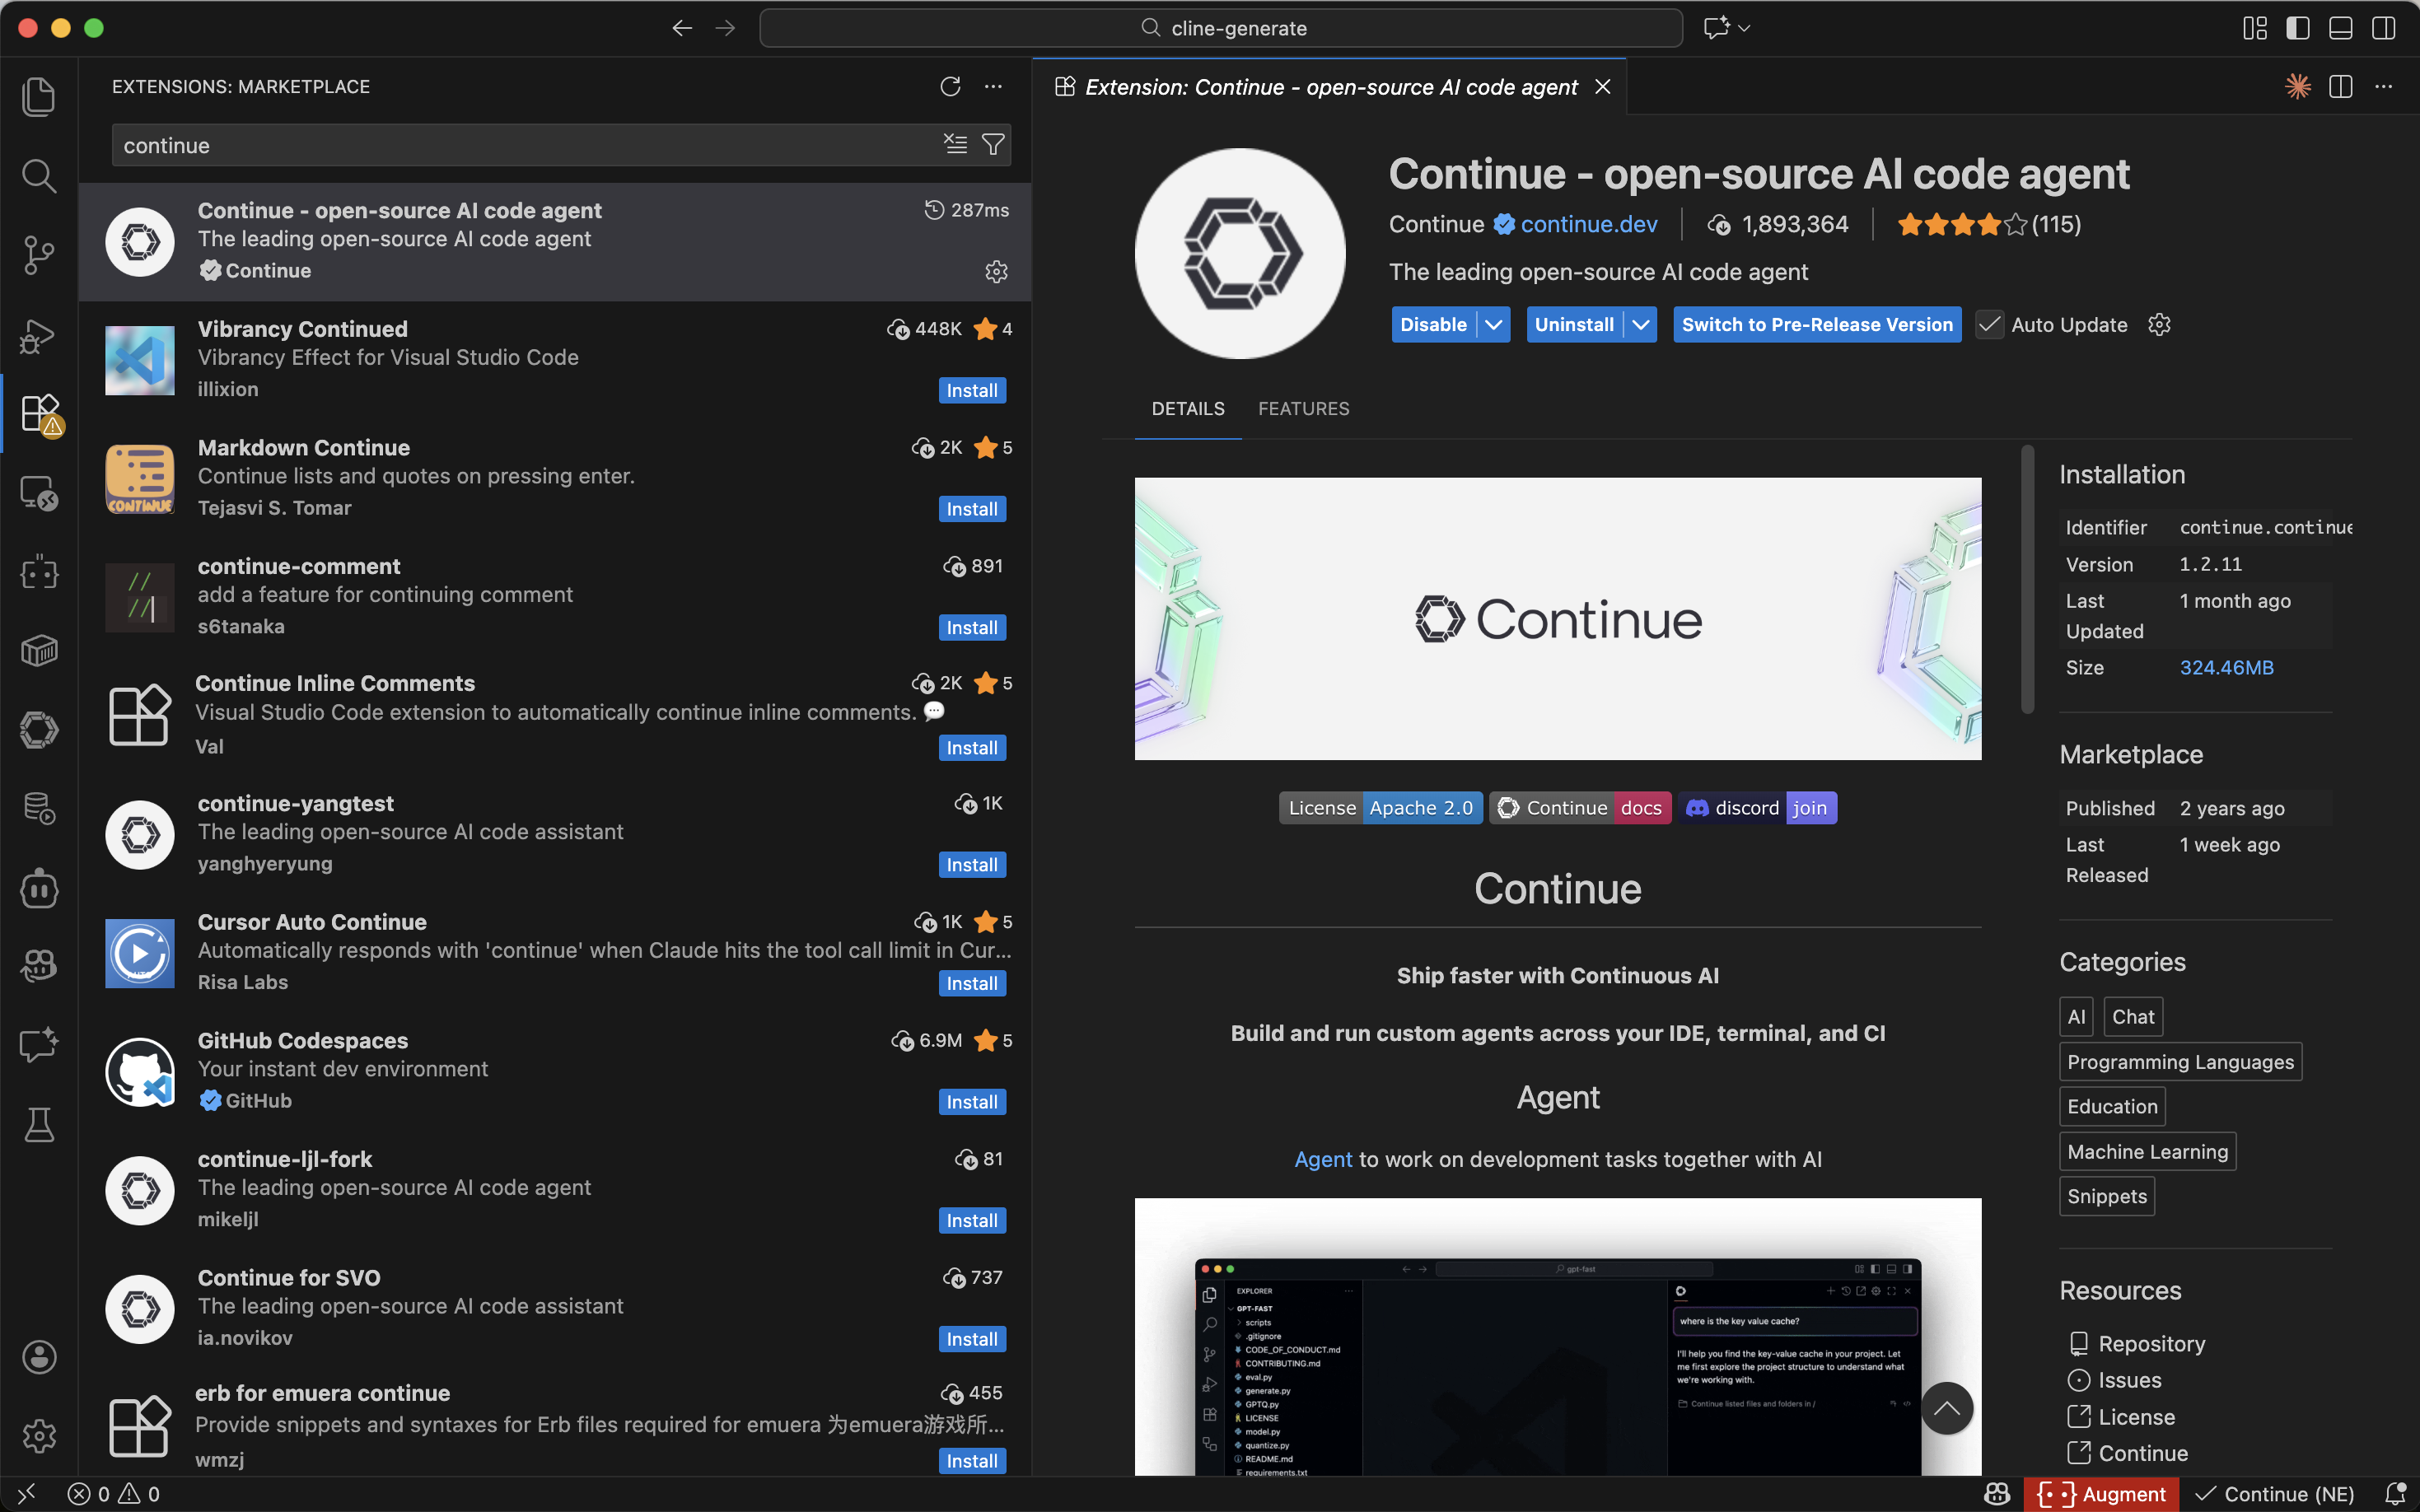
Step 1: Obtain the database connection information
Contact your seekdb deployment engineer or administrator to obtain the database connection string. For example:
mysql -h$host -P$port -u$user_name -p$password -D$database_name
Parameters:
-
$host: The IP address for connecting to seekdb. -
$port: The port number for connecting to seekdb. Default is2881. -
$database_name: The name of the database to access.tipThe connected user must have
CREATE,INSERT,DROP, andSELECTprivileges on the database. -
$user_name: The username for connecting to the database. -
$password: The password for the account.
Step 2: Configure the seekdb MCP Server
This section uses Visual Studio Code as an example to show how to configure the seekdb MCP Server.
Install the seekdb MCP Server
Run the following command to install the seekdb MCP Server:
pip install seekdb-mcp-server
Configure the seekdb server environment variables in the .env file
Create a file named .env in the current directory and add the following content:
vi .env
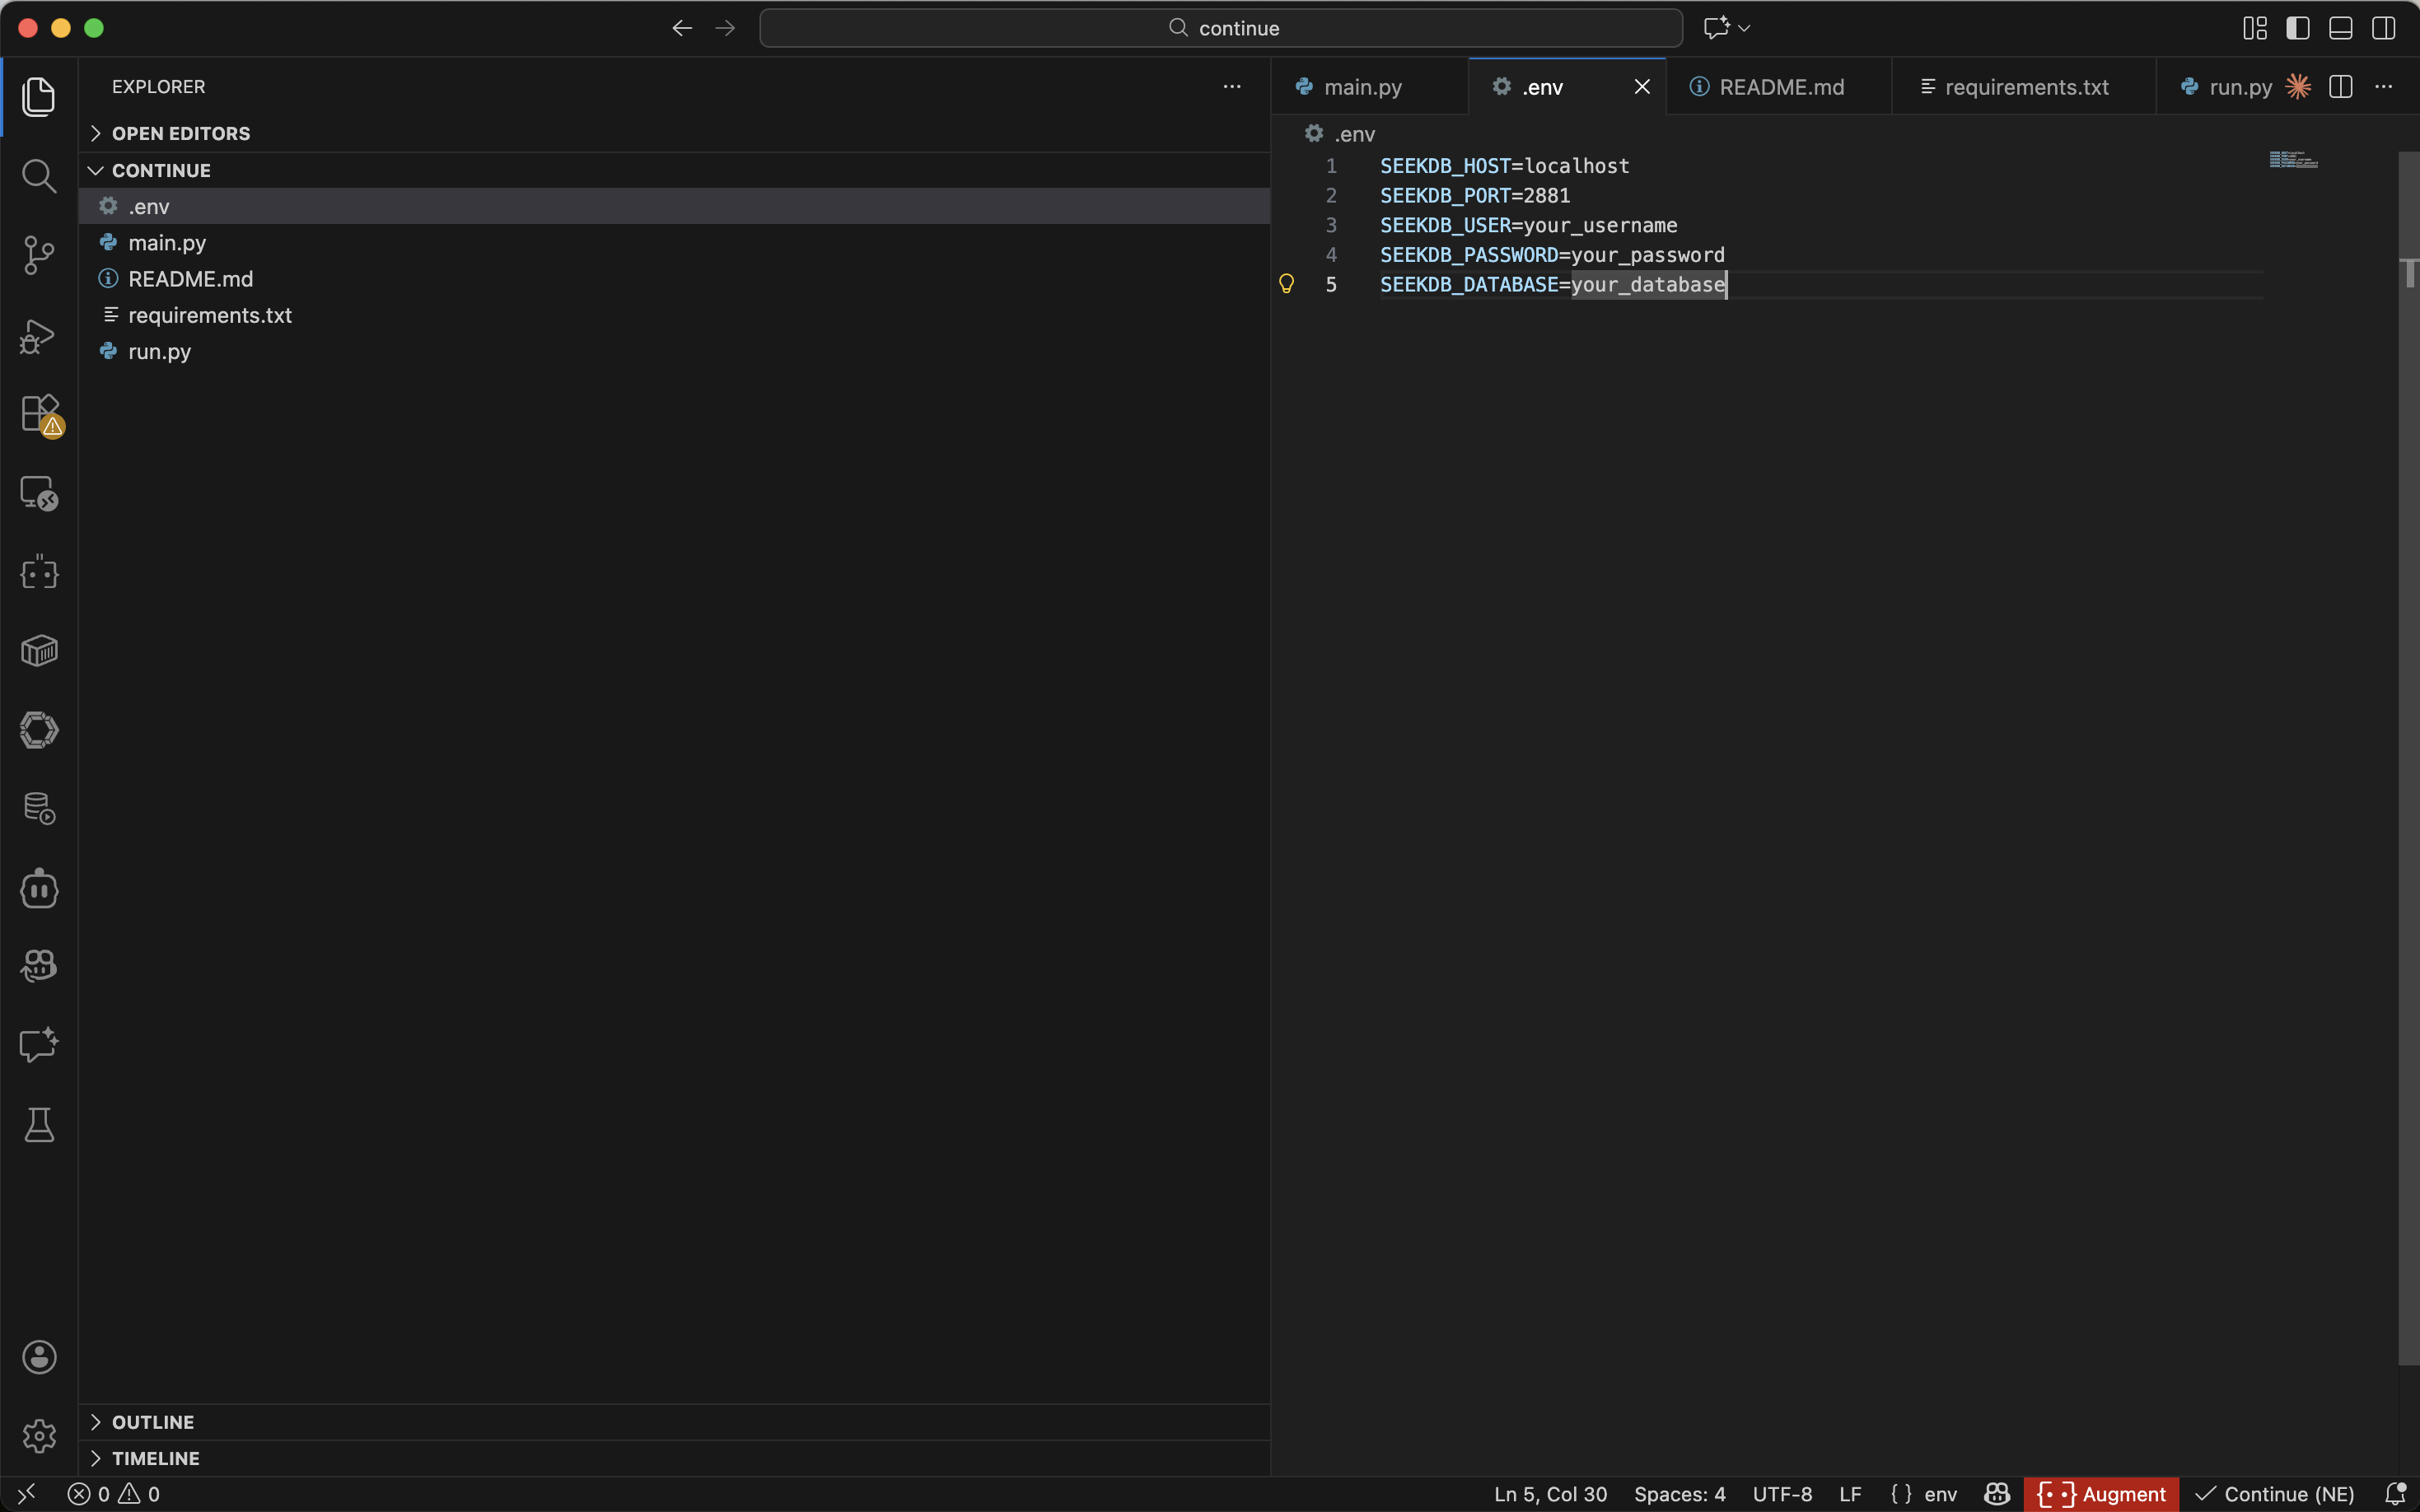
SEEKDB_HOST=localhost # Database host
SEEKDB_PORT=2881 # Database port (default: 2881)
SEEKDB_USER=your_username
SEEKDB_PASSWORD=your_password
SEEKDB_DATABASE=your_database
Start in SSE mode
env $(cat .env | xargs) uvx seekdb-mcp-server --transport sse --port 8000 --host 0.0.0.0
Configure the large model and seekdb MCP Server in the Continue plugin
Manually create a Visual Studio Code workspace directory and open it with Visual Studio Code. The files generated by Continue will be placed in this directory. The example directory is named Continue.
Configure the large model
Click the Continue icon in the sidebar to open the Continue dialog box. Click Settings to go to Add Models and configure the large model for Continue:
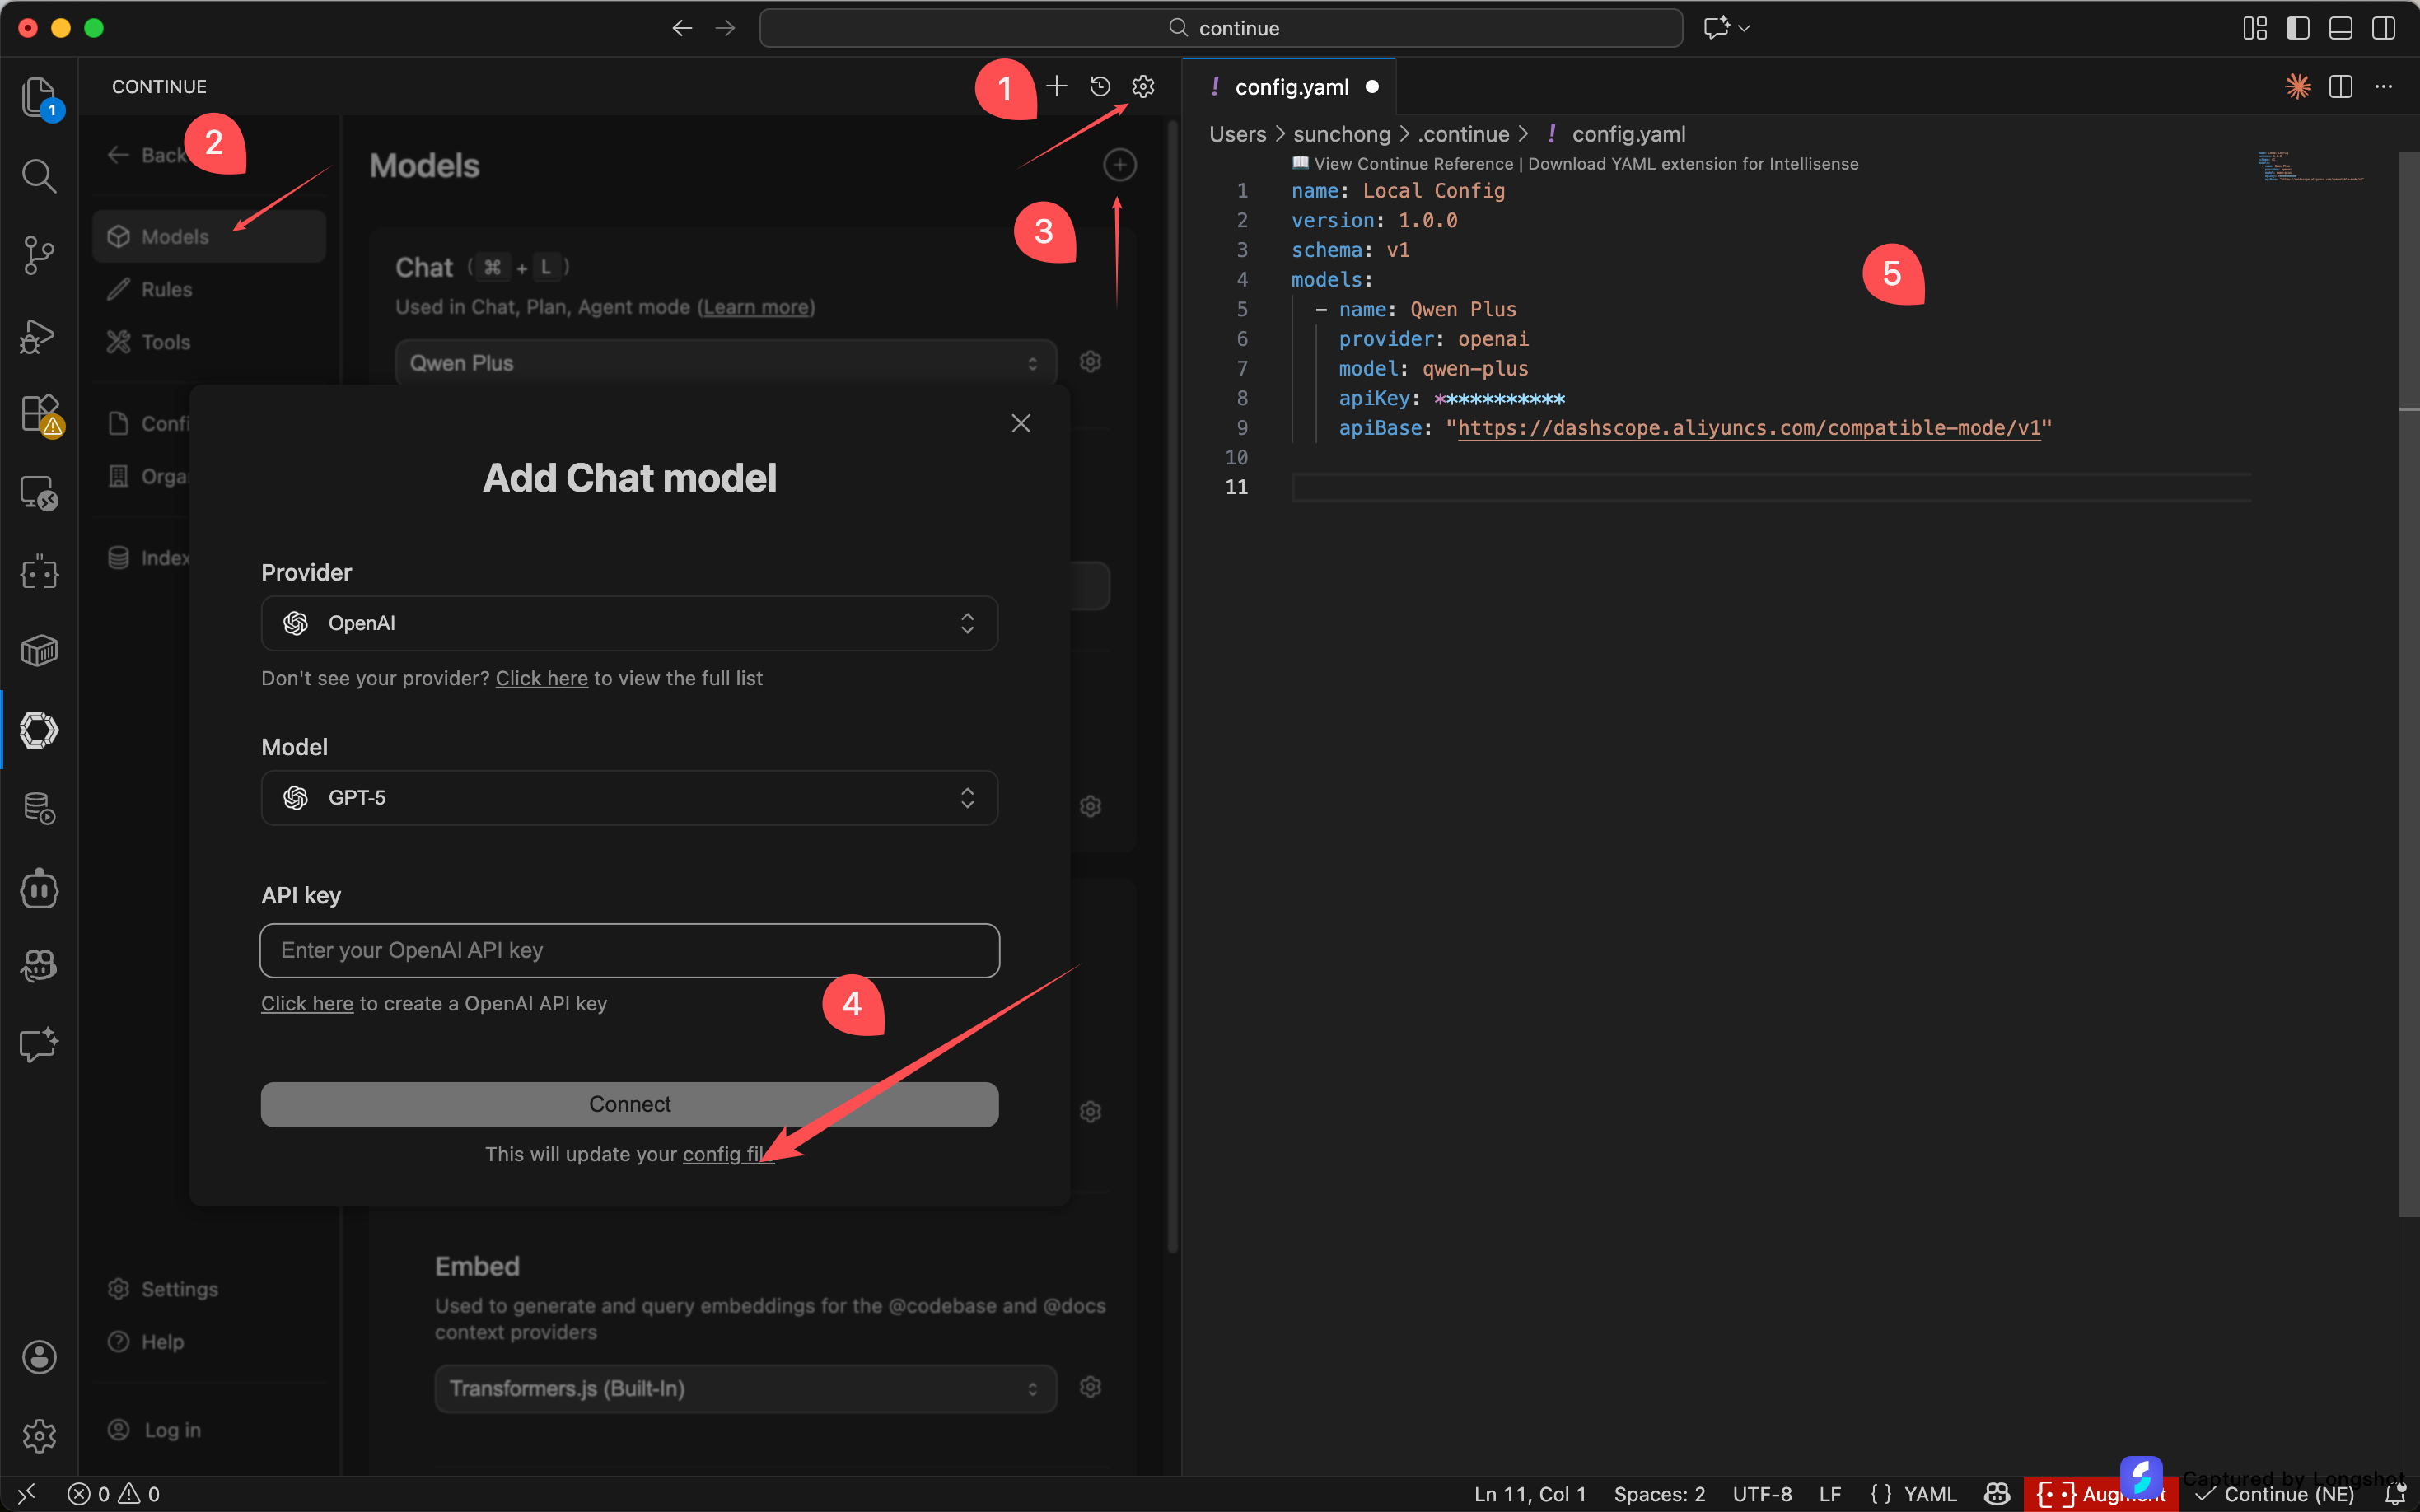
The config.yaml file for configuring the large model is as follows:
name: Local Config
version: 1.0.0
schema: v1
models:
  - name: Qwen Plus
    provider: openai
    model: qwen-plus
    apiKey: ***********
    apiBase: "https://dashscope.aliyuncs.com/compatible-mode/v1"
Configure the seekdb MCP Server
MCP can be used only in the Continue Agent and Plan modes.
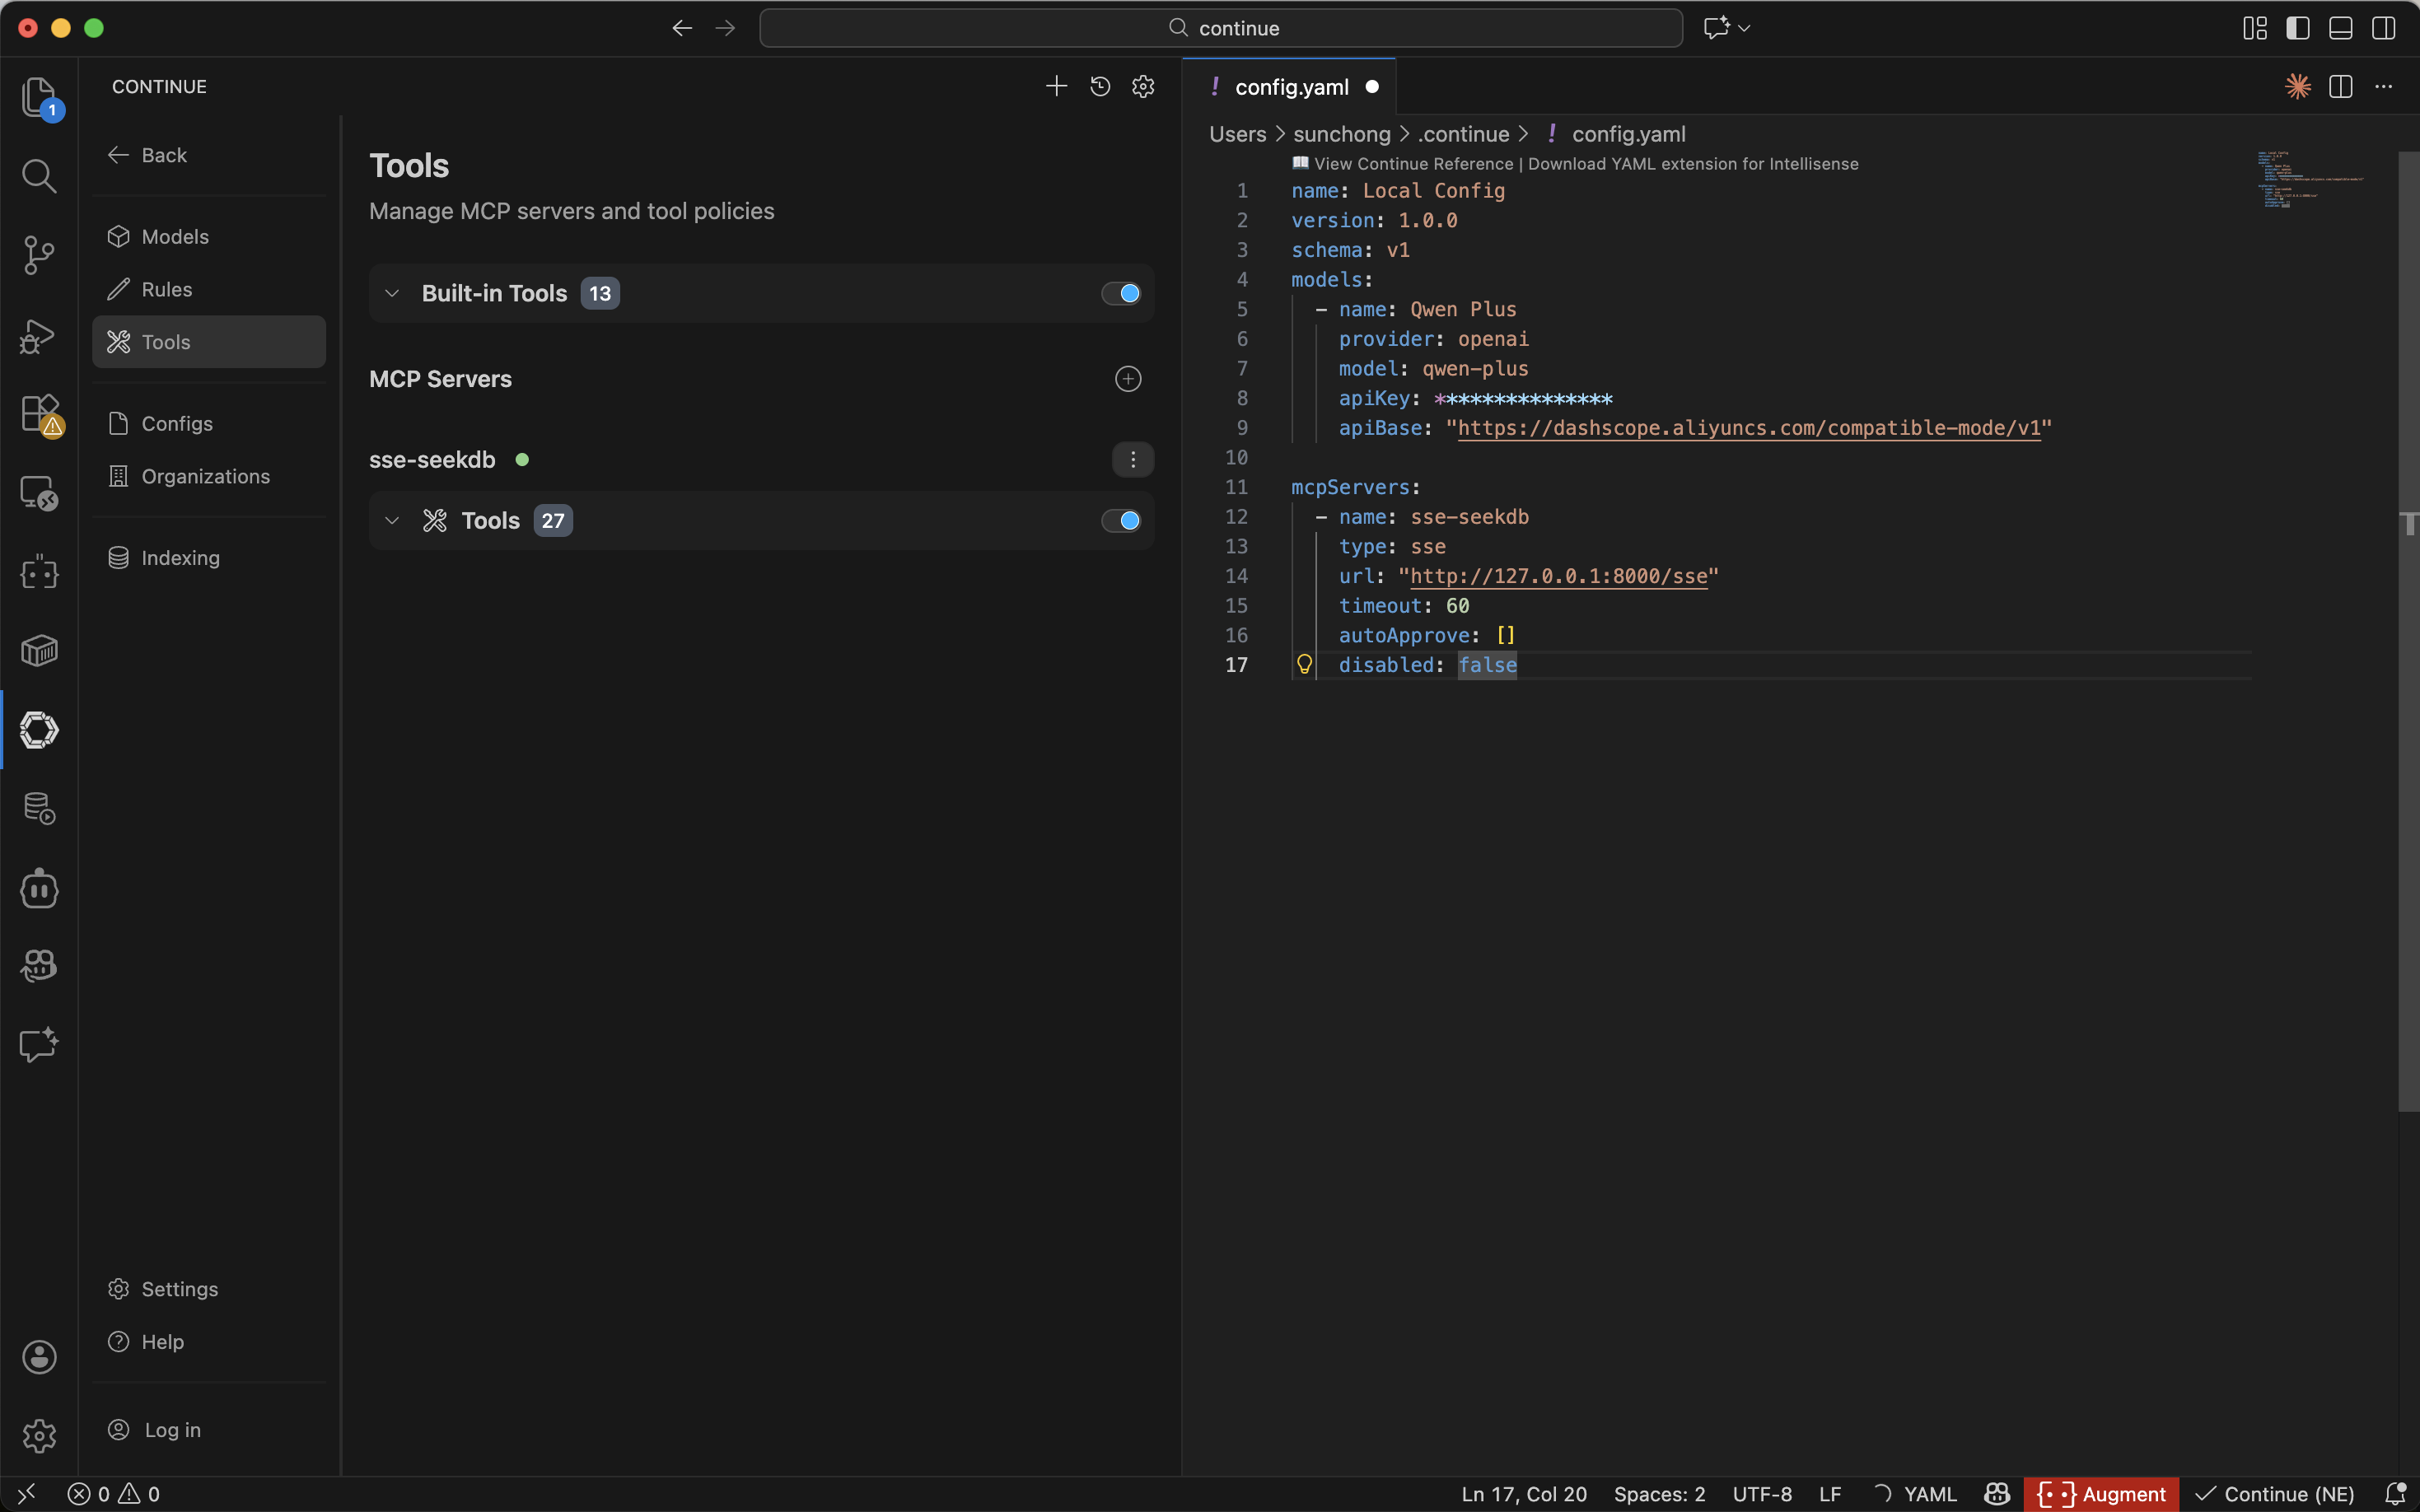
The config.yaml file for configuring the seekdb MCP Servers is as follows:
mcpServers:
  - name: sse-seekdb
    type: sse
    url: "http://ip:port/sse"
    timeout: 60
    autoApprove: []
    disabled: false
Test the MCP Server
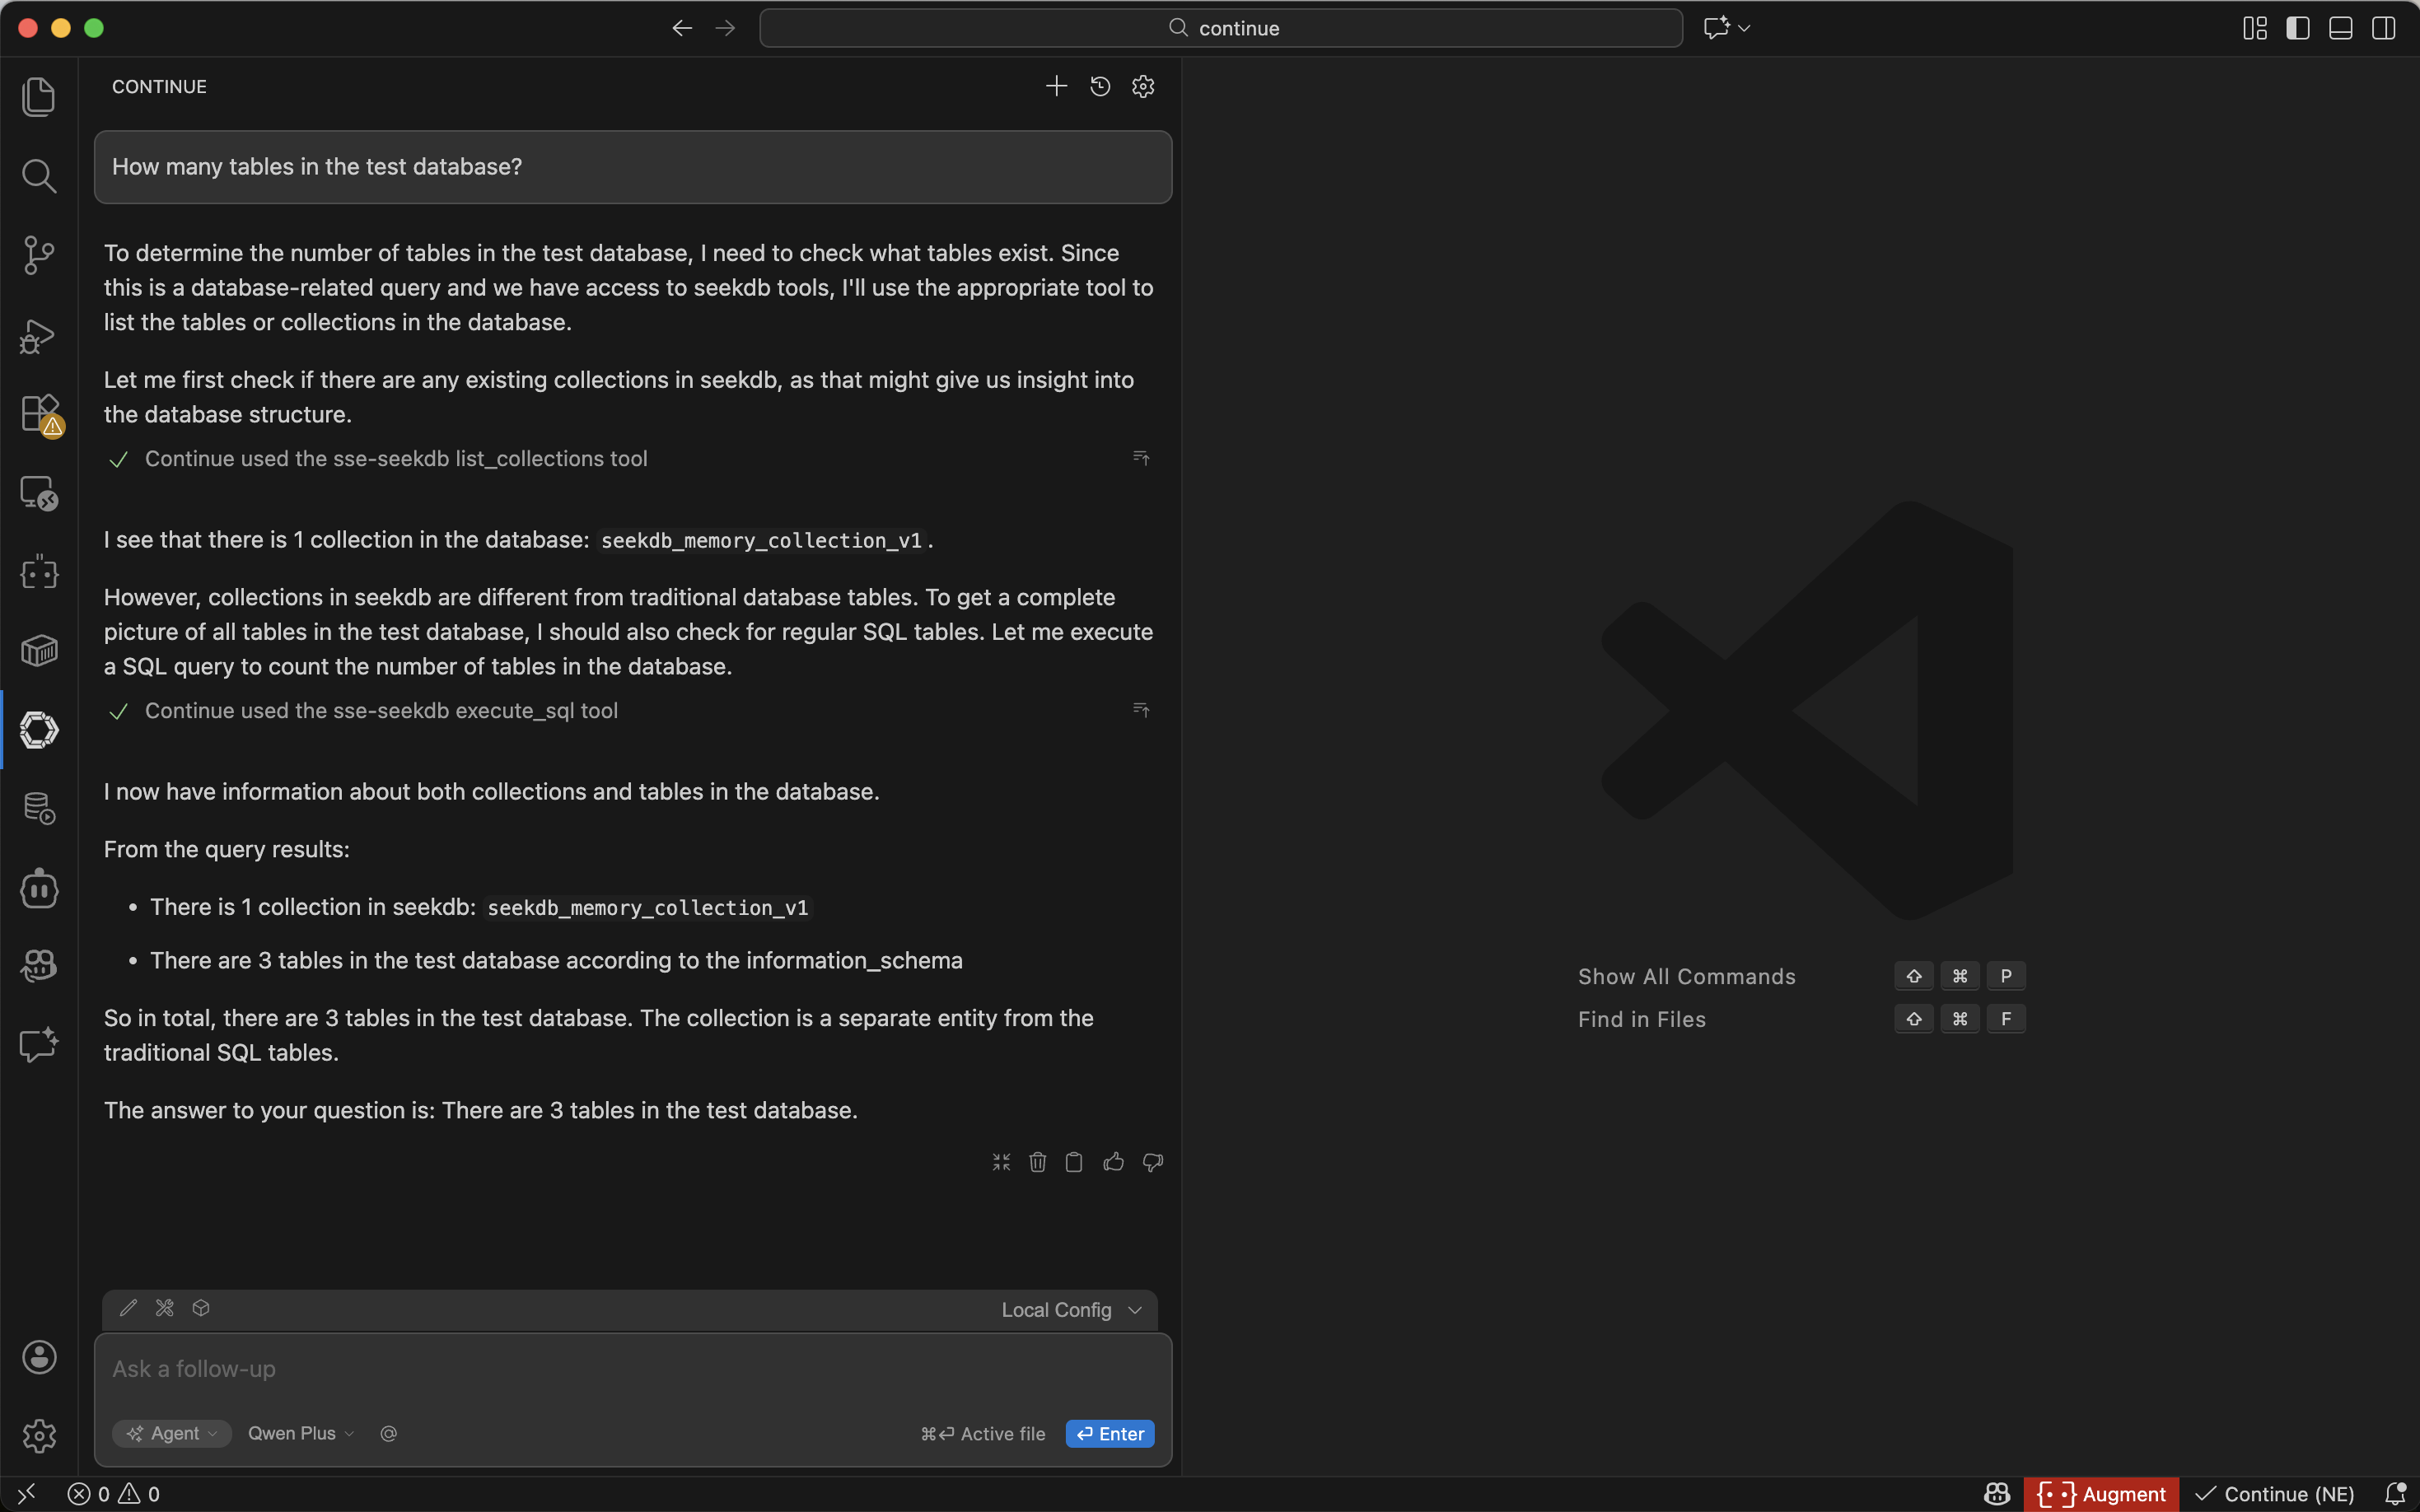
Open the Continue session dialog box and enter the prompt How many tables in the test database?. Continue will display the SQL statement to be executed. If there are no issues, click Accept. Continue will display the names of the tables in the test database, indicating that it can connect to seekdb.
Use FastAPI to quickly create a RESTful API project
You can use FastAPI to quickly create a RESTful API project. FastAPI is a Python web framework that allows you to build RESTful APIs quickly.
-
Create a customer table
Enter the prompt:
Create a "customer" table with "ID" as the primary key and containing fields such as "name", "age", "telephone", and "location"in the dialog box. Confirm the SQL statement and click theAcceptbutton to execute it.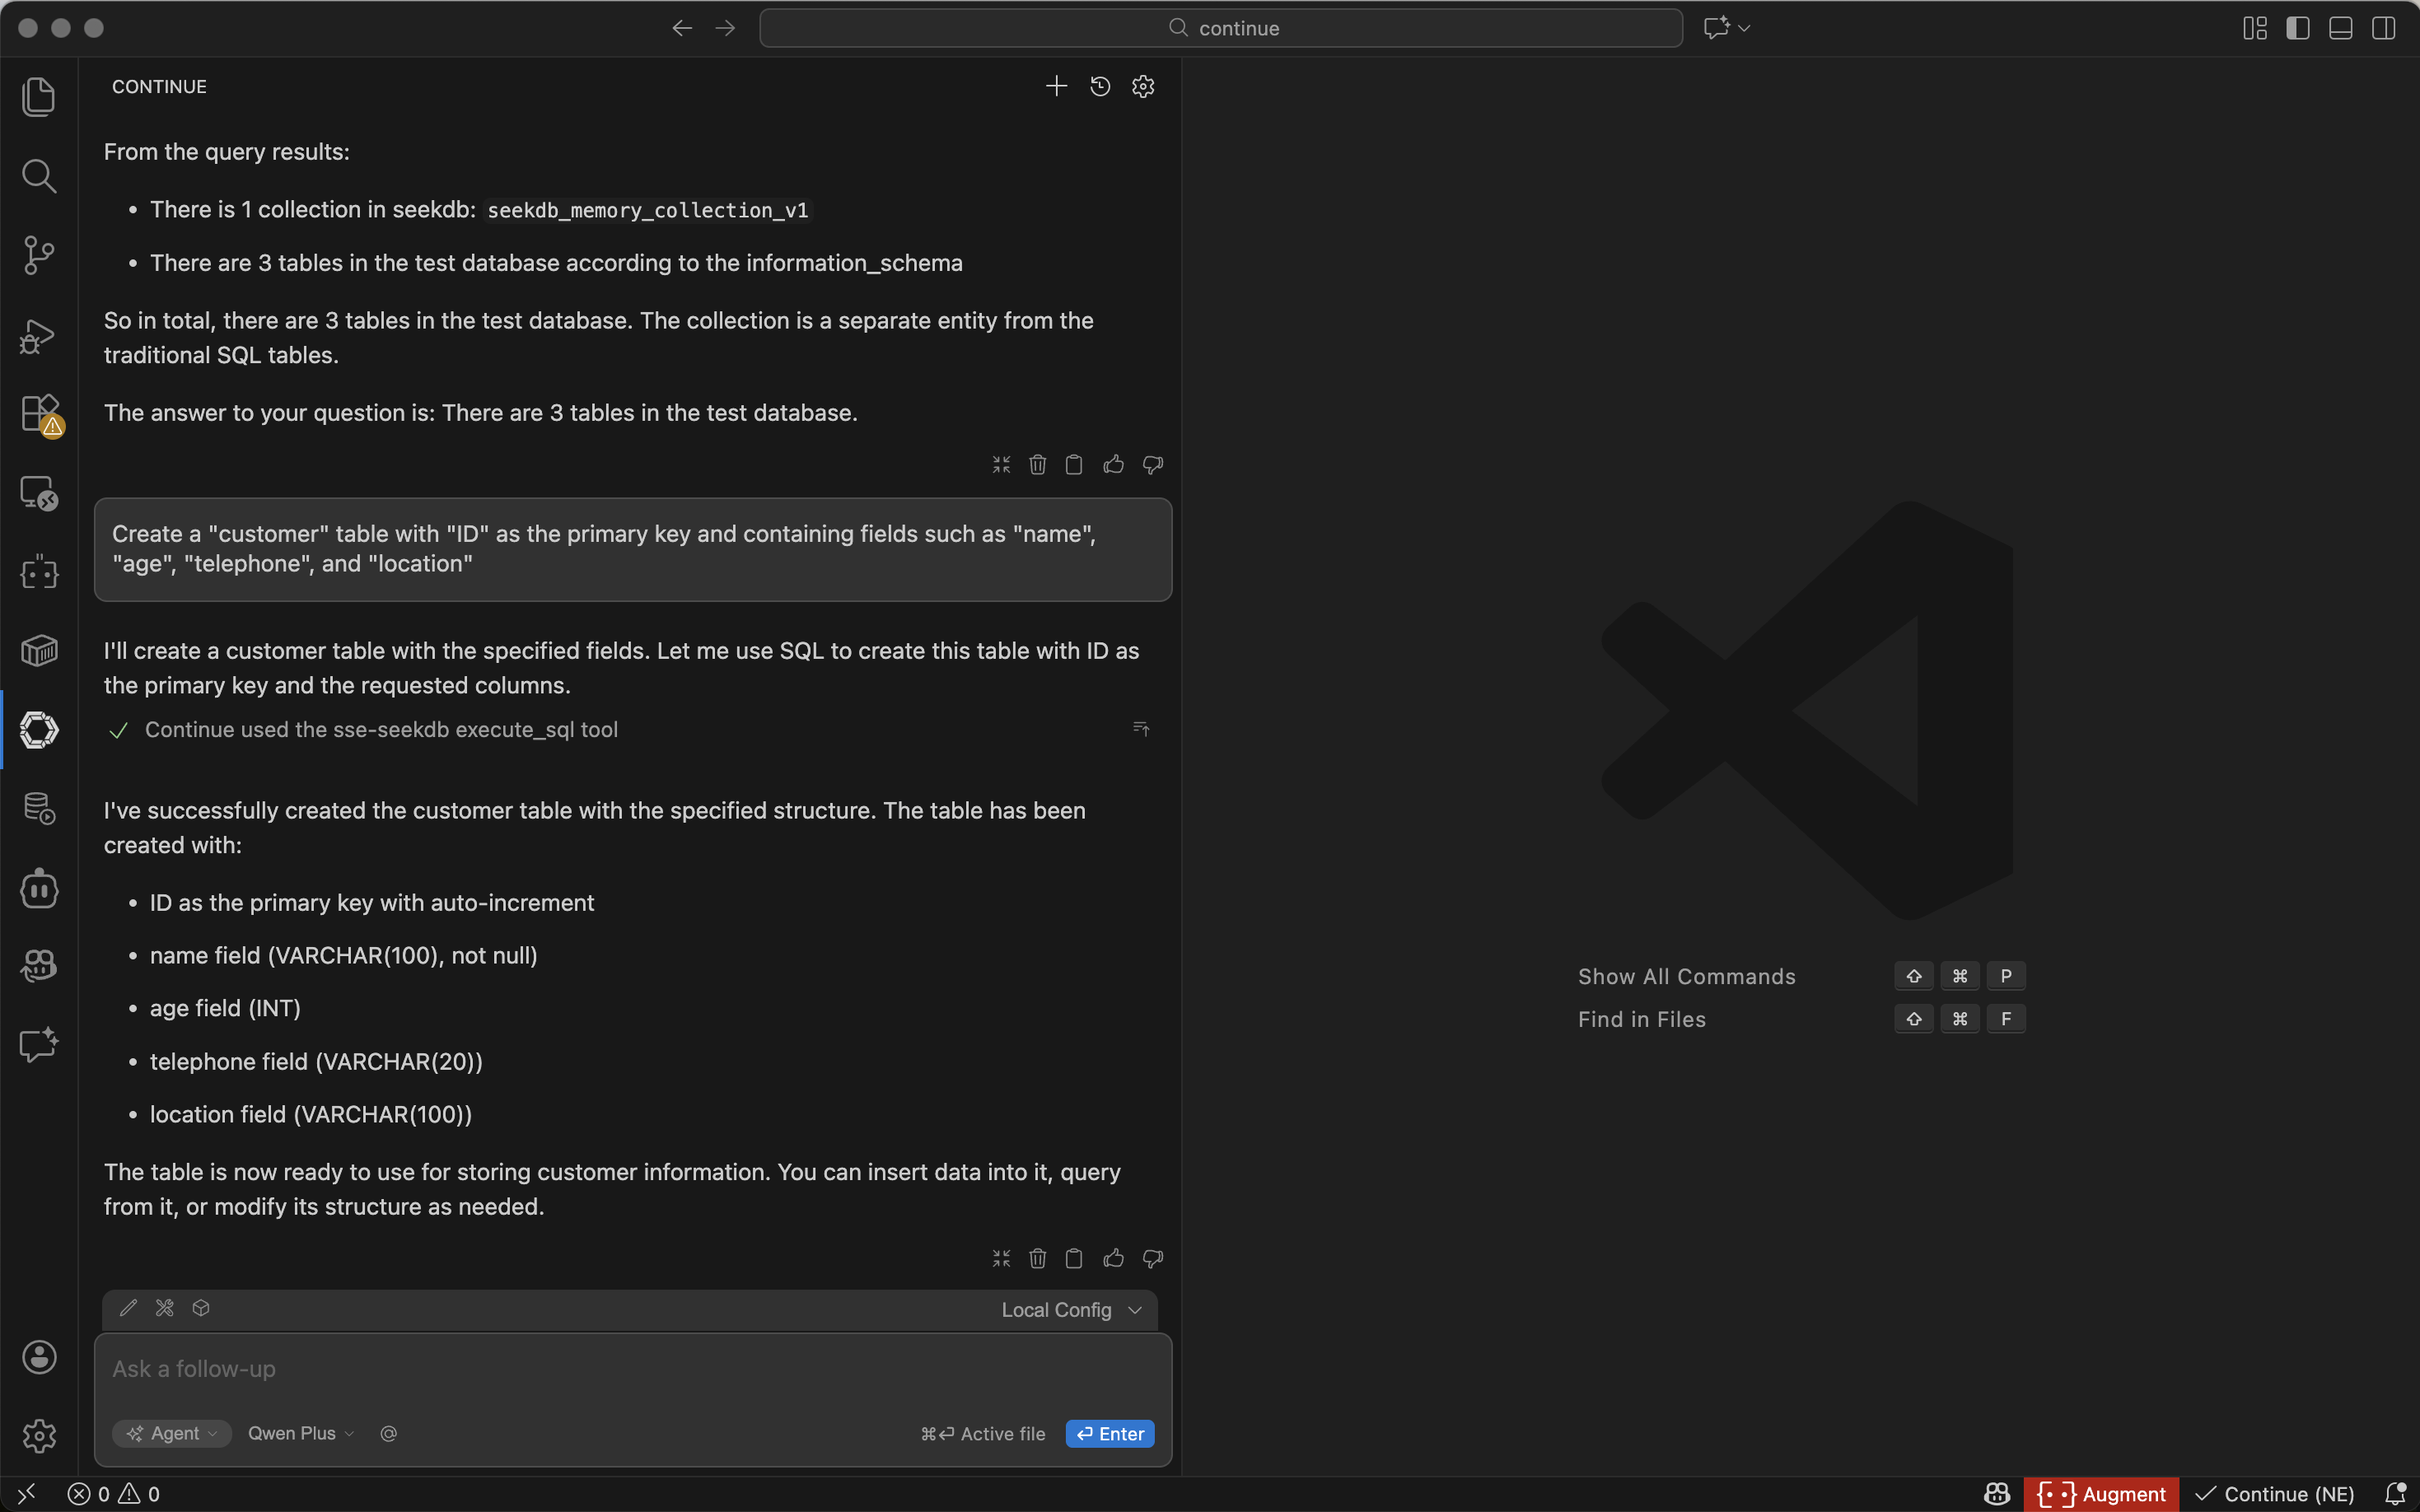
-
Insert test data
Enter the prompt:
Insert 10 pieces of data into the customer tablein the dialog box. Confirm the SQL statement and click the Accept button to execute it: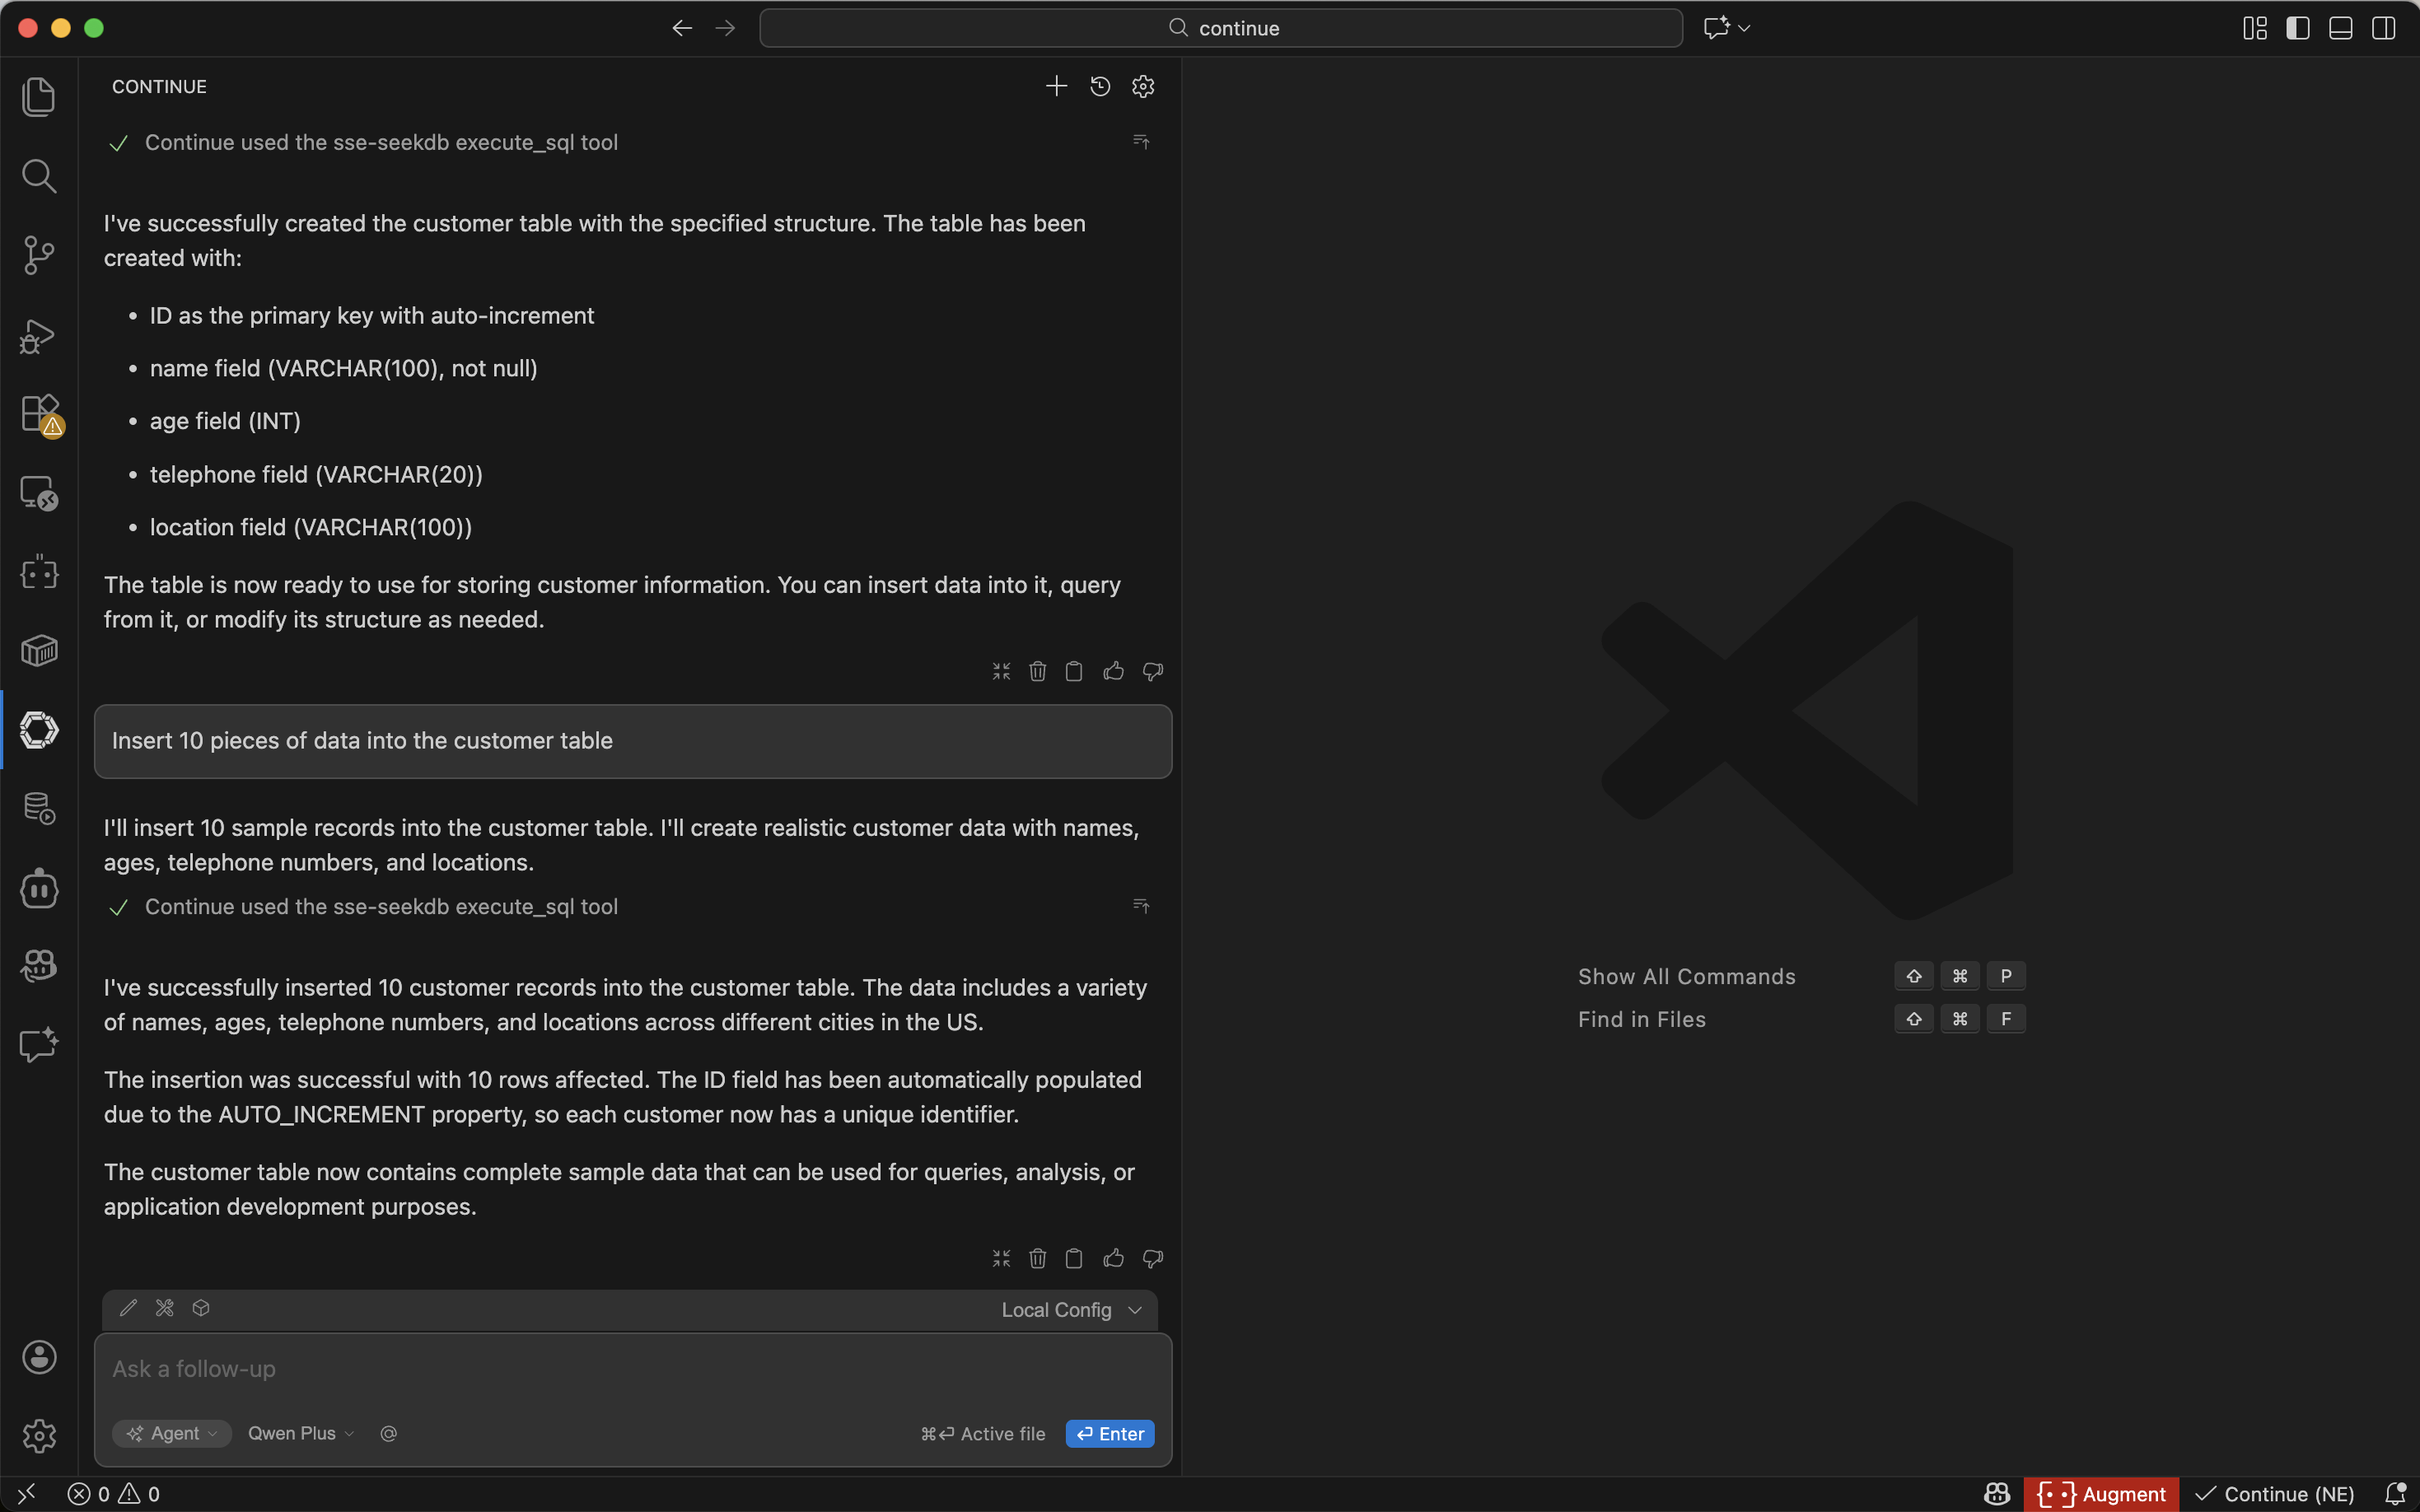
-
Create a FastAPI project
Enter the prompt:
Create a FastAPI project on the customer tablein the dialog box. Click the Accept button to execute it.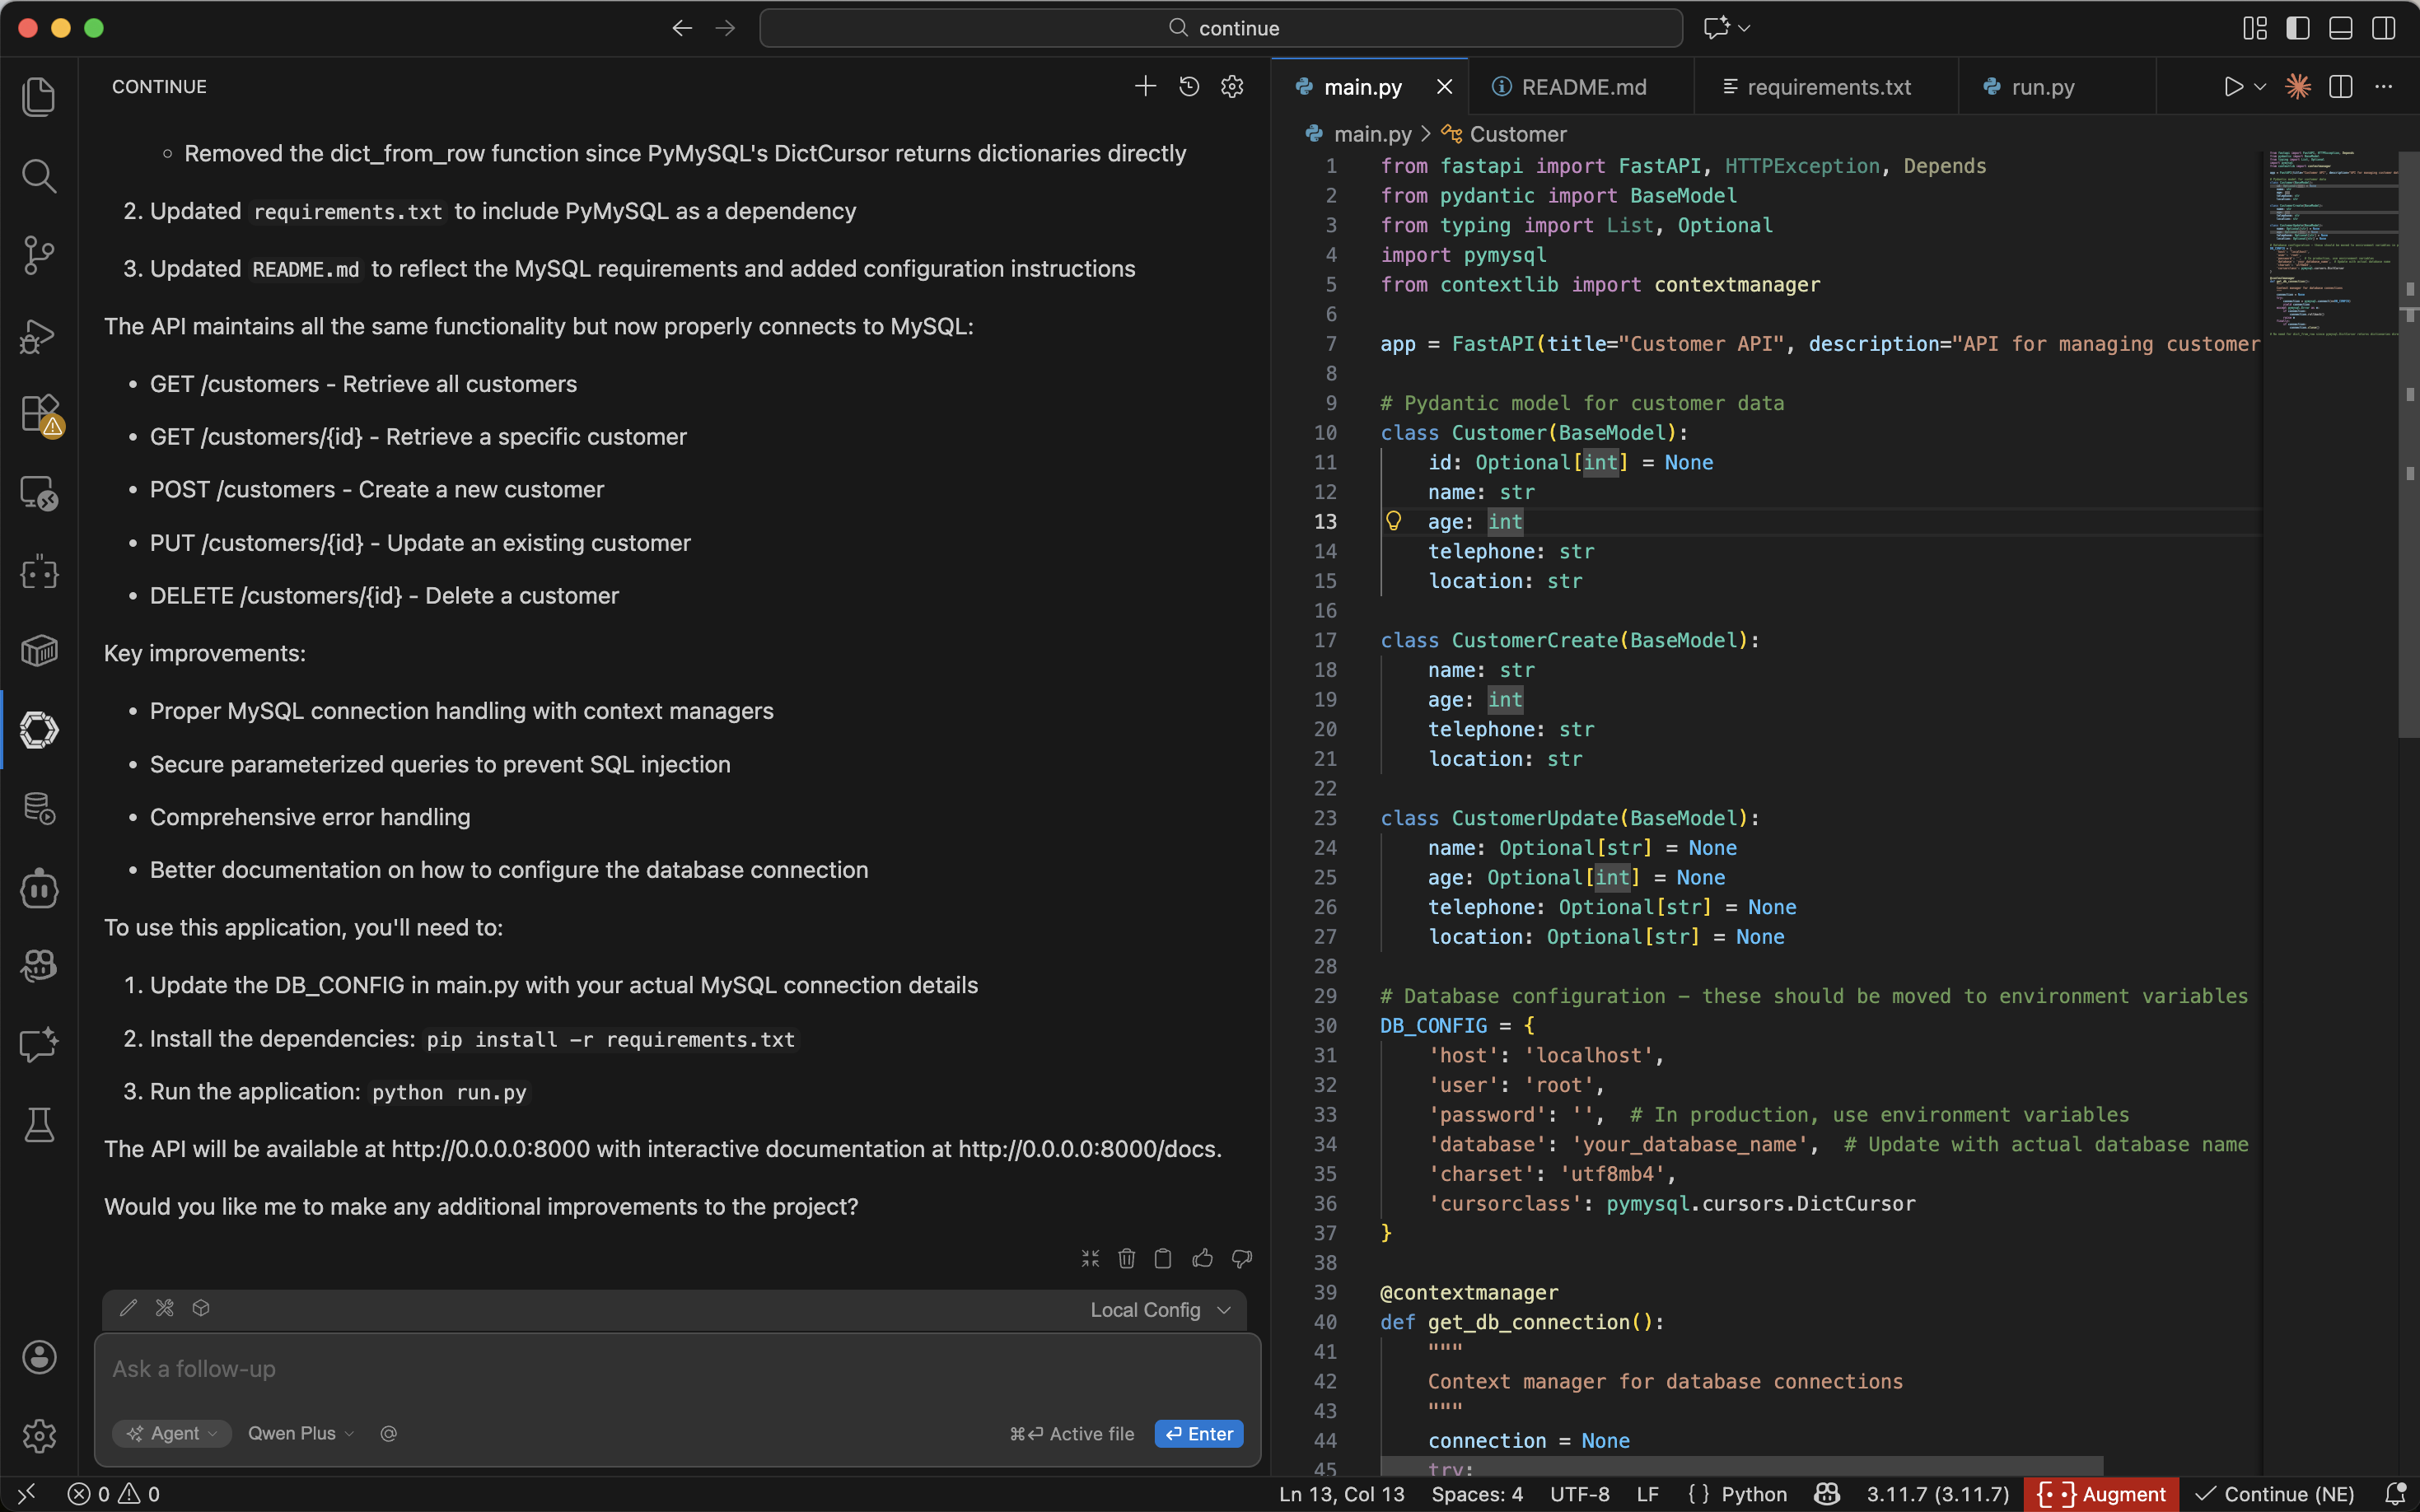
This step will automatically generate multiple files. It is recommended to select
All Acceptfor the first use, as the content of the files generated by AI may be uncertain. You can adjust them as needed based on your actual requirements. -
Configure the database connection information for the FastAPI project
-
Install the project dependencies
Run the following command to install the project dependencies:
pip install -r requirements.txt -
Start the FastAPI project
Run the following command to start the FastAPI project:
source .env
uvicorn main:app --reload -
View the data in the table
Run the following command in the command line or use other request tools to view the data in the table:
curl http://127.0.0.1:8000/customersThe returned result is as follows:
[{"id":null,"name":"John Smith","age":35,"telephone":"138-0000-0001","location":"New York"},{"id":null,"name":"Emma Johnson","age":28,"telephone":"138-0000-0002","location":"Los Angeles"},{"id":null,"name":"Michael Brown","age":42,"telephone":"138-0000-0003","location":"Chicago"},{"id":null,"name":"Sophia Davis","age":31,"telephone":"138-0000-0004","location":"Houston"},{"id":null,"name":"William Wilson","age":45,"telephone":"138-0000-0005","location":"Phoenix"},{"id":null,"name":"Olivia Moore","age":29,"telephone":"138-0000-0006","location":"Philadelphia"},{"id":null,"name":"James Taylor","age":38,"telephone":"138-0000-0007","location":"San Antonio"},{"id":null,"name":"Ava Anderson","age":33,"telephone":"138-0000-0008","location":"San Diego"},{"id":null,"name":"Alexander Thomas","age":41,"telephone":"138-0000-0009","location":"Dallas"},{"id":null,"name":"Isabella Jackson","age":36,"telephone":"138-0000-0010","location":"San Jose"}]