Proxool connection pool and seekdb sample program
This topic describes how to build an application by using Proxool connection pool, MySQL Connector/J, and seekdb to perform basic database operations, such as table creation, data insertion, data deletion, data update, and data query.
Download the proxool-mysql-client sample project
Prerequisites
-
You have installed seekdb.
-
You have installed JDK 1.8 and Maven.
-
You have installed IntelliJ IDEA.
infoThe code in this topic is run in IntelliJ IDEA Community Edition 2021.3.2. You can also use other tools to run the sample code.
Procedure
The following steps are for compiling and running the proxool-mysql-client project in IntelliJ IDEA Community Edition 2021.3.2 on the Windows operating system. If you are using a different operating system or compiler, the steps may vary.
- Import the
proxool-mysql-clientproject into IntelliJ IDEA. - Obtain the seekdb URL.
- Modify the database connection information in the
proxool-mysql-clientproject. - Run the
proxool-mysql-clientproject.
Step 1: Import the proxool-mysql-client project into IntelliJ IDEA
-
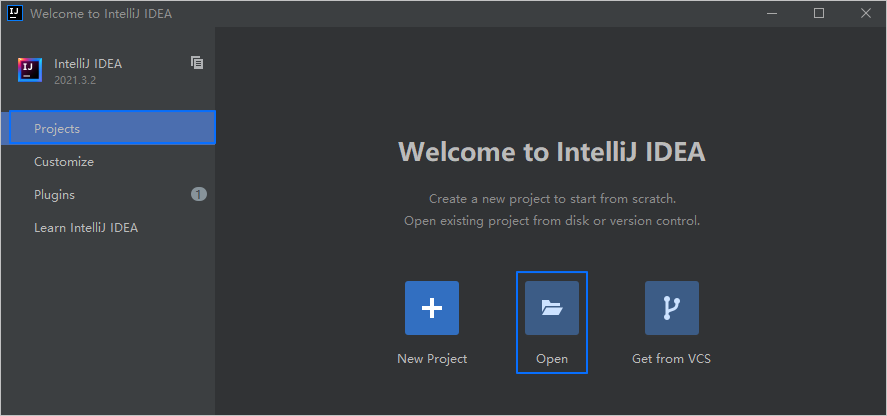
Open IntelliJ IDEA.
-
On the welcome screen, click Open, navigate to your project directory, select the root directory of the project, and click OK.
-
IntelliJ IDEA automatically detects the project type and loads the project.
infoWhen you import a Maven project using IntelliJ IDEA, it automatically detects the
pom.xmlfile in the project and downloads the required dependency libraries based on the described dependencies, then adds them to the project.
-
(Optional) Manually import unresolved dependencies.
If all dependencies in the
pom.xmlfile are automatically imported into the project, you can skip this step.If the Sync window indicates that the
proxool-cglibandproxooldependencies are unresolved, you can manually add them. Theproxool-cglibandproxooljarfiles are located in thelibfolder at the root directory of theproxool-mysql-clientproject. Follow these steps to add them to the project:- In IntelliJ IDEA, click File > Project Structure to open the project structure settings.
- In the left panel, select Modules.
- In the right module list, select the Dependencies tab, click the + icon, and choose JARs or directories.
- In the dialog box that appears, navigate to the
libdirectory containing thejarfiles, select thejarfiles, and click OK. - On the Dependencies tab, you will see the newly added
jarfiles listed. - Click Apply or OK to save the changes.

Step 2: Obtain the seekdb URL
-
Contact the seekdb deployment personnel or administrator to obtain the database connection string.
Example:
mysql -hxxx.xxx.xxx.xxx -P2881 -uroot -p****** -Dtest -AFor more information about connection strings, see Connect to seekdb by using a MySQL client.
-
Fill in the corresponding information in the URL based on the seekdb connection string.
jdbc:mysql://$host:$port/$database_name?user=$user_name&password=$passwordParameter description:
$host: The IP address for connecting to seekdb. Replace it with the actual IP address. You can also use the local IP address or 127.0.0.1.$port: The port for connecting to seekdb. Replace it with the actual port. The default port is 2881, which can be customized during seekdb deployment.$database_name: The name of the database to access.user_name: The connection account. Format:username.password: The password for the account.
For more information about MySQL Connector/J connection properties, see Configuration Properties.
Example:
jdbc:mysql://xxx.xxx.xxx.xxx:2881/test?user=root&password=******
Step 3: Modify the database connection information in the proxool-mysql-client project
Modify the database connection information in the proxool-mysql-client/src/main/resources/db.properties file based on the information obtained in Step 2: Obtain the seekdb URL.
Example:
- The seekdb address is
xxx.xxx.xxx.xxx. - The access port is 2881.
- The database name to access is
test. - The connection account is
root. - The password is
******.
Code:
...
jdbc-1.proxool.driver-url=jdbc:mysql://xxx.xxx.xxx.xxx:2881/test?useSSL=false
jdbc-1.user=root
jdbc-1.password=******
...
Step 4: Run the proxool-mysql-client project
-
In the project navigation pane, find and expand the src/main/java/com.example directory.
-
Right-click the Main file and select Run 'Main.main()'.
-
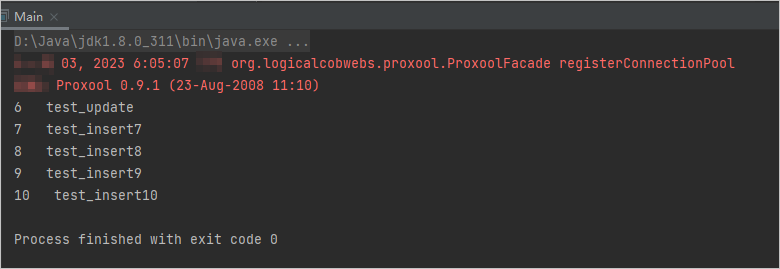
IntelliJ IDEA automatically compiles and runs the project, displaying the output in the Run panel.
-
You can also execute the following SQL statement in seekdb to view the results.
SELECT * FROM test.test_proxool;The returned result is as follows:
+------+---------------+
| c1   | c2            |
+------+---------------+
|    6 | test_update   |
|    7 | test_insert7  |
|    8 | test_insert8  |
|    9 | test_insert9  |
|   10 | test_insert10 |
+------+---------------+
5 rows in set
Project code
Click proxool-mysql-client to download the project code, which is a compressed file named proxool-mysql-client.zip.
After decompressing it, you will find a folder named proxool-mysql-client. The directory structure is as follows:
proxool-mysql-client
├── lib
│    ├── proxool-0.9.1.jar
│    └── proxool-cglib.jar
├── src
│   └── main
│       ├── java
│       │   └── com
│       │       └── example
│       │           └── Main.java
│       └── resources
│           └── db.properties
└── pom.xml
File description:
lib: stores the dependency library files required for the project.proxool-0.9.1.jar: the Proxool connection pool library file.proxool-cglib.jar: the CGLib library file used to support the Proxool connection pool.src: the root directory for source code.main: the main code directory, containing the core logic of the application.java: the directory for Java source code.com: the directory for Java packages.example: the directory for the packages of the sample project.Main.java: a sample main class file that includes logic for creating tables, inserting, deleting, updating, and querying data.resources: the directory for resource files, including configuration files.db.properties: the configuration file for the connection pool, containing relevant database connection parameters.pom.xml: the configuration file for the Maven project, used to manage project dependencies and build settings.
Introduction to the pom.xml file
The pom.xml file is the configuration file for a Maven project, defining information such as the project's dependencies, plugins, and build rules. Maven is a Java project management tool that can automatically download dependencies, compile, and package projects.
The code in the pom.xml file in this topic mainly includes the following parts:
-
File declaration statement.
This statement declares that the file is an XML file using XML version
1.0and character encodingUTF-8.Sample code:
<?xml version="1.0" encoding="UTF-8"?> -
Configure the POM namespace and POM model version.
- Use
xmlnsto set the POM namespace tohttp://maven.apache.org/POM/4.0.0. - Use
xmlns:xsito set the XML namespace tohttp://www.w3.org/2001/XMLSchema-instance. - Use
xsi:schemaLocationto set the POM namespace tohttp://maven.apache.org/POM/4.0.0and the location of the POM XSD file tohttp://maven.apache.org/xsd/maven-4.0.0.xsd. - Use the
<modelVersion>element to set the POM model version used by the POM file to4.0.0.
Sample code:
<project xmlns="http://maven.apache.org/POM/4.0.0"
         xmlns:xsi="http://www.w3.org/2001/XMLSchema-instance"
         xsi:schemaLocation="http://maven.apache.org/POM/4.0.0 http://maven.apache.org/xsd/maven-4.0.0.xsd">
  <modelVersion>4.0.0</modelVersion>

 <!-- Other configurations -->

</project> - Use
-
Configure basic information.
- Use
<groupId>to set the project's organization tocom.example. - Use
<artifactId>to set the project name toproxool-mysql-client. - Use
<version>to set the project version to1.0-SNAPSHOT.
Sample code:
    <groupId>com.example</groupId>
    <artifactId>proxool-mysql-client</artifactId>
<version>1.0-SNAPSHOT</version> - Use
-
Configure the properties of the project's source files.
Set the Maven compiler plugin to
maven-compiler-pluginand set the source code and target Java versions to 8. This means that the project's source code is written using Java 8 features, and the compiled bytecode will also be compatible with the Java 8 runtime environment. This setup ensures that the project can correctly handle Java 8 syntax and features during compilation and runtime.infoJava 1.8 and Java 8 are different names for the same version.
Sample code:
    <build>
        <plugins>
            <plugin>
                <groupId>org.apache.maven.plugins</groupId>
                <artifactId>maven-compiler-plugin</artifactId>
                <configuration>
                    <source>8</source>
                    <target>8</target>
                </configuration>
            </plugin>
        </plugins>
</build> -
Configure the components that the project depends on.
Use
<dependency>to define the dependencies:-
Add the
mysql-connector-javalibrary for connecting to and operating on the database:- Use
<groupId>to set the dependency's organization tomysql. - Use
<artifactId>to set the dependency's name tomysql-connector-java. - Use
<version>to set the dependency's version to5.1.47.
Sample code:
        <dependency>
            <groupId>mysql</groupId>
            <artifactId>mysql-connector-java</artifactId>
            <version>5.1.47</version>
</dependency> - Use
-
Add the
proxool-cglibdependency library for supporting the CGLib library of the Proxool connection pool:- Use
<groupId>to set the dependency's organization toproxool. - Use
<artifactId>to set the dependency's name toproxool-cglib. - Use
<version>to set the dependency's version to0.9.1.
Sample code:
        <dependency>
            <groupId>proxool</groupId>
            <artifactId>proxool-cglib</artifactId>
            <version>0.9.1</version>
</dependency> - Use
-
Add the
proxooldependency library, which is the core library of the Proxool connection pool:- Use
<groupId>to set the dependency's organization toproxool. - Use
<artifactId>to set the dependency's name toproxool. - Use
<version>to set the dependency's version to0.9.1.
Sample code:
        <dependency>
            <groupId>proxool</groupId>
            <artifactId>proxool</artifactId>
            <version>0.9.1</version>
</dependency> - Use
-
Add the
commons-loggingdependency library for general logging in applications:- Use
<groupId>to set the dependency's organization tocommons-logging. - Use
<artifactId>to set the dependency's name tocommons-logging. - Use
<version>to set the dependency's version to1.2.
Sample code:
        <dependency>
            <groupId>commons-logging</groupId>
            <artifactId>commons-logging</artifactId>
            <version>1.2</version>
</dependency> - Use
-
Code introduction
db.properties is the connection pool configuration file in the example of this topic, which contains the configuration attributes of the connection pool.
When you use a .properties file to configure the Proxool connection pool, you must follow these rules:
- Use a custom name with
jdbcas the prefix to identify each connection pool. You can customize this name to uniquely identify each connection pool. - The attributes related to the Proxool connection pool should be prefixed with
proxool.. These attributes are used to configure the properties of the Proxool connection pool itself. - Attributes without the
jdbcprefix will be ignored and not used by Proxool. - Attributes without the
proxool.prefix will be passed to the actual database connection, that is, these attributes will be passed to the actual database driver.
For more information on configuring the Proxool connection pool, see Configuration.
The db.properties file in this topic is an example of an attribute file used to configure the connection pool attributes of a data source named jdbc-1. It mainly includes the following parts:
- Sets the alias of the data source to
TEST.
Sample code:
jdbc-1.proxool.alias=TEST
-
Configures the database connection parameters.
-
Sets the class name of the driver. Here, it is the class name of the MySQL JDBC driver,
com.mysql.jdbc.Driver. 2. Sets the database connection URL, including the host IP, port number, database to be accessed, and additional connection attributes. 3. Sets the database username. 4. Sets the database password.
Sample code:
    jdbc-1.proxool.driver-class=com.mysql.jdbc.Driver
    jdbc-1.proxool.driver-url=jdbc:mysql://$host:$port/$database_name?useSSL=false
    jdbc-1.user=$user_name
    jdbc-1.password=$password
Parameter description:
$host: the IP address for connecting to seekdb. Replace it with an actual IP address. You can also use the local IP address or 127.0.0.1.$port: the port for connecting to seekdb. Replace it with an actual port. The default port is 2881, which can be customized when you deploy seekdb.$database_name: the name of the database to be accessed.$user_name: the connection account. Format:username.$password: the password of the account.
-
Configures other parameters of the Proxool connection pool.
-
Sets the maximum number of connections in the connection pool to 8. 2. Sets the minimum number of connections in the connection pool to 5. 3. Sets the number of available connections in the connection pool to 4. 4. Sets the detailed mode of the connection pool to on, which displays more log information. 5. Sets the statistics recording cycle of the connection pool to 10 seconds, 1 minute, and 1 day. 6. Sets the log level of the connection pool statistics recording to error level.
Sample code:
    jdbc-1.proxool.maximum-connection-count=8
    jdbc-1.proxool.minimum-connection-count=5
    jdbc-1.proxool.prototype-count=4
    jdbc-1.proxool.verbose=true
    jdbc-1.proxool.statistics=10s,1m,1d
    jdbc-1.proxool.statistics-log-level=error
The specific attribute (parameter) configuration depends on the project requirements and the characteristics of the database. We recommend that you adjust and configure them according to your actual situation. For more information about the Proxool connection pool parameters, see Properties.
Common configuration parameters:
| Configuration | Default Value | Description |
|---|---|---|
| alias | N/A | Used to set an alias for the connection pool. It can help identify a specific connection pool, which is especially useful when there are multiple pools. |
| driver-class | N/A | Specifies the database driver class name. |
| driver-url | N/A | Specifies the database connection URL, which includes the host IP address, port number, schema, and optional database driver parameters. |
| username | N/A | Specifies the username for the database. |
| password | N/A | Used to set the database password. |
| maximum-connection-count | 15 | Sets the maximum number of connections in the connection pool. Default value is 15, indicating that up to 15 connections can be created. |
| minimum-connection-count | 5 | Specifies the minimum number of connections in the connection pool. The default value is 5, indicating that the connection pool maintains at least five connections. |
| prototype-count | 0 | The number of prototype connections in the connection pool. The default value is 0, which indicates that the connection pool does not create extra connections on its own. |
| verbose | false | Specifies whether to enable detailed logging for the connection pool. The default value is false, meaning the connection pool does not provide detailed logs.When the verbose attribute is set to true, the connection pool generates more detailed information to help developers with debugging and monitoring. This information may include the connection pool status, connection creation and release, and connection usage statistics, among others.Enabling verbose mode helps developers understand the connection pool's operation, and verify whether connections are correctly allocated and recycled. This mode is very useful for identifying connection leaks, performance issues, and optimization opportunities.In a production environment, it is not recommended to set verbose to true, as it may cause a large volume of log data to be generated, affecting system performance and log file size. In most cases, it is recommended to keep verbose set to false, and temporarily enable it only for debugging and monitoring. |
| statistics | null | The sample duration for configuring statistics of the connection pool usage. A sample duration in the s, m, h, or d format indicates the sampling frequency. For example, 10s,15m indicates sampling every 10 seconds and every 15 minutes. The default value is null, which indicates that no statistics will be collected.When you set the statistics parameter, the connection pool samples the statistics of the connection pool, such as the number of active connections, idle connections, and connection requests, regularly. The sampling duration determines the sampling frequency and granularity. |
| statistics-log-level | null | Specifies the log level for statistics, which defines the type of log tracking. You can set this parameter to DEBUG, INFO, WARN, ERROR, or FATAL. By default, this parameter is set to null, indicating that statistics are not logged.After you set the statistics-log-level attribute, the connection pool logs generated statistics at the specified log level. These statistics include the status of the connection pool, connection creation and release, and connection usage. |
| test-after-use | N/A | Specifies whether a connection is tested after it is closed. If you set this attribute to true and also define the house-keeping-test-sql attribute, each connection that is closed (i.e., returned to the connection pool) will be tested. If the test fails, the connection is discarded. Connections in a connection pool are typically returned to the pool after use for reuse. The test-after-use attribute ensures that a connection is tested and validated before it is returned to the pool. This test is usually performed using the SQL statement defined by the house-keeping-test-sql attribute. When the test-after-use attribute is enabled, the connection pool can promptly identify and remove unavailable connections, preventing the application from obtaining invalid connections. This enhances the stability and reliability of the application. Note: To use the test-after-use feature, you must first define the house-keeping-test-sql attribute, which specifies the SQL statement used for testing. This ensures the connection pool can test and validate connections based on the defined rules. |
| house-keeping-test-sql | N/A | The test SQL statement for idle connections in the connection pool. If the housekeeping thread of the connection pool finds idle connections, it uses this SQL statement to test these idle connections. The test SQL statement should be executed very quickly, such as checking the current date. If this property is not defined, no connection test is performed. In MySQL mode, use the SELECT CURRENT_DATE or SELECT 1 statement. In Oracle mode, use the SELECT sysdate FROM DUAL or SELECT 1 FROM DUAL statement. |
| trace | false | Indicates whether to log the details of each SQL call. When set to true, each SQL call will be logged at the DEBUG level and show the execution time. You can also obtain this information by registering a ConnectionListener (see ProxoolFacade). The default value is false. |
| maximum-connection-lifetime | 4 hours | This parameter specifies the maximum lifetime of a connection. A connection is destroyed after it exists for the maximum time. The default value is 4 hours. The lifetime of a connection is the period from the time when the connection is created to the time when the connection is destroyed. By setting the maximum-connection-lifetime parameter, you can limit the longest duration that a connection can remain in the connection pool. This prevents connections from being unused for too long and avoids resource leaks. |
| maximum-active-time | 5 minutes | The maximum activity time of a thread. If the activity time of a thread in the connection pool exceeds this setting, the thread will be terminated by the connection pool guardian thread. Therefore, ensure that this parameter is set to a value greater than the expected slowest response time. The default value is 5 minutes. The daemon thread terminates extra idle threads in the connection pool whose activity time exceeds this setting and finally retains minimum-connection-count threads in the pool. The daemon thread checks the number of idle threads periodically based on the time set by the house-keeping-sleep-time parameter. |
| maximum-new-connections | N/A | Sets the maximum number of simultaneous new connections to create in the connection pool. This attribute is deprecated. We recommend that you use the simultaneous-build-throttle attribute instead. |
| simultaneous-build-throttle | 10 | Used to specify the maximum number of simultaneous connections that the connection pool can establish at any given time. In other words, it sets the upper limit on the number of new connections that are being established but not yet available. Connection establishment can involve multiple threads, especially when connections are established as needed, and there is typically a delay between the decision to establish a connection and when it becomes available. This setting helps ensure that no large number of threads simultaneously decide to establish new connections. The simultaneous-build-throttle attribute limits the number of simultaneous new connections the connection pool can establish, controlling its concurrency. If the maximum number of concurrent connections is reached, threads requesting new connections will be blocked until a connection becomes available or the specified timeout is exceeded.By setting an appropriate value for simultaneous-build-throttle, you can balance the concurrency and resource usage of the connection pool. The default value is 10, which means the connection pool can establish up to 10 simultaneous connections. |
| overload-without-refusal-lifetime | 60 | This parameter is used to determine the status of a connection pool. If a connection request is rejected within the specified time threshold (in milliseconds), the connection pool is considered overloaded. The default value is 60 seconds. |
| test-before-use | N/A | Specifies whether to test each connection before it is provided to an application. If this attribute is set to true, each connection is tested by executing the predefined test SQL statement (defined by the house-keeping-test-sql attribute) before it is provided to an application. If the test fails, the connection is discarded, and the connection pool selects another available connection. If all connections fail the test, a new connection is created. If the new connection also fails the test, a SQLException is thrown.Note that for MySQL databases, you must also include the autoReconnect=true parameter in the connection parameters. Otherwise, even if test-before-use is set to true, reconnection will not be possible. |
| fatal-sql-exception | null | Specifies the messages to detect and handle SQL exceptions. It is a list of message fragments separated by commas. When a SQLException occurs, its message is compared with these message fragments. If it contains any of the message fragments (case-sensitive), it is considered a fatal SQL exception. This will result in the connection being discarded. Regardless of the situation, the exception is rethrown so that the user is informed of what occurred. You can also configure different exceptions to be thrown (see the fatal-sql-exception-wrapper-class attribute). The default value is null.Note that if the fatal-sql-exception-wrapper-class attribute is set, you can configure an alternative exception class to be thrown. This allows you to customize how SQL exceptions are handled. |
| fatal-sql-exception-wrapper-class | null | Specifies the exception wrapper for fatal SQL exceptions. When the fatal-sql-exception attribute is configured, the default behavior is to discard the exception that caused the fatal SQLException and directly throw the original exception to the user. Using this attribute, you can wrap the SQLException in another exception. This exception can be any type you choose, as long as it extends from SQLException or RuntimeException. Proxool provides two classes for your use if you prefer not to build your own exception classes: FatalSQLException and FatalRuntimeException. To use these classes, set this attribute to org.logicalcobwebs.proxool.FatalSQLException or org.logicalcobwebs.proxool.FatalRuntimeException as needed. The default value is null, indicating that fatal SQLException is not wrapped. The default value is null.Note that the exception wrapper class must be a subclass of SQLException or RuntimeException. |
| house-keeping-sleep-time | 30 seconds | Specifies the sleep time for the connection pool's maintenance thread (housekeeping thread). The maintenance thread is responsible for checking the status of all connections and deciding whether to destroy or create connections. The default value is 30 seconds, meaning the maintenance thread will perform maintenance tasks every 30 seconds. |
| injectable-connection-interface | N/A | Allows Proxool to implement methods defined in the delegated Connection object. |
| injectable-statement-interface | N/A | Allows Proxool to implement methods defined in the delegated Statement object. |
| injectable-prepared-statement-interface | N/A | Allows Proxool to implement methods defined in the delegated PreparedStatement object. |
| injectable-callable-statement-interface | N/A | Allows Proxool to implement methods defined in the delegated CallableStatement object. |
| jndi-name | N/A | Specifies the name under which the connection pool is registered in JNDI (Java Naming and Directory Interface). |
Introduction to Main.java
The Main.java file is part of the sample program, demonstrating how to obtain a database connection using the Proxool connection pool and perform a series of database operations, including creating tables, inserting data, deleting data, updating data, querying data, and printing the query results.
The code in the Main.java file in this topic primarily includes the following parts:
- Import the required classes and interfaces.
Define the package where the code is located and import classes and interfaces related to Proxool and JDBC. These classes are used to implement the configuration and management of the database connection pool and to execute SQL statements. By using the Proxool connection pool, the performance and reliability of database operations can be improved. The specific steps are as follows:
- Define the package where the code is located as
com.example, which is used to store the current Java class. 2. Import theorg.logicalcobwebs.proxool.configuration.PropertyConfiguratorclass, which is used to configure Proxool. 3. Import thejava.io.InputStreamclass, which is used to read the configuration file. 4. Import thejava.sql.Connectionclass, which is used to obtain a database connection. 5. Import thejava.sql.DriverManagerclass, which is used to obtain a database connection. 6. Import thejava.sql.ResultSetclass, which is used to obtain query results. 7. Import thejava.sql.Statementclass, which is used to execute SQL statements. 8. Import thejava.util.Propertiesclass, which is used to load and read the configuration file.
Code:
    package com.example;

    import org.logicalcobwebs.proxool.configuration.PropertyConfigurator;
    import java.io.InputStream;
    import java.sql.Connection;
    import java.sql.DriverManager;
    import java.sql.ResultSet;
    import java.sql.Statement;
    import java.util.Properties;
- Define the class name and method.
Define the entry method of the Java program. In this method, read the configuration file to obtain the database connection information. After establishing a database connection using the Proxool driver, call the defined methods to execute DDL statements, DML statements, and query statements in sequence. Capture and print any exceptions that may occur. The purpose of this code is to perform database operations and record logs using a logger. The specific steps are as follows:
-
Define a public class named Main.
-
Define a private static constant named
DB_PROPERTIES_FILEto represent the path of the database configuration (property) file. This constant can be referenced in the code to load and read the property file. 2. Define a public static methodmainas the starting point of the program. -
Define a code block for capturing possible exceptions.
-
Create a
Propertiesobject to read the properties from the configuration file. 2. Use the class loader of the Main class to obtain the input stream of the configuration file. 3. Use the loaded input stream to load the configuration file and load the properties into thePropertiesobject. 4. Use the loaded properties to configure the connection pool. 5. Dynamically load the Proxool database driver. 6. Use the Proxool driver to establish a database connection. 7. Create aStatementobject. 8. Call the defined methodexecuteDDLStatements()to execute DDL statements, which are used to create tables. 9. Call the defined methodexecuteDMLStatements()to execute DML statements, which are used to insert, update, and delete data. 10. Call the defined methodexecuteQueryStatements()to execute query statements and obtain data. -
Capture and print any exceptions that may occur.
-
Define a method for creating tables.
Code:
    public class Main {
        private static final String DB_PROPERTIES_FILE = "/db.properties";

public static void main(String[] args) {
            try {
                Properties properties = new Properties();
                InputStream is = Main.class.getResourceAsStream(DB_PROPERTIES_FILE);
                properties.load(is);
                PropertyConfigurator.configure(properties);

Class.forName("org.logicalcobwebs.proxool.ProxoolDriver");
                try (Connection conn = DriverManager.getConnection("proxool.TEST");
                    Statement stmt = conn.createStatement()) {
                    executeDDLStatements(stmt);
                    executeDMLStatements(stmt);
                    executeQueryStatements(stmt);
                }
            } catch (Exception e) {
                e.printStackTrace();
            }
        }

// Define a method for creating tables
        // Define a method for executing DML statements
        // Define a method for querying data
    }
- Define a method for creating tables.
Define a private static method executeDDLStatements() for executing DDL (Data Definition Language) statements, including statements for creating tables. The specific steps are as follows:
- Define a private static method
executeDDLStatements()that receives aStatementobject as a parameter and may throw anExceptionexception. 2. Use theexecute()method to execute SQL statements and create a table namedtest_proxoolwith two columns,c1andc2, of typesINTandVARCHAR(32), respectively.
Code:
        private static void executeDDLStatements(Statement stmt) throws Exception {
            stmt.execute("CREATE TABLE test_proxool (c1 INT, c2 VARCHAR(32))");
        }
- Define a method for executing DML statements.
Define a private static method executeDMLStatements() for executing DML (Data Manipulation Language) statements, including statements for inserting, deleting, and updating data. The specific steps are as follows:
- Define a private static method
executeDMLStatements()that receives aStatementobject as a parameter and throws anExceptionexception if an exception occurs during execution. 2. Use aforloop to iterate from 1 to 10. In the loop, use theexecute()method to execute SQL insert statements and insert the variableiand the corresponding string value into thetest_proxooltable. 3. Execute an SQL delete statement to delete rows from thetest_proxooltable where the value of thec1column is less than or equal to 5. 4. Execute an SQL update statement to update the value of thec2column totest_updatefor rows in thetest_proxooltable where the value of thec1column is 6.
Code:
        private static void executeDMLStatements(Statement stmt) throws Exception {
            for (int i = 1; i <= 10; i++) {
                stmt.execute("INSERT INTO test_proxool VALUES (" + i + ",'test_insert" + i + "')");
            }
            stmt.execute("DELETE FROM test_proxool WHERE c1 <= 5");
            stmt.execute("UPDATE test_proxool SET c2 = 'test_update' WHERE c1 = 6");
        }
- Define a method for querying data.
Define a private static method executeQueryStatements() that executes SELECT statements and processes the results. The steps are as follows:
- Define a private static method
executeQueryStatements()that takes aStatementobject as a parameter. If an exception occurs during execution, the method throws anException. 2. Use theexecuteQuery()method to execute theSELECTstatement and store the results in aResultSetobjectrs. Here, the query returns all data from thetest_proxooltable. Use thetry-with-resourcesstatement to ensure that theResultSetis automatically closed after use. 3. Use awhileloop and thenext()method to iterate through each row of data in theResultSetobjectrs. In each iteration, thers.next()method moves the pointer to the next row in the result set. If there is another row of data available, this method returnstrue; otherwise, it returnsfalse. In thewhileloop, as long asrs.next()returnstrue, it indicates that more rows of data are available. The code within the loop executes and processes the data of the current row. Once all rows have been processed,rs.next()will returnfalse, and the loop ends. 4. Use thegetInt()andgetString()methods to retrieve the values of the specified columns in the current row and print them to the console. Here, the values of thec1andc2columns are printed. ThegetInt()method is used to retrieve integer values, and thegetString()method is used to retrieve string values.
Here is the code:
        private static void executeQueryStatements(Statement stmt) throws Exception {
            try (ResultSet rs = stmt.executeQuery("SELECT * FROM test_proxool")) {
                while (rs.next()) {
                    System.out.println(rs.getInt("c1") + "   " + rs.getString("c2"));
                }
            }
        }
Complete code
pom.xml
<?xml version="1.0" encoding="UTF-8"?>
<project xmlns="http://maven.apache.org/POM/4.0.0"
         xmlns:xsi="http://www.w3.org/2001/XMLSchema-instance"
         xsi:schemaLocation="http://maven.apache.org/POM/4.0.0 http://maven.apache.org/xsd/maven-4.0.0.xsd">
    <modelVersion>4.0.0</modelVersion>

    <groupId>com.oceanbase</groupId>
    <artifactId>proxool-mysql-client</artifactId>
    <version>1.0-SNAPSHOT</version>
    <build>
        <plugins>
            <plugin>
                <groupId>org.apache.maven.plugins</groupId>
                <artifactId>maven-compiler-plugin</artifactId>
                <configuration>
                    <source>8</source>
                    <target>8</target>
                </configuration>
            </plugin>
        </plugins>
    </build>

    <dependencies>
        <dependency>
            <groupId>mysql</groupId>
            <artifactId>mysql-connector-java</artifactId>
            <version>5.1.47</version>
        </dependency>
        <dependency>
            <groupId>proxool</groupId>
            <artifactId>proxool-cglib</artifactId>
            <version>0.9.1</version>
        </dependency>
        <dependency>
            <groupId>proxool</groupId>
            <artifactId>proxool</artifactId>
            <version>0.9.1</version>
        </dependency>
        <dependency>
            <groupId>commons-logging</groupId>
            <artifactId>commons-logging</artifactId>
            <version>1.2</version>
        </dependency>
    </dependencies>
</project>
db.properties
#alias: the alias of the data source
jdbc-1.proxool.alias=TEST
#driver-class: driver name
jdbc-1.proxool.driver-class=com.mysql.jdbc.Driver
#driver-url: url connection string, username and password must be determined
jdbc-1.proxool.driver-url=jdbc:mysql://$host:$port/$database_name?useSSL=false
jdbc-1.user=$user_name
jdbc-1.password=$password
#The maximum number of database connections. The default is 15
jdbc-1.proxool.maximum-connection-count=8
#The minimum number of database connections, defaults to 5
jdbc-1.proxool.minimum-connection-count=5
#The number of available connections in the Connection pool. If the number of connections in the current Connection pool is less than this value, new connections will be established (assuming that the maximum number of available connections is not exceeded). For example, if we have three active connections and two available connections, and our prototype count is 4, the database Connection pool will try to establish another two connections. This is different from the minimum connection count Minimum connection count also counts active connections. Prototype count is the number of spare connections
jdbc-1.proxool.prototype-count=4
#verbose: detailed information settings. Parameter bool value
jdbc-1.proxool.verbose=true
#statistics: connection pool usage statistics. Parameter "10s, 1m, 1d"
jdbc-1.proxool.statistics=10s,1m,1d
#statistics-log-level:  log statistics tracking type. Parameter 'ERROR' or 'INFO'
jdbc-1.proxool.statistics-log-level=error
Main.java
package com.example;

import org.logicalcobwebs.proxool.configuration.PropertyConfigurator;
import java.io.InputStream;
import java.sql.Connection;
import java.sql.DriverManager;
import java.sql.ResultSet;
import java.sql.Statement;
import java.util.Properties;

public class Main {
    private static final String DB_PROPERTIES_FILE = "/db.properties";

    public static void main(String[] args) {
        try {
            Properties properties = new Properties();
            InputStream is = Main.class.getResourceAsStream(DB_PROPERTIES_FILE);
            properties.load(is);
            PropertyConfigurator.configure(properties);

            Class.forName("org.logicalcobwebs.proxool.ProxoolDriver");
            try (Connection conn = DriverManager.getConnection("proxool.TEST");
                Statement stmt = conn.createStatement()) {
                executeDDLStatements(stmt);
                executeDMLStatements(stmt);
                executeQueryStatements(stmt);
            }
        } catch (Exception e) {
            e.printStackTrace();
        }
    }

    private static void executeDDLStatements(Statement stmt) throws Exception {
        stmt.execute("CREATE TABLE test_proxool (c1 INT, c2 VARCHAR(32))");
    }

    private static void executeDMLStatements(Statement stmt) throws Exception {
        for (int i = 1; i <= 10; i++) {
            stmt.execute("INSERT INTO test_proxool VALUES (" + i + ",'test_insert" + i + "')");
        }
        stmt.execute("DELETE FROM test_proxool WHERE c1 <= 5");
        stmt.execute("UPDATE test_proxool SET c2 = 'test_update' WHERE c1 = 6");
    }

    private static void executeQueryStatements(Statement stmt) throws Exception {
        try (ResultSet rs = stmt.executeQuery("SELECT * FROM test_proxool")) {
            while (rs.next()) {
                System.out.println(rs.getInt("c1") + "   " + rs.getString("c2"));
            }
        }
    }
}
References
- For more information about MySQL Connector/J, see Overview of MySQL Connector/J.
- For more information about using the Proxool connection pool, see Introduction for Users.