Alert management
Log in to the obshell Dashboard console and click Alarm Center in the left-side navigation pane to go to the Alarm Center page.
The Alarm Center page allows you to centrally manage and monitor alert events in a seekdb instance. You can view and manage alert events, set alert suppression rules, and configure alert rules on this page. This helps you respond to and handle exceptions in a timely manner, ensuring system stability.
When you log in to the Alert Center page for the first time, you need to enter the Alertmanager address, username, and password. If you have not installed Alertmanager, we recommend that you install it by following the instructions in Configure monitoring components.
Filter
You can filter the content in the Alarm event, Alarm Shielding, and Alarm Rules tabs based on the conditions. The supported conditions vary across tabs. You can configure the conditions and then perform precise searches. Click Reset to clear the query content and re-enter the query content.
| Parameter | Description |
|---|---|
| Alarm level | You can select an alert level from the drop-down list. The alert levels are Serious, Warning, Attention, and Reminder.
|
| Keywords | The keyword for the alert. You can enter a custom keyword and search for the corresponding alert. |
| Start Time | The start time of the alert. |
| End Time | The end time of the alert. |
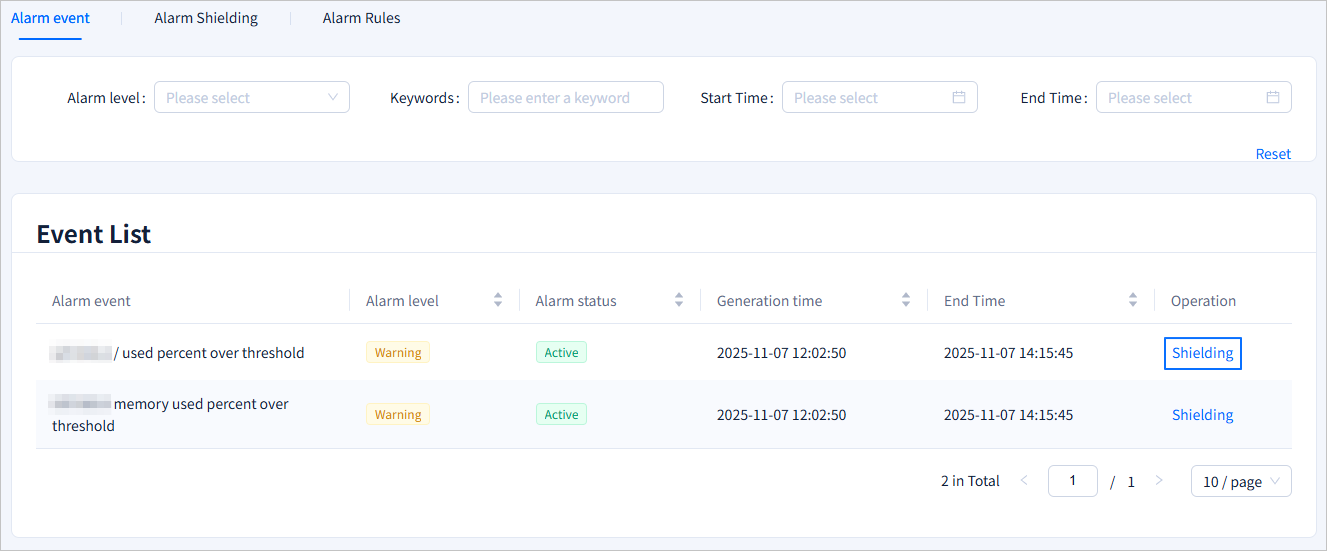
Events
You can view the details of each alert in the Event List tab, including Alarm event, Alarm level, Alarm status, Generation time, End Time, and the actions that you can perform on the event. You can sort the alerts by Alarm level, Alarm status, Generation time, and End Time.
Mute an alert
If you do not need to pay attention to an alert, you can click Shielding in the Operation column of the alert to quickly mute the alert.
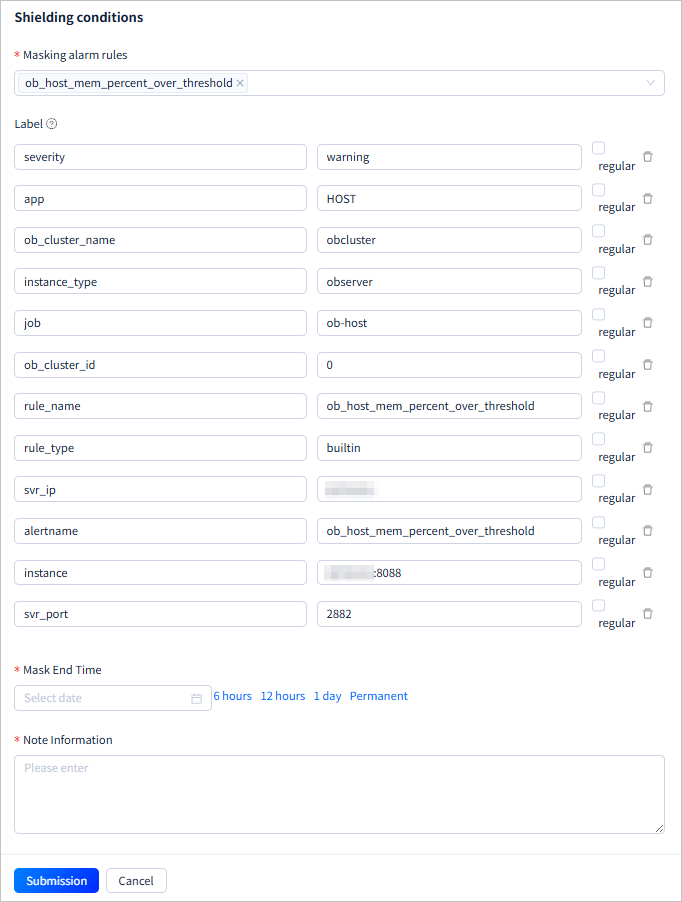
After you click Shielding, the page switches to the Alarm Shielding tab and the Shielding conditions drawer appears. The Shielding conditions drawer is automatically filled with the Masking alarm rules and Label information corresponding to the selected alert. You only need to select Mask End Time and enter Note Information. You can set the Mute End Time in the following two ways:
-
Click the selection box and use the time selector to customize the end time.
-
Click the selection box and set a fixed mute duration. For example, if you click 6 hours, the system will fill in the current time + 6 hours into the box.
After an alert is muted, the Alarm Shielding tab will display a new mute record. In the Alarm event tab, the status of the corresponding alert will change from Active to Inhibit. Muted alerts will not be sent before the set end time. If you need to send the alert earlier, you can modify the mute record in the Alarm Shielding tab or Unmask the alert. For more information, see Edit a suppression rule and Remove a suppression rule.
Alert suppression
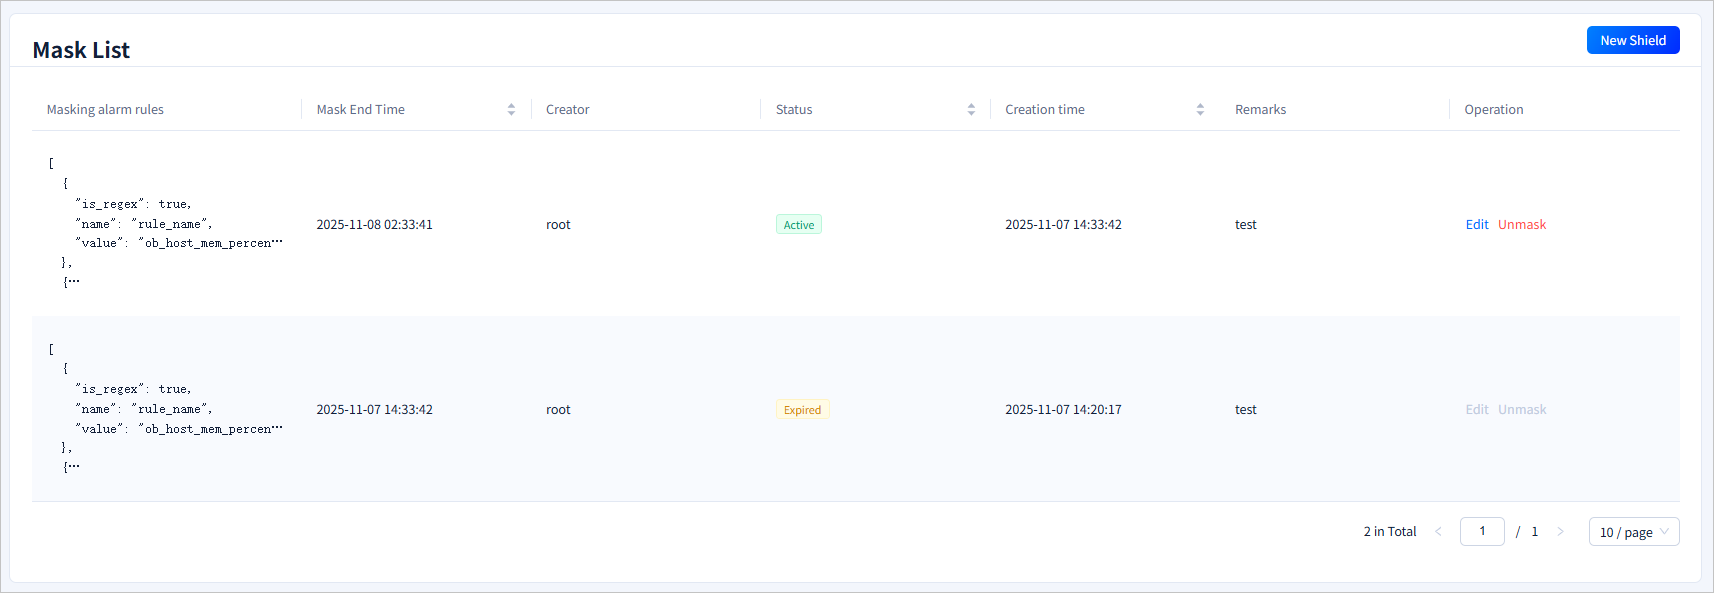
In the suppression list, you can view the Masking alarm rules, Mask End Time, Creator, Status, Creation time, and Remarks of the suppression rules, as well as the operations that can be performed. You can sort the suppression rules based on Mask End Time, Status, and Creation time. You can also edit or remove specific suppression rules. When you hover the pointer over the Masking alarm rules column, the alert rule details are displayed.
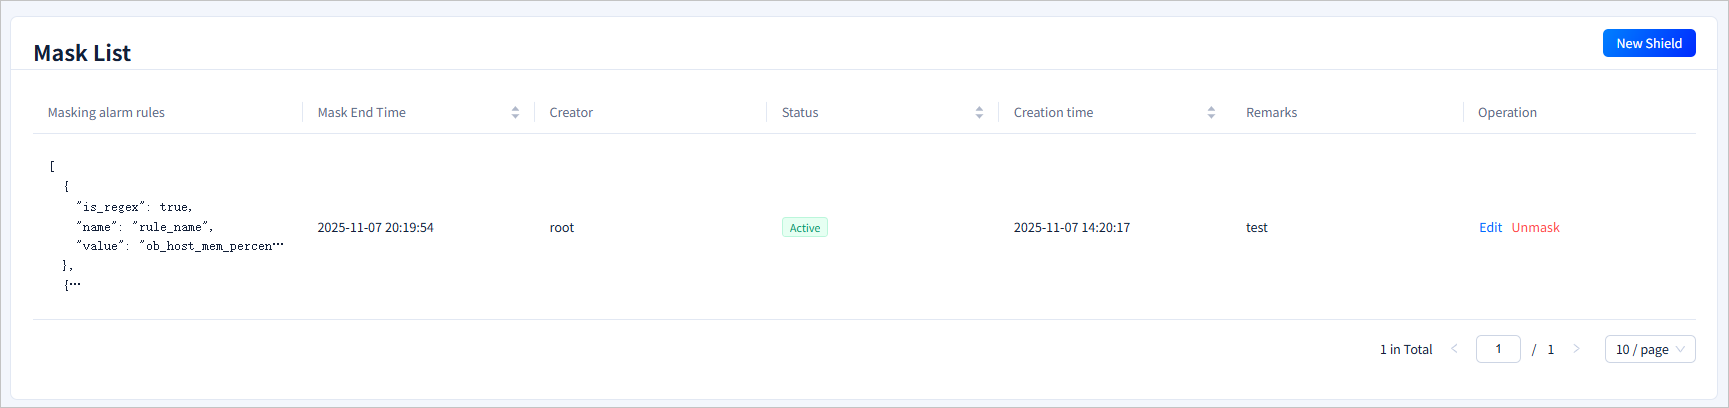
Create a suppression rule
On the Alarm Shielding tab, click New Shield. In the Shielding conditions drawer, configure the suppression conditions and click Submission. The system returns to the Alarm Shielding tab and adds the suppression rule to the suppression list.
| Parameter | Description |
|---|---|
| Masking alarm rules | In the drop-down list, select the alert rule that you want to suppress. You can select multiple alert rules. The alert rules in the Rule List list on the Alarm Rules tab are consistent with those in this drop-down list. You can view the details of an alert rule on the Alarm Rules tab. |
| Label | Optional. You can specify the tag matching condition for alert suppression. You can specify a value or a regular expression. An alert is suppressed only when all the conditions are met. Generally, you do not need to configure this parameter. |
| Mask End Time | The end time of alert suppression. Alerts are not sent before the end time. You can configure the end time in one of the following ways:
|
| Note Information | You can add remarks to the suppression rule for easy identification and reuse. |
To suppress an alert, we recommend that you go to the Alarm event tab and suppress the alert event. After you click the Shielding field in the Operation column, the system automatically jumps to the Alarm Shielding tab and displays the Shielding conditions drawer. In the drawer, the system automatically fills the Masking alarm rules and Label information associated with the alert event. You only need to configure the end time of alert suppression and add remarks. Then, the alert is suppressed.

Edit a suppression rule
On the Alarm Shielding tab, in the Mask List section, click Edit in the Operation column. In the Shielding conditions drawer, you can edit the suppression rule.
The Shielding conditions drawer automatically fills the Masking alarm rules, Label, Mask End Time, and Note Information information of the suppression rule. You can modify the parameters as needed. For more information, see Create a suppression rule. After you click Submission, the suppression rule is edited.
After a suppression rule is edited, the suppression list is updated with the new suppression rule. The status of the original suppression rule is changed from Active to Expired and no further operations can be performed on it.
Remove a suppression rule
On the Alarm Shielding tab, in the Mask List section, click Unmask in the Operation column. In the confirmation dialog box that appears, click Disarm. The suppression rule is removed. After the suppression rule is removed, the status of the suppression rule is changed from Active to Expired and no further operations can be performed on it.
After a suppression rule is removed, it cannot be recovered. Proceed with caution.

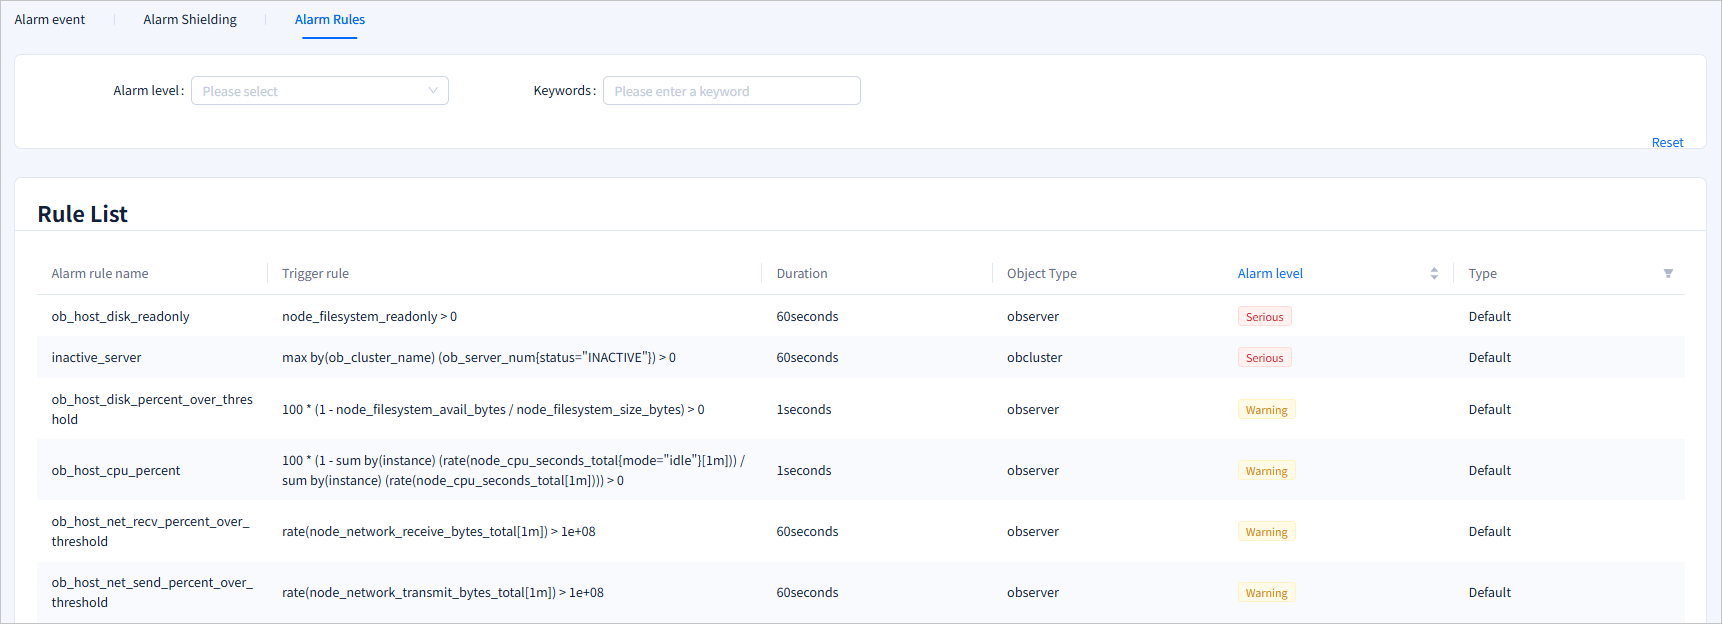
Alert rules
In the rule list, you can view the Alarm rule name, Trigger rule, Duration, Object Type, Alarm level, and Type. You can sort the rules by Alarm level and filter the rules by Type to view Custom or Default rules.
obshell Dashboard does not support custom alert rules. You can visit the GitHub repository of obd to view the Prometheus alert rules provided by OceanBase.