Instance management
Log in to the obshell Dashboard console. The instance management page is displayed by default. This topic describes the information displayed on the instance management page and the operations that you can perform on the page.
The instance management page displays the basic information of seekdb, the IP address whitelist, the instance status, and the start and end times of the last major compaction. You can also start, stop, and restart seekdb on the instance management page. You can also upgrade obshell and perform a major compaction on an instance on the page.
Basic information
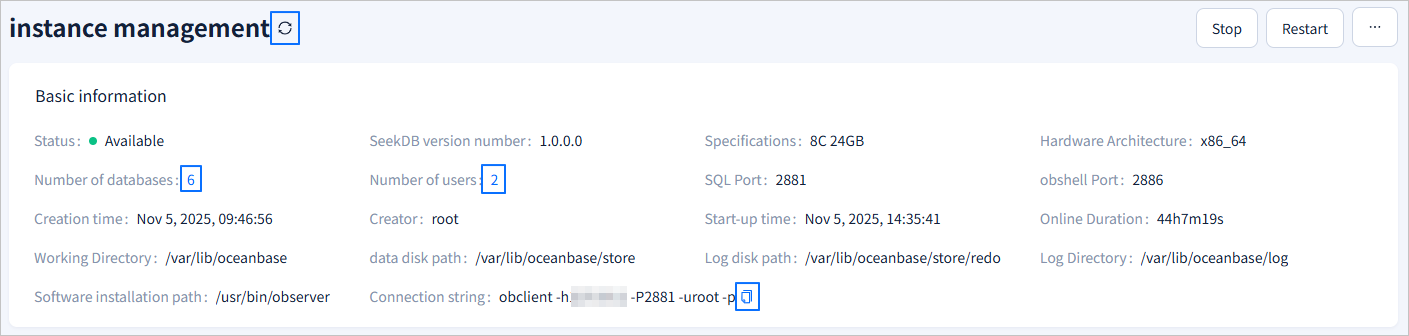
The Basic information module displays the instance status, seekdb version, instance specification, number of databases and users in the instance, port, creation time, working directory, and other basic information. For more information about the displayed items, see the following figure.
After you click the refresh icon next to instance management, the Basic information module will be refreshed to show the latest instance information. You can click the number next to Number of databases or Number of users to go to the Database Management or User Management page, where you can view database or user information. You can click the ![]() icon next to Connection string to copy the connection string for later use.
icon next to Connection string to copy the connection string for later use.
Start and stop instances
obshell Dashboard does not support starting or stopping seekdb instances managed by systemd. If your current seekdb instance is started by systemd, execute the systemctl stop seekdb/systemctl start seekdb command to stop or start the instance.
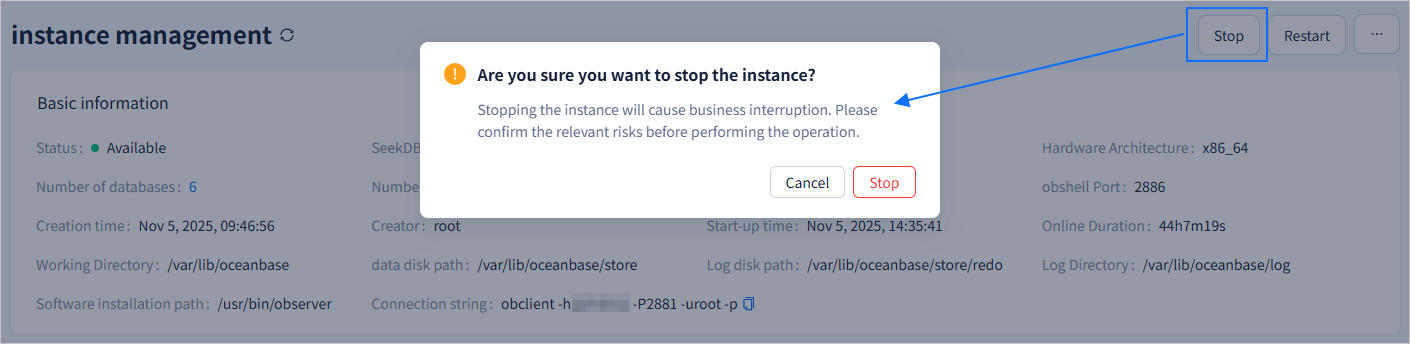
When the status of an instance is Available, click the Stop button in the upper-right corner of the instance management page. In the confirmation dialog box that appears, click Stop. On the obshell Dashboard, the system submits a stop task and displays the task ID. Click the displayed task ID to view the task execution status.
Stopping an instance will cause business disruption. Please proceed only after you have confirmed the potential risks.
After the stop task is completed, the instance status changes to Stopped. On the instance management page, click Start in the upper-right corner, and in the confirmation dialog box that appears, click Start. The obshell Dashboard will submit a start task and display the task ID. You can click the task ID to view the task details.
Reboot an instance
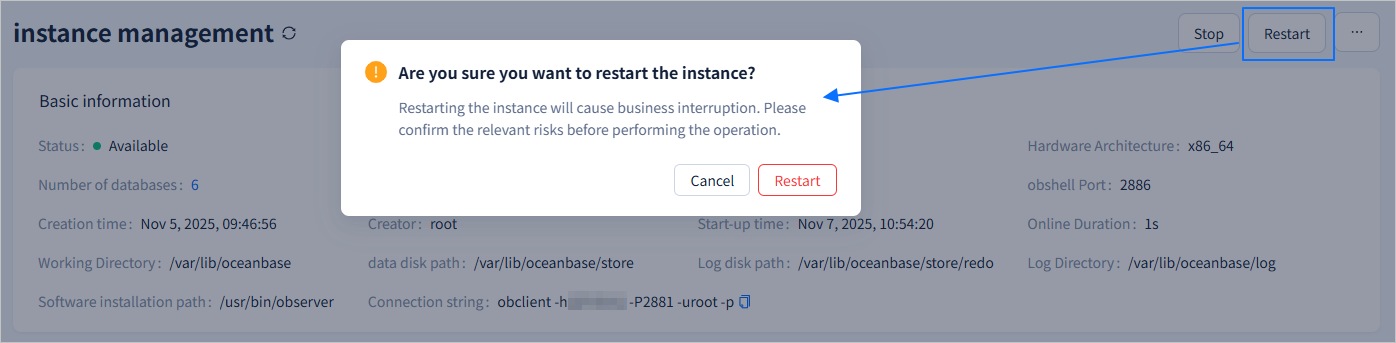
On the Instance Management page, click Restart in the upper-right corner of the page. On the confirmation dialog box that appears, click Restart. The Dashboard displays the ID of the restart task. You can click the task ID to view the task details.
Restarting the instance will cause a business interruption. Please confirm the relevant risks before performing this operation.
Upgrade obshell
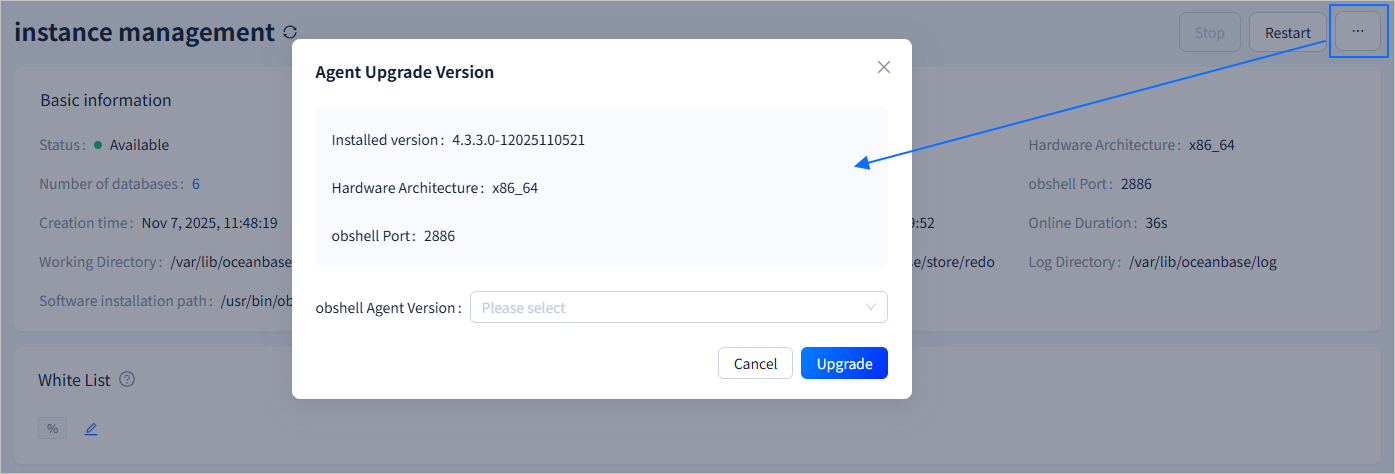
Hover the cursor over ··· in the upper-right corner and click Upgrade obshell.
In the Agent Upgrade Version window, configure the obshell Agent Version. The version is selected from the uploaded obshell software packages. If there are no obshell software packages with a version higher than the current one in the obshell Dashboard, click + Upload Package in the drop-down list to upload a package.
Make sure that the required installation package exists locally. If it does not exist, click Download RPM Package on the Upload Package page to download the corresponding software package from the open-source mirror site.
After the configuration is completed, click Upgrade and then click OK in the window that appears. The obshell Dashboard will submit a task to upgrade obshell. You can click View Tasks in the pop-up window to view the task execution status.
White List
The White List module displays the list of IP addresses that can connect to the instance. You can click the icon in the right side of the module to modify the whitelist.
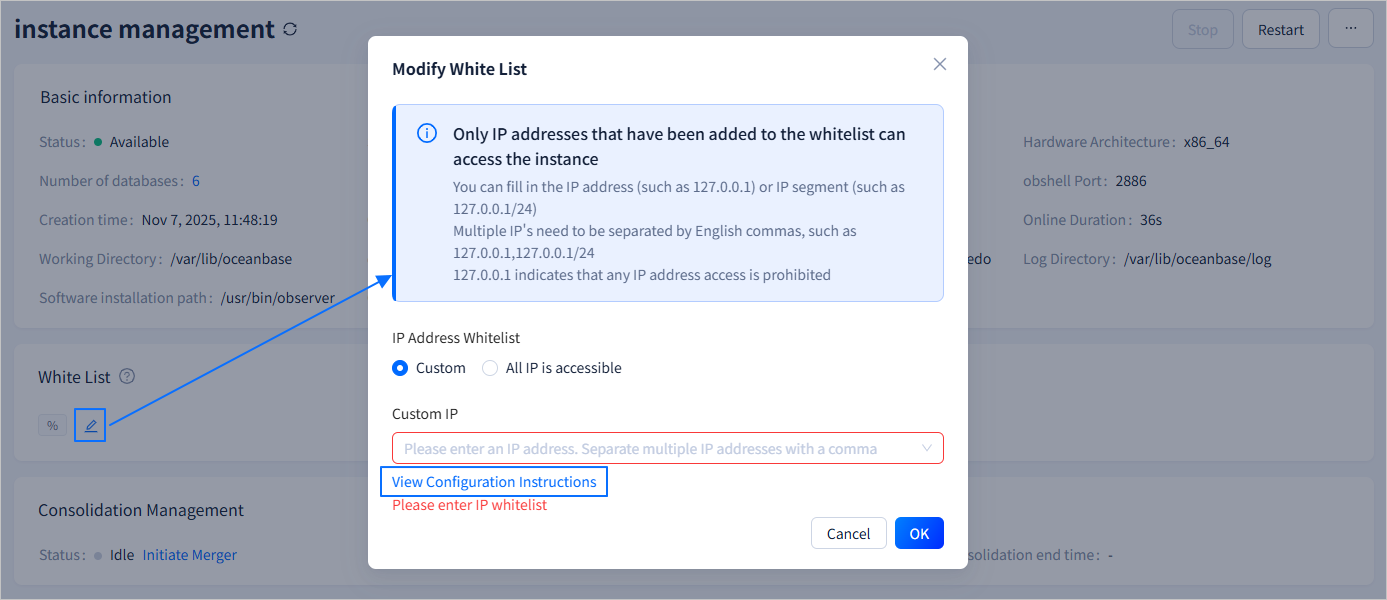
You can customize the accessible IP address or set all IP addresses to be accessible. When you select the custom setting, you can specify the list of clients that can log in to the instance in the Custom IP field. After you enter an IP address, press the Enter key or enter a comma (,) to configure multiple node IP addresses. Hover the cursor over View Configuration Instructions to view the configuration description. The following table describes the supported IP address formats:
- IP address, for example: 127.0.0.10,127.0.0.11
- Subnet/mask, for example: 127.0.0.0/24
- Fuzzy match, for example: 127.0.0.% or 127.0.0._
- Mixed multiple formats, for example: 127.0.0.10,127.0.0.2,127.0.0.%,127.0.0._,127.0.0.1/24
If you set the value to %, all clients can connect to the instance. This may cause security risks. Proceed with caution.
Consolidation Management
The Consolidation Management module displays the Status, Last merge start time, and Last consolidation end time of the current instance. Click Initiate Merger after Status and then click OK in the window that appears to initiate a major compaction.
