User management
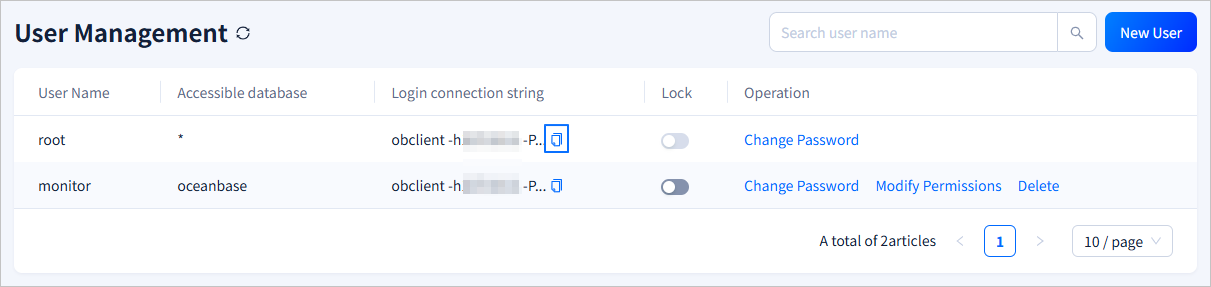
Log in to the obshell Dashboard console and click User Management in the left-side navigation pane to go to the User Management page.
On the User Management page, you can view all users in the instance. You can click the ![]() icon in the Login connection string column to copy the connection string for a user. If the instance contains a large number of users, you can use the search bar in the upper-right corner to search for and view the information about a specified user.
icon in the Login connection string column to copy the connection string for a user. If the instance contains a large number of users, you can use the search bar in the upper-right corner to search for and view the information about a specified user.
Create a user
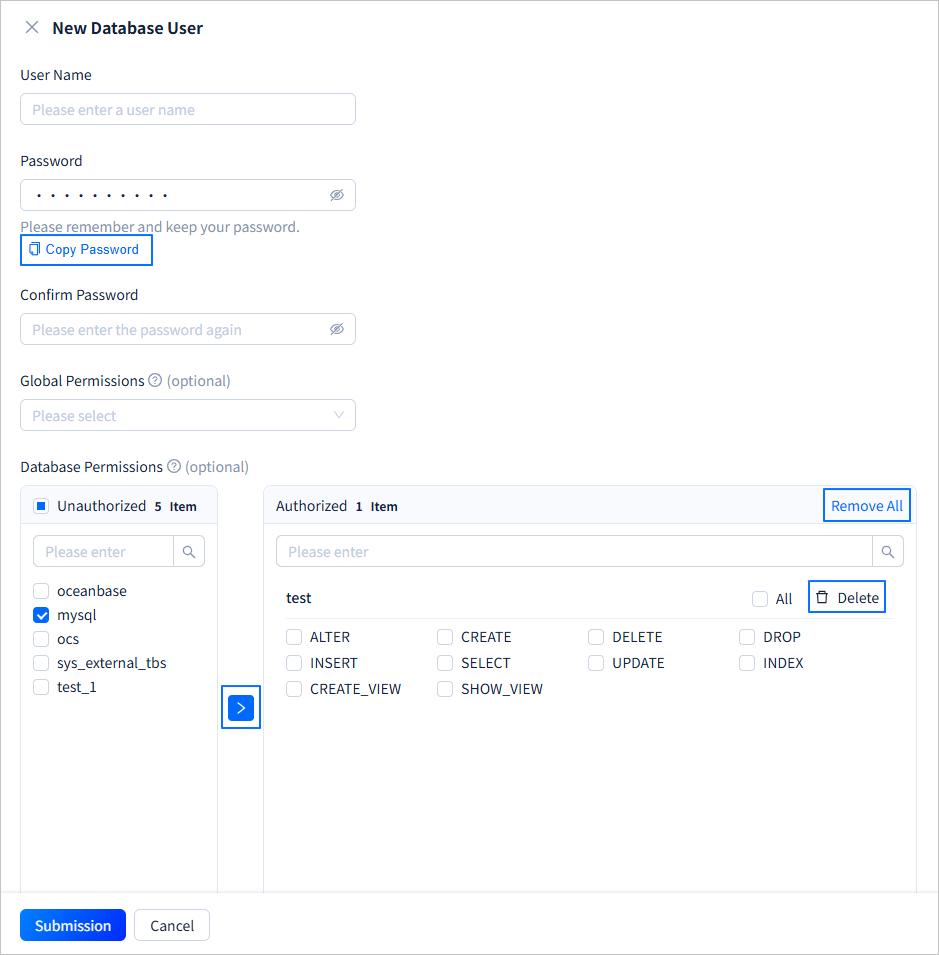
On the User Management page, click New User in the upper-right corner. On the New Database User page, set the User Name, Password, Global Permissions, and Database Permissions. After the settings are completed, click Submission.
| Parameter | Description |
|---|---|
| User Name | Set the name of the new user. The username must meet the following requirements:
|
| Password | The password must meet the following requirements:
|
| Confirm Password | Re-enter the password to confirm the configuration. If the two passwords are inconsistent, a prompt is displayed: The new password entered twice is inconsistent, please re-enter.. |
| Global Permissions (Optional) | You can select the privileges that the user can have from the drop-down list. The privileges apply to all databases. For more information about the privileges, see Privilege types in MySQL mode. If no privileges are selected, the user has no privileges. |
| Database Permissions | Set the privileges of the new user for each database. The privileges apply to all targets in the specified database. To set the privileges, perform the following steps:
|
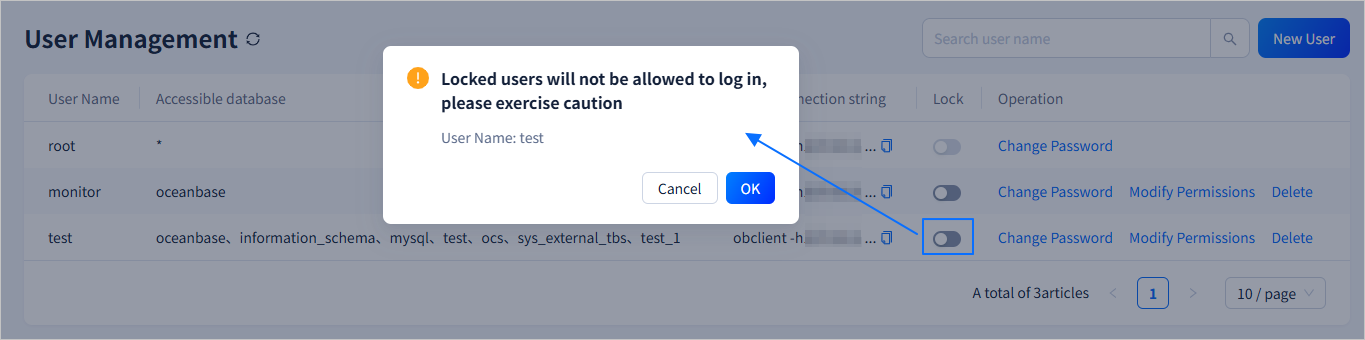
Lock a user
You can click the switch icon in the Lock column to lock or unlock a user. If the user is not locked, click ![]() in the Lock column. In the dialog box that appears, click OK to lock the user. A locked user cannot log in. Proceed with caution. If the user is locked, click
in the Lock column. In the dialog box that appears, click OK to lock the user. A locked user cannot log in. Proceed with caution. If the user is locked, click ![]() in the Lock column. In the dialog box that appears, click OK to unlock the user. An unlocked user can log in.
in the Lock column. In the dialog box that appears, click OK to unlock the user. An unlocked user can log in.
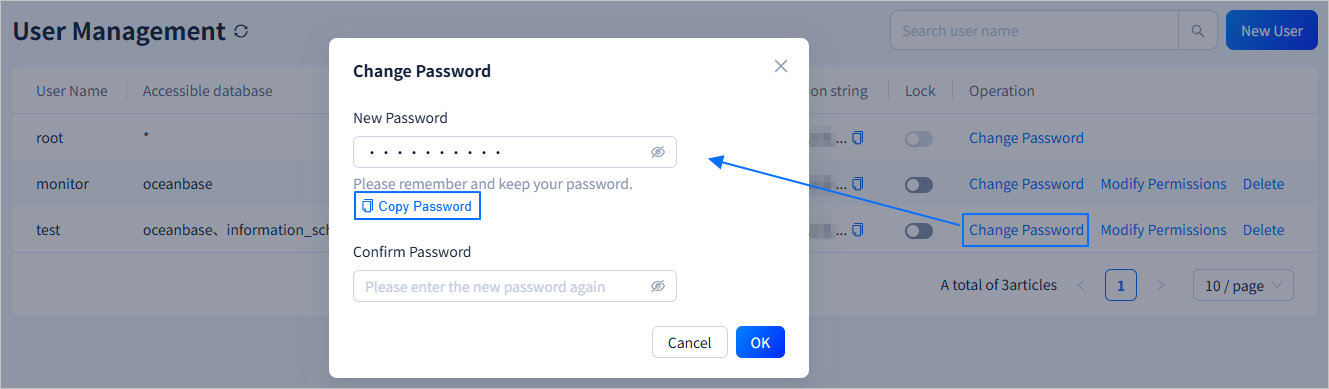
Change a password
Click the Change Password field in the Operation column. In the dialog box that appears, enter the New Password and Confirm Password. After you complete the entries, click OK to change the password. The password must meet the following requirements:
-
The password must be 8 to 32 characters long.
-
The password must contain at least two characters of each of the following types: digits (0 to 9), uppercase letters (A to Z), lowercase letters (a to z), and special characters (
~!@#%^&*_-+=|()[]:;,.?/).
After you configure the password, click Copy Password to copy the password for later use.
Modify permissions
Click the Modify Permissions field in the Operation column to modify the global and database permissions of the corresponding user. You can directly select a global permission from the drop-down list. To modify the database permissions of the user, perform the following steps:
-
In the left list, select one or more databases. The left list displays all databases in the current instance. You can also search for a specific database in the left search field.
-
Click > in the middle. The selected databases are moved to the right list.
-
In the right list, select the permissions that the user can have in the specified database. To grant all permissions to the user in the specified database, click All in the upper-right corner of the database.
-
Repeat steps 1, 2, and 3 to set the user permissions for different databases. You can also search for a specific database in the right search field.
-
To revoke the user permissions of a specified database, click Delete in the upper-right corner of the database in the right list. This moves the database back to the left list. You can also click Remove All in the upper-right corner of the right list. In the dialog box that appears, click Determine to move all databases in the right list back to the left list.
-
After you complete the settings, click Submission.

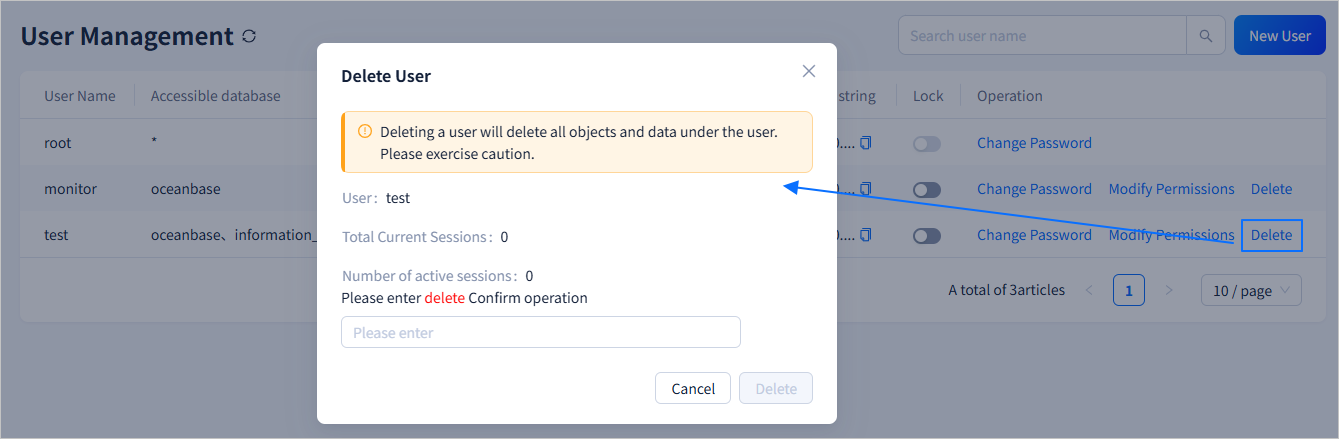
Delete a user
Click the Delete field in the Operation column. In the dialog box that appears, enter delete in the input field and click Delete. This deletes the specified user. The objects and data under the user will also be deleted. Proceed with caution.